The tin can phone is a staple of longitudinal wave demonstrations wherein a human voice vibrates the bottom of a soup can, and compression waves travel along a string to reproduce the speaker in another can at the other end. All the parts in this electrical demonstration are different, but the concept is the same.
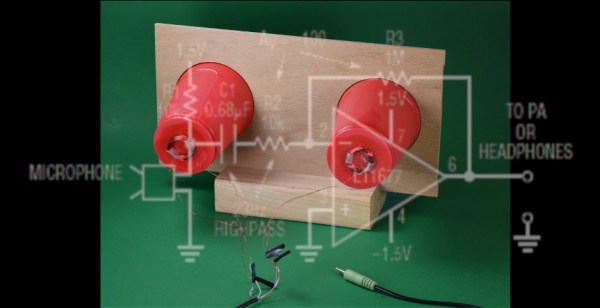
Speakers are sound transducers that turn electrical impulses into air vibrations, but they generate electricity when their coil vibrates. Copper wires carry those impulses from one cup to another. We haven’t heard of anyone making a tin can phone amplifier, but the strictly passive route wasn’t working, so an op-amp does some messy boosting. The link and video demonstrate the parts and purposes inside these sound transducers in an approachable way. Each component is constructed in sequence so you can understand what is happening and make sense of the results.
Can someone make a tin can amplifier transformer? We’d like to see that. In another twist of dual-purpose electronics, did you know that LEDs can sense light?