Watch These Two Robots Cooperate On A 3D Print

Putting a 3D printer on a mobile robotic platform is one thing, but two robots co-cooperatively printing a large object together is even more impressive. AMBOTS posted the video on Twitter and we’ve embedded it below.

The robots sport omnidirectional wheels and SCARA format arms, and appear to interact with some kind of active tabletop to aid positioning. The AMBOTS website suggests that the same ideas could be used for other tasks such as pick and place style assembly work, and the video below of co-operative 3D printing is certainly a neat proof of concept.

As a side note: most omni wheels we see (such as the ones on these robots) are of the Mecanum design but there are other designs out there you may not have heard of, such as the Liddiard omnidirectional wheel.

Continue reading “Watch These Two Robots Cooperate On A 3D Print”

Dollar Store Garden Lights As ATtiny Power Supplies

Solar garden lights are just another part of the great trash pile of our age, electronics so cheap as to be disposable. Most of you probably have a set lurking somewhere at home, their batteries maybe exhausted. Internally though they are surprisingly interesting devices. A solar cell, a little boost converter chip, and a little NiCd battery alongside the LED. These are components with potential, as [Randy Elwin] noted with a mind to his ATtiny85 projects.

The YX805A chip he references in his write-up is one of several similar chips that function in effect as joule thieves, extending the available charge in the battery to keep the LED active as long as possible when their solar panel is generating nothing, and turning it off in daylight when the panel can charge. Their problem is that they are designed as joule thieves rather than regulators, so using them as a microcontroller PSU without modification can result in overvoltage.

His solution is to use the device’s solar panel input as a feedback pin from his ATtiny, allowing the microcontroller to keep an eye on its supply voltage and enable or disable the converter as necessary while it keeps running from the reservoir capacitor. Meanwhile the solar panel now charges the NiCd cell through a single diode. It’s not perfect and maybe needs a clamp or something, he notes that there is a condition in which the supply can peak at 8 volts, a level which would kill an ATtiny. But still, we like simple hacks on dollar store parts, so it’s definitely worth further investigation.

This isn’t the first garden light hack we’ve shown you, there was this flashlight, and some LED hacks.

Solar light picture: Leon Brooks [Public domain].

Cement Shelves Double As USB Hub

Some of us are able to get by in life with somewhere between 0 and 1 USB ports. We typically refer to these people as “Mac users”. For the rest of us, too much is never enough, and we find ourselves seeking out expansion cards and hubs and all manner of perverse adapters and dongles. [JackmanWorks] was a man who found himself in need of more connectivity, so he built this beautiful shelf with an integrated 12-port hub.

Material choice is key here, with this build looking resplendent in mahogany and cement. As the core of the build, the USB hub is first disassembled and sealed up to prevent damage from the cement. Hot glue is used to protect the PCB, while electrical tape helps cover the individual ports. The cement is then poured into a form which creates the overarching structure for the shelf, with the USB hub being cast in place. With the cement cured, mahogany boards are then cut and waxed, before installation into the structure. These form the individual shelves which hold phones, hard drives and other USB accessories.

The shelf was designed so that the entire structure is supported through the bottom shelf, which then sits on top of the desktop computer case. It’s an attractive piece, and the weight of the cement construction makes it pleasantly stable in use. It’s rare, but we do occasionally see shelf hacks around these parts. Video after the break.

Continue reading “Cement Shelves Double As USB Hub”

“Vintage” Radio Gets A Modern Makeover

Taking an old piece of gear and cramming it full of modern hardware is a very popular project. In fact, it’s one of the most common things we see here at Hackaday, especially in the Raspberry Pi era. The appeal is obvious: somebody has already done the hard work of designing and building an attractive enclosure, all you need to do is shoehorn your own gear into it. That being said, we know some of our beloved readers get upset when a vintage piece of gear gets sacrificed in the name of progress.

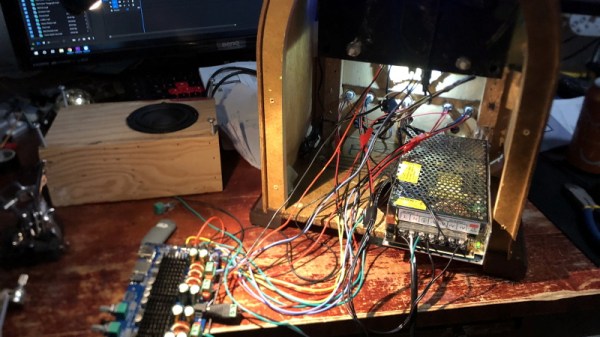
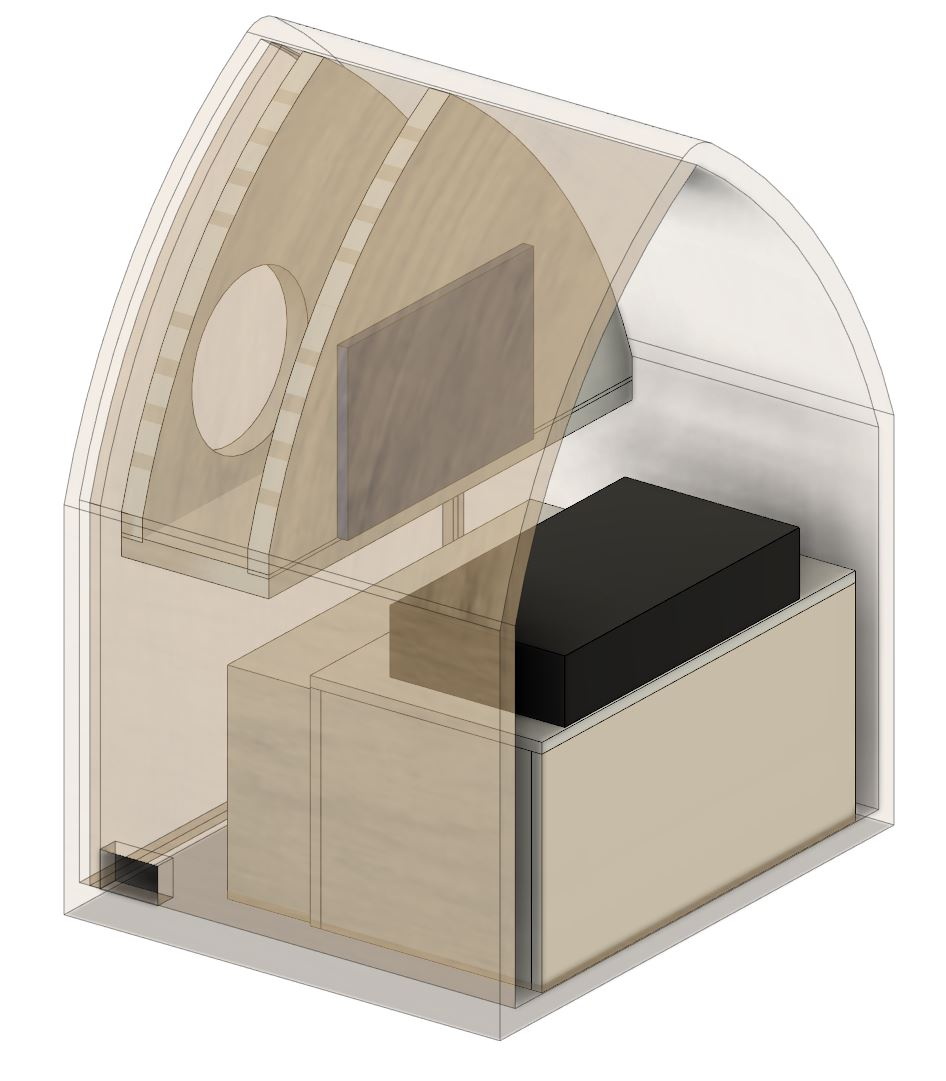
Thankfully, you can put your pitchforks down for this one. The vintage radio [Freshanator] cannibalized to build this Bluetooth speaker is actually a replica made to invoke the classic “cathedral” look. Granted it may still have been older than most of the people reading this right now, but at least it wasn’t actually from the 1930’s.

To start the process, [Freshanator] created a 3D model of the inside of the radio so all the components could be laid out virtually before anything was cut or fabricated. This included the design for the speaker box, which was ultimately 3D printed and then coated with a spray-on “liquid rubber” to seal it up. The upfront effort and time to design like this might be high, but it’s an excellent way to help ensure you don’t run into some roadblock halfway through the build.

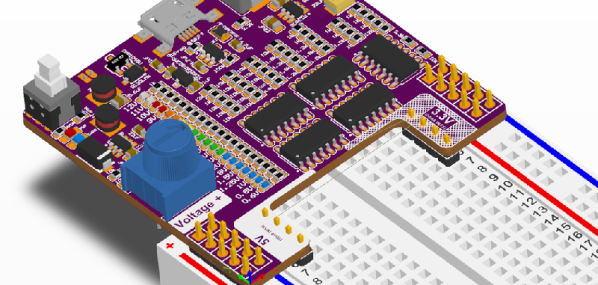
Driving the speakers is a TPA3116-based amplifier board with integrated Bluetooth receiver, which has all of its buttons broken out to the front for easy access. [Freshanator] even went the extra mile and designed some labels for the front panel buttons to be made on a vinyl cutter. Unfortunately the cutter lacked the precision to make them small enough to actually go on the buttons, so they ended up getting placed above or next to them as space allowed.

The build was wrapped up with a fan installed at the peak of the front speaker grille to keep things cool. Oh, and there are lights. Because there’s always lights. In this case, some blue LEDs and strategically placed EL wire give the whole build an otherworldly glow.

If you’re interested in a having a frustrating quasi-conversation with your vintage looking audio equipment, you could always cram an Echo Dot in there instead. Though if you go that route, you can just 3D print a classic styled enclosure without incurring the wrath of the purists.

A Breadboard Power Supply That’s More Universal Than Most

A favorite project of ours is the humble breadboard power supply. Yes, you can still prototype on breadboards, no, you don’t need an entire bench power supply to prototype on one, and every breadboard made in the last forty years has had the same pattern of holes. There’s plenty of opportunity to improve the breadboard power supply.

One of the best ones we’ve seen yet comes from [John Loeffler]. It’s a simple, constant voltage power supply that’s variable from 0.6 V all the way up to 12 V. It’s powered through a micro USB port, and you get 3.3 V and 5 V rails automagically. There’s even voltage indication.

The mechanical design of this power supply is simple enough, with pins that plug into the detachable power rails on either side of the breadboard. Where it gets interesting is the voltage indication. There’s a resistor ladder and a series of LEDs to indicate the voltage on the variable side of this power supply. Add in some modern switched mode power supply based on the MIC5225 series of chips (a popular regulator that’s very nice for the price) and you have a completely functional power supply hanging off a breadboard.

While it’s not a really nice rack mounted bench power supply that weighs a lot, or even one of the cheapo bench supplies, this does fulfill a need. Sometimes you just need a simple power supply for a breadboard, and this is one of the best ones we’ve seen yet.

Cast Aluminium Becomes A Machine Tool

Shaper tools were, at one time, a necessary tool for any machine shop. With a shaper and a lathe, you can rebuild or manufacture almost anything. At the very least, you can make the tool to manufacture anything. For the last few months, [Makercise] has been working on building his own homemade shaper, and now it’s making chips. (YouTube, also embedded below.)

First off, what exactly is a metal shaper? It’s not commonly seen in machine shops these days, but at the turn of the last century, these were popular and practical machines to cut keyways into a piece of stock. Effectively, it’s kind of like a jigsaw, in that it cuts with a reciprocating action and is able to plane the entire surface of a metal plate. Today, if you want to surface a piece of stock, you would just throw it onto the Bridgeport, but there are still some use cases for a metal shaper.

The design of this shaper comes directly from the Gingery series of books, the famous series of books that are step-by-step instructions on how to build a machine shop starting from the technology of rubbing two sticks together. [Makercise] has built one of these machines before, the metal lathe, and the second in the Gingery series of books after a foundry, and the next book is instructions on how to build a mill.

Sure, [Makercise] is using modern tools and modern techniques to build this shaper. There’s a CNC machine involved, and nobody is going to Greenland to make aluminum anymore. Still, this is a flat piece of metal made from scratch, an a great example of how far you can take home machining in a post-apocalyptic scenario.

Continue reading “Cast Aluminium Becomes A Machine Tool”

3D Printed Tank Track Pops Together With Plastic BB For Hinge

3D printing is well-suited to cranking out tank tread designs, because the numerous and identical segments required are a great fit for 3D printing’s strengths. The only hitch is the need for fasteners between each of those segments, but [AlwynxJones] has a clever solution that uses plentiful hard plastic spheres (in the form of 6 mm airsoft BBs) as both a fastener and a hinge between each of the 3D printed track segments.

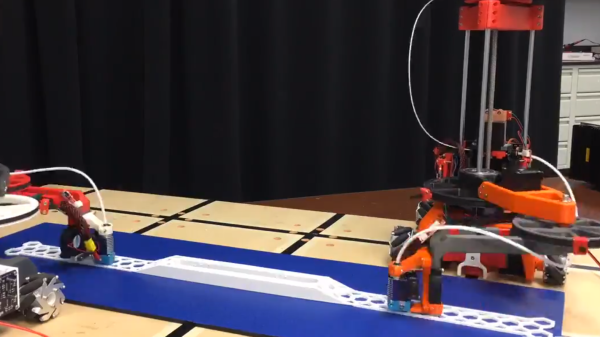
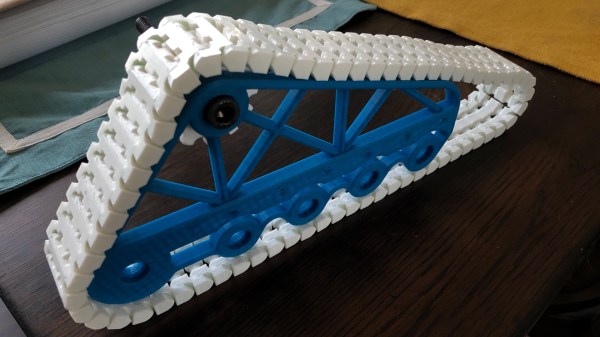
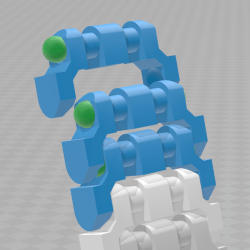
Each segment has hollows made to snugly fit 6 mm BBs (shown as green in the image here) which serve both as fasteners and bearing surfaces. Assembly requires a bit of force to snap everything together, but [AlwynxJones] judges the result worth not having to bother with bolts, wires, or other makeshift fasteners.

Bolts or screws are one option for connecting segments, but those are heavy and can get expensive. Segments of printer filament have been successfully used in other tread designs, though that method requires added work in the form of either pins, or heat deforming the filament ends to form a kind of rivet. This design may be a work in progress, but it seems like a promising and clever approach.

[via Reddit]