Launch Day Wii U Homebrew Is Very Encouraging

[youtube=http://hackaday.com/?v=5RBQG8As7Rs&w=580]

With the launch of the Wii U yesterday, we were wondering exactly how long it would take for this new console to be broken wide open allowing for the execution of homebrew code. Technically, it only took a day, as [wraggster] shows us, but the results aren’t what you would expect. Right now, he’s using methods meant for the classic Wii to open his system up; probably not the best way to open up the Wii U, but a start nonetheless.

This hack revolves around the Super Smash Bros. Brawl exploit that allows for the execution of unsigned code. It’s called Smash Stack and is one of the more popular ways of getting homebrew code running on the old, last-gen Wii.

Of course [wraggster]’s hack is dependent on the fact the classic Wii has been open for homebrew development for years now, and only works because of the Wii U’s ability to play classic Wii games. This probably isn’t the direction Wii U hackers want to go into, but it does provide a way for anyone to get into the Wii U system without using any new tricks.

Wii U To Be Released This Weekend, Wii U GamePad To Be Torn Apart On Workbenches Across The Land

In case you’ve been living under a rock for the past few months, Nintendo will be releasing their next-gen console this weekend. It’s called the Wii U, and one of the most interesting features is the Wii U GamePad – the first controller to feature a full-color video screen right between the analog sticks.

Needless to say, we’re not terribly interested in the Wii U. The GamePad, though, looks perfect for robot controllers, FPV aerial vehicles, and a whole slew of projects that require some remote control.

The hardware for the GamePad is fairly impressive; apart from D pads and analog sticks, the new Wii Controller features a front-facing camera, gyroscope, accelerometer, magnetometer, 6.2 inch 854×480 touchscreen display, and an extension port housing an I2C bus for all your old Wii peripherals.

Other than a stock feature list, we have no idea how the Wii U will be able to transmit video to the GamePad. It might be WiFi, allowing you to connect all your projects to a wireless network and control them without a whole lot of hardware.

We’ll keep you posted on the developments of hacking the Wii U GamePad. Hopefully we’ll all have an awesome remote control by next year.

Zelda Is The Princess, Now Link Is Too

[Mike] is a huge fan of The Legend of Zelda: The Wind Waker and now that he has a daughter it’s a great time to pass this epic quest down to the next generation. There’s a problem with explaining the plot to her daughter, though: even though the player can name the character after themselves, there’s no way to change the gendered pronouns. Yes, it’s a problem that could have been solved by a cameo by Professor Oak asking, “Are you a boy or a girl?’ but [Mike] came up with a better solution: changing all the pronouns with a ROM hack.

There are a few ‘problems’ with altering the dialogue with a ROM hack. Most importantly, all the new pronouns need to be the same length as the words they replace. [Mike] is using the word ‘milady’ to replace ‘my lad’ and ‘master,’ but also had to take a page from critiques of modern epics and replace ‘swordsman’ with ‘swordmain.’

So far, everything is working as planned and the [Mike]’s daughter [Maya] is enjoying seeing herself sail her dragon ship and battle foes. It’s a great effort to bring some semblance of gender neutrality to a classic game, and an awesome project for a really great dad.

Thanks to [Guillaume] for sending this one in.

The Smallest NES Controller Ever

A few months ago, [Ben] saw a video of the world’s largest NES controller. “I bet I could make the smallest,” he thought in a strange game of one-upmanship. Now [Ben] has the smallest fully functional NES compatible controller, a feat of engineering that can only end in very, very sore thumbs.

The old NES controller is a very simple device: eight buttons are connected directly to a 4021 shift register. Every time the NES is looking for a change in input, it reads out the data in the shift register and gets the status of all the buttons.

After finding the  smallest footprint 4021 shift register he thought he could solder, [Ben] found some very small SMD push buttons and a very tiny resistor network for the pull ups. The result is tiny, and thanks to the sacrifices of a few NES controller extension cables he found on Amazon, 100% compatible with his old NES.

You can grab all the schematics over on [Ben]’s git. Tip ‘o the hat to [Troy] for sending this one in.

SNES Emulator Has It’s Slot Sealed Shut

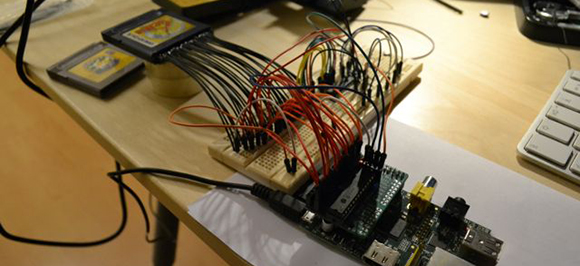
If you look closely you’ll notice there’s nowhere to put the game cartridge on this Super Nintendo system. That’s because this is a Rasberry Pi based SNES emulator that plays ROMs, not cartridges. Since the RPi board is used the only limit to what you can play is the board’s RAM and which ROMs you have on the SD card.

The case has basically been gutted and the unused cartridge slot was sealed with some Bondo before painting. In addition to the Rasberry Pi you’ll find a 7-port powered USB hub and a Teensy microcontroller board. The hub allows for the controllers to be connected via USB. The Teensy is recognized as a USB HID device and is used to connect the reset button to a functions on the emulator program. The power switch still works too. To make this happen [MIDItheKID] spliced a USB connector and a microB USB connector to the power switch. We think this draws power from the hub but we’re not 100% sure.

[MIDItheKID] mentions in the Reddit comments that he’s thinking of grabbing that new RPi that has more memory and doing some similar work on his dead PSX.

Reading An N64 Controller With A Microcontroller

We’ve seen NES, SNES, Sega, and just about every weird controller Atari put out connected to microcontrollers, but connecting the N64 controller to a project has remained one of those seldom-seen, rarely copied endeavors, not often tackled by makers around the globe. [Pieter-Jan] decided to throw his hat in the ring and give reading an N64 controller with a PIC a try, and we’re pleased to report he’s been completely successful.

One of the difficulties of reading an N64 controller is simply the speeds involved; with only three pins on the controller port, the N64 controller uses a serial protocol to send 32 bits of controller data at a fairly fast rate. Armed with a PIC18F ‘micro, [Pieter] realized that programming in C would be too slow, he needed to go all the way down to the bare metal and program his micro in assembly.

Every time the N64 controller data needs to be read, the console sends out a 9-bit polling request. The controller responds in turn with a 32-bit sequence informing the console of the status of all the buttons and joysticks. Once [Pieter] got his micro sending the correct polling response, it was only an issue of parsing the data returned from the controller.

Right now, [Pieter] has a small demo board rigged up that flashes a LED whenever the A, B, or Z buttons are pressed. This can be expanded to the remaining buttons and joystick, but for now we’ll just enjoy [Pieter]’s demo after the break.

Continue reading “Reading An N64 Controller With A Microcontroller”

Emulators 101: How To Write A Program That Functions Like An NES CPU

We’d bet everyone reading this article has played a game on an emulator at some time or another. And you may have a base idea of how those emulators work. But we’d wager the vast majority of you are clueless about the actual implementation of game emulators (we know we are). But that has all changed after seeing this demonstration of how [Bisqwit] wrote his own NES emulator. The description doesn’t cover anything more than the basics of writing code that emulates the NES CPU hardware itself. But it’s presented in such a way that makes it quite easy to understand for anyone who has a basic knowledge of programming. He starts with a switch statement for handling the processor’s opcodes and then moves through piece by piece showing how he refined his code to make it work while keeping it readable. We think this is a great teaching method and appreciate the time he put into producing this tutorial.

The explanation starts about 4:22 into the video which is embedded after the break. You’ll also find the first two demo videos there. Those involve mostly fast-motion text editing of the emulator coding process with some gameplay tests at the end of the second video.

Continue reading “Emulators 101: How To Write A Program That Functions Like An NES CPU”