It is hard to be remembered in the electronics business. Edison gets a lot of credit, as does Westinghouse and Tesla. In the radio era, many people know Marconi and de Forest (although fewer remember them every year), but less know about Armstrong or Maxwell. In the solid-state age, we tend to remember people like Shockley (even though there were others) and maybe Esaki.
If you knew most or all of those names without looking them up, you are up on your electronics history. But do you know the name Rufus Turner? Continue reading “Do You Know Rufus Turner?”→
It seems [Kevin] has particularly bad luck with neighbors. His first apartment had upstairs neighbors who were apparently a dance troupe specializing in tap. His second apartment was a town house, which had a TV mounted on the opposite wall blaring American Idol with someone singing along very loudly. The people next to [Kevin]’s third apartment liked music, usually with a lot of bass, and frequently at seven in the morning. This happened every day until [Kevin] found a solution (Patreon, but only people who have adblock disabled may complain).
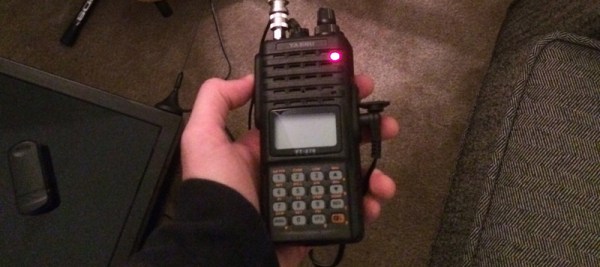
In a hangover-induced rage that began with thumping bass at 7AM on a Sunday, [Kevin] tore through his box of electronic scrap for every capacitor and inductor in his collection. An EMP was the only way to find any amount of peace in his life, and the electronics in his own apartment would be sacrificed for the greater good. In his fury, [Kevin] saw a Yaesu handheld radio sitting on his desk. Maybe, just maybe, if he pressed the transmit button on the right frequency, the speakers would click. The results turned out even better than expected.
With a car mount antenna pointed directly at the neighbor’s stereo, [Kevin] could transmit on a specific, obscure frequency and silence the speakers. How? At seven in the morning on a Sunday, you don’t ask questions. That’s a matter for when you tell everyone on the Internet.
Needless to say, using a radio to kill your neighbor’s electronics is illegal, and it might be a good idea for [Kevin] to take any references to this escapade off of the Internet. It would be an even better idea to not put his call sign online in the future.
That said, this is a wonderful tale of revenge. It’s not an uncommon occurrence, either. Wikihow, Yahoo Answers and Quora – the web pages ‘normies’ use for the questions troubling their soul – are sometimes unbelievably literate when it comes to unintentional electromagnetic interference, and some of the answers correctly point out grounding a stereo and putting a few ferrite beads on the speaker cables is the way to go. Getting this answer relies entirely on asking the right question, something I suspect 90% of the population is completely incapable of doing.
While [Kevin]’s tale is a grin-inducing two-minute read, You shouldn’t, under any circumstances, do anything like this. Polluting the airwaves is much worse than polluting your neighbor’s eardrums; one of them violates municipal noise codes and another is breaking federal law. It’s a good story, but don’t do it yourself.
Editor’s Note: Soon after publishing our article [Kevin] took down his post and sent us an email. He realized that what he had done wasn’t a good idea. People make mistakes and sometimes do things without thinking. But talking about why this was a bad idea is one way to help educate more people about responsible behavior. Knowing you shouldn’t do something even though you know how is one paving stone on the path to wisdom.
–Mike Szczys
Getting software-defined radio (SDR) tools into the hands of the community has been great for the development and decoding of previously-cryptic, if not encrypted, radio signals the world over. As soon as there’s a new protocol or modulation method, it’s in everyone’s sights. A lot of people have been working on LoRa, and [bertrik] at RevSpace in The Hague has done some work of his own, and put together an amazing summary of the state of the art.
LoRa is a new(ish) modulation scheme for low-power radios. It’s patented, so there’s some information about it available. But it’s also proprietary, meaning that you need a license to produce a radio that uses the encoding. In keeping with today’s buzzwords, LoRa is marketed as a wide area network for the internet of things. HopeRF makes a LoRa module that’s fairly affordable, and naturally [bertrik] has already written an Arduino library for using it.
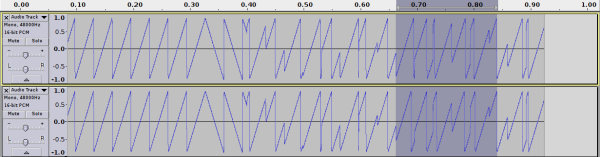
So with a LoRa radio in hand, and a $15 RTL-SDR dongle connected to a laptop, [bertrik] got some captures, converted the FM-modulated chirps down to audio, and did a bunch of hand analysis. He confirmed that an existing plugins for sdrangelove did (mostly) what they should, and he wrote it all up, complete with a fantastic set of links.
There’s more work to be done, so if you’re interested in hacking on LoRa, or just having a look under the hood of this new modulation scheme, you’ve now got a great starting place.
One of the best things about having your amateur radio license is that it allows you to legally build and operate transmitters. If you want to build a full-featured single-sideband rig with digital modes, have at it. But there’s a lot of fun to be had and a lot to learn from minimalist builds like this Michigan Mighty-Mite one-transistor 80-meter band transmitter.
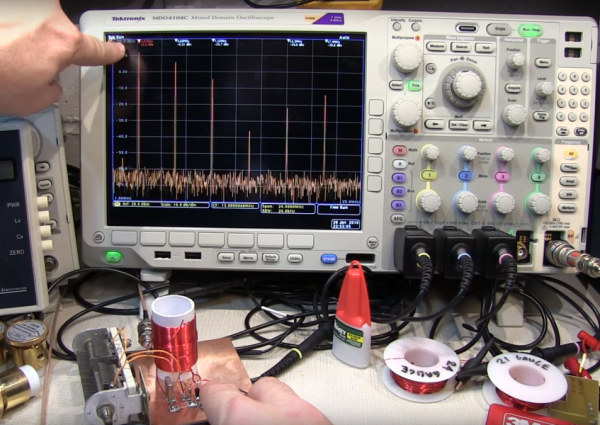
If the MMM moniker sounds familiar, it may be because of this recent post. And in fact, [W2AEW]’s build was inspired by the same SolderSmoke blog posts that started [Paul Hodges] on the road to his breadboard and beer can build. [W2AEW]’s build is a bit sleeker, to be sure, but where the video really shines is in the exploration and improvement of the signal quality. The basic Mighty-Mite outputs a pretty dirty signal – [W2AEW]’s scope revealed 5 major harmonic spikes, and what was supposed to be a nice sine wave was full of divots and potholes. There’s only so much one transistor, a colorburst crystal and a couple of capacitors can do, so the video treats us to an explanation of the design of the low-pass filter needed to get rid of the harmonics and clean up the output into a nice solid sine wave.
If your Morse skills aren’t where they should be to take advantage of the Might-Mite’s CW-only mode, then you’ll need to look at other modulations. Maybe a tiny FM transmitter would suit your needs better?
Sometimes words just have to be spelled for others. I’ve been on phone conversations where the person on the other end is spelling for me and it’s painful. “Was that a ‘b’ or a ‘p’?” Sometimes they’ll try on the fly to use words with the beginning letter trying to convey the letter: “B as in boy”. Then they’ll get stumped mumbling while they think desperately for ‘k’ words… ‘ketchup’. Okay, but is that really ketchup or catsup? Now think how much easier spelling is on a phone than over a poor quality radio channel. What we say, and how we say it is the key to our brain’s ability to error correct human speech. It’s a solved problem that was built into radio etiquette long ago.
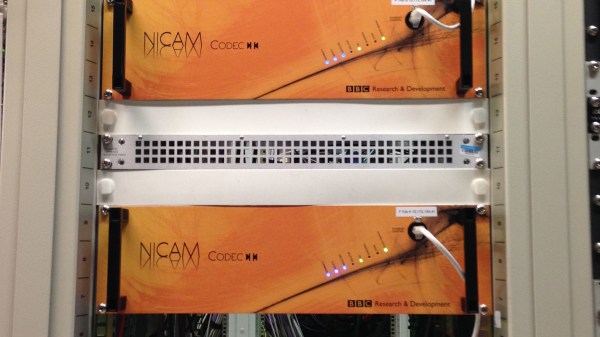
What happens when part of a radio transmitting service listened to by over half the country needs to be replaced? That was a recent challenge for the BBC’s Research and Development team last year, and if you’re from the UK — you wouldn’t have noticed a single thing.
[Justin Mitchell] is a principle engineer in R&D at BBC, and just this past year had to transition the audio coding system installed in 1983 to new hardware due to failing circuit boards and obsolete components. The encoding is used to get audio from a central source to broadcasting towers all over the country. The team had to design and build a replacement module that would essentially replace an entire server rack of ancient hardware — and make it plug-and-play. Easy, right? Continue reading “35 Million People Didn’t Notice When Zynq Took Over Their Radio”→
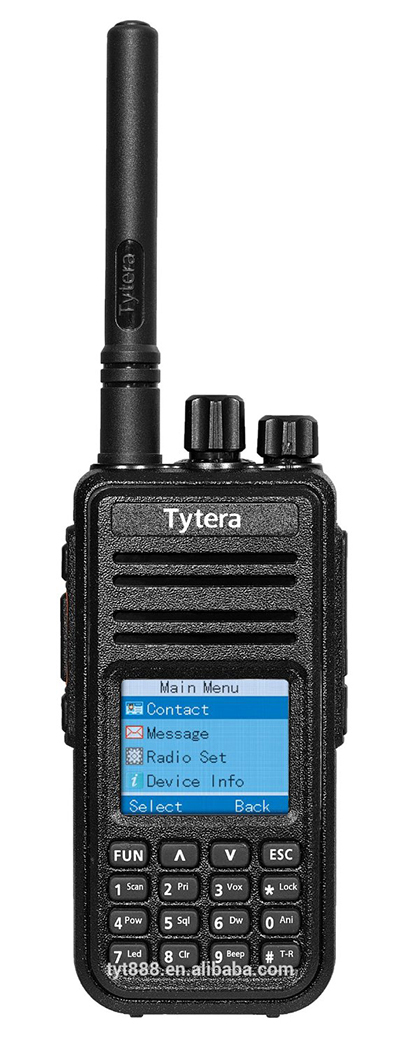
Every once in a great while, a piece of radio gear catches the attention of a prolific hardware guru and is reverse engineered. A few years ago, it was the RTL-SDR, and since then, software defined radios became the next big thing. Last weekend at Shmoocon, [Travis Goodspeed] presented his reverse engineering of the Tytera MD380 digital handheld radio. The hack has since been published in PoC||GTFO 0x10 (56MB PDF, mirrored) with all the gory details that turn a $140 radio into the first hardware scanner for digital mobile radio.
The Tytera MD-380 digital radio
The Tytera MD380 is a fairly basic radio with two main chips: an STM32F405 with a megabyte of Flash and 192k of RAM, and an HR C5000 baseband. The STM32 has both JTAG and a ROM bootloader, but both of these are protected by the Readout Device Protection (RDP). Getting around the RDP is the very definition of a jailbreak, and thanks to a few forgetful or lazy Chinese engineers, it is most certainly possible.
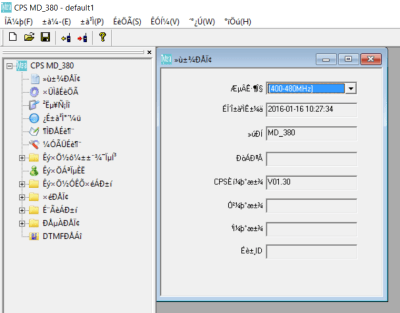
The STM32 in the radio implements a USB Device Firmware Upgrade (DFU), probably because of some example code from ST. Dumping the memory from the standard DFU protocol just repeated the same binary string, but with a little bit of coaxing and investigating the terrible Windows-only official client application, [Travis] was able to find non-standard DFU commands, write a custom DFU client, and read and write the ‘codeplug’, an SPI Flash chip that stores radio settings, frequencies, and talk groups.
Further efforts to dump all the firmware on the radio were a success, and with that began the actual reverse engineering of the radio. It runs an ARM port of MicroC/OS-II, a real-time embedded operating system. This OS is very well documented, with slightly more effort new functions and patches can be written.
In Digital Mobile Radio, audio is sent through either a public talk group or a private contact. The radio is usually set to only one talk group, and so it’s not really possible to listen in on other talk groups without changing settings. A patch for promiscuous mode – a mode that puts all talk groups through the speaker – is just setting one JNE in the firmware to a NOP.
The Tytera MD-380 ships with a terrible Windows app used for programming the radio
With the help of [DD4CR] and [W7PCH], the entire radio has been reverse engineered with rewritten firmware that works with the official tools, the first attempts of scratch-built firmware built around FreeRTOS, and the beginnings of a very active development community for a $140 radio. [Travis] is looking for people who can add support for P25, D-Star, System Fusion, a proper scanner, or the ability to send and receive DMR frames over USB. All these things are possible, making this one of the most exciting radio hacks in recent memory.
Before [Travis] presented this hack at the Shmoocon fire talks, intuition guided me to look up this radio on Amazon. It was $140 with Prime, and the top vendor had 18 in stock. Immediately after the talk – 20 minutes later – the same vendor had 14 in stock. [Travis] sold four radios to members of the audience, and there weren’t that many people in attendance. Two hours later, the same vendor had four in stock. If you’re looking for the best hardware hack of the con, this is the one.