As far as timekeeping goes, there’s nothing more accurate and precise than an atomic clock. Unfortunately, we can’t all have blocks of cesium in our basements, so various agencies around the world have maintained radio stations which, combined with an on-site atomic clock, send out timekeeping signals over the air. In the United States, this is the WWVB station located in Colorado which is generally receivable anywhere in the US but can be hard to hear on the East Coast. That’s why [JonMackey], who lives in northern New Hampshire, built this WWVB simulator.
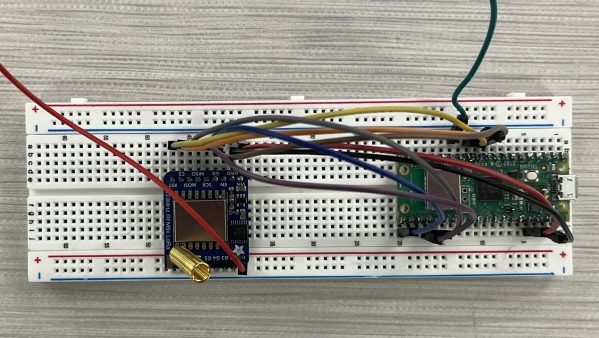
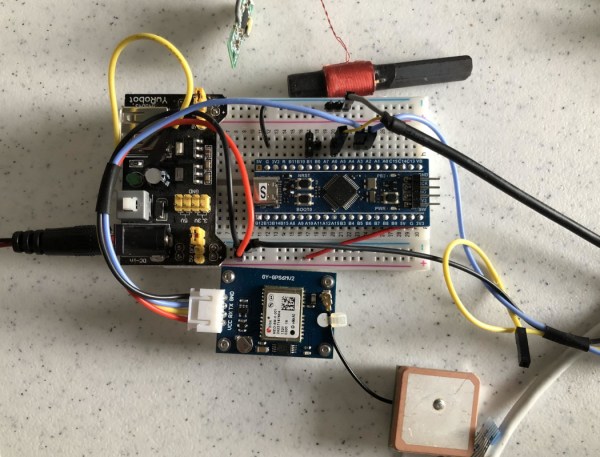
Normally, clocks built to synchronize with the WWVB station include a small radio antenna to receive the 60 kHz signal and the 1-bit-per-second data transmission which is then decoded and used to update the time shown on the clock. Most of these clocks have internal (but much less precise) timekeeping circuitry to keep themselves going if they lose this signal, but [JonMackey] can go several days without his clocks hearing it. To make up for that he built a small transmitter that generates the proper timekeeping code for his clocks. The system is based on an STM32 which receives its time from GPS and broadcasts it on the correct frequency so that these clocks can get updates.
The small radio transmitter is built using one of the pins on the STM32 using PWM to get its frequency exactly at 60 kHz, which then can have the data modulated onto it. The radiating area is much less than a meter, so this isn’t likely to upset any neighbors, NIST, or the FCC, and the clocks need to be right beside it to update. Part of the reason why range is so limited is that very low frequency (VLF) radios typically require enormous antennas to be useful, so if you want to listen to more than timekeeping standards you’ll need a little bit of gear.