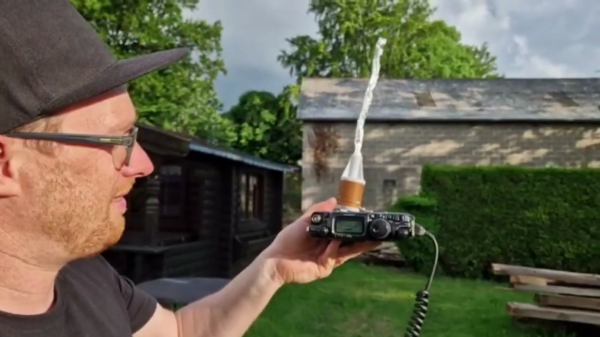
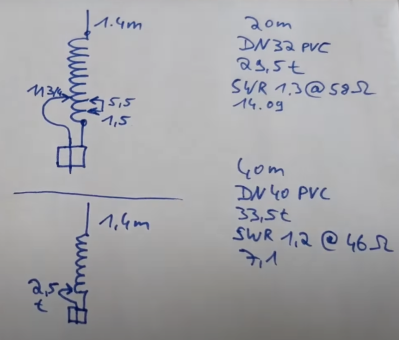
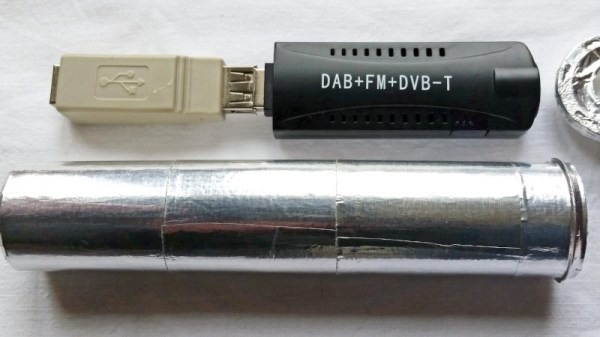
[VK3YE] knows there are at least two things wrong with the cheap antennas you get with most SDR dongles. First, they are too short. You’d like to have enough to pull out a quarter wavelength on the longest frequency you want to operate. The second problem is there’s no real ground. He fixed both of these problems, as you can see in the video below.
The result might be called an ugly duckling rather than a rubber ducky. But it does seem to work. You could probably come up with something nicer to reseal the base, but the tape does work. A nice 3D printed housing would work, too, and might improve the appearance. We also thought about the goop you use on tool handles.
We actually have simply cut these antennas off and reused the cable and connector to hook up a better antenna. You might get more mileage out of that approach. On the other hand, the magnetic base and reasonably small form factor is pretty attractive.
Dipoles are a classic builder’s antenna, after all they are usually little more than two pieces of wire and a feedline. But as [Rob] shows us in the video below, there are a few things to consider.
The first thing is where to get the wire. A damaged extension cord donated the wire. That’s actually an interesting idea because you get multiple wires the same length inside the extension cord. Continue reading “A Cheap Dipole Antenna From An Extension Cord”→
We don’t normally embrace the supernatural here at Hackaday, but when the topic turns to the radio frequency world, Arthur C. Clarke’s maxim about sufficiently advanced technology being akin to magic pretty much works for us. In the RF realm, the rules of electricity, at least the basic ones, don’t seem to apply, or if they do apply, it’s often with a, “Yeah, but…” caveat that’s sometimes hard to get one’s head around.
Perhaps nowhere does the RF world seem more magical than in antenna design. Sure, an antenna can be as simple as a straight piece or two of wire, but even in their simplest embodiments, antennas belie a complexity that can really be daunting to newbie and vet alike. That’s why we were happy to recently host Karen Rucker’s Introduction to Antenna Basics course as part of Hackaday U.
The class was held over a five-week period starting back in May, and we’ve just posted the edited videos for everyone to enjoy. The class is lead by Karen Rucker, an RF engineer specializing in antenna designs for spacecraft who clearly knows her business. I’ve watched the first video of the series and so far and really enjoy Karen’s style and the material she has chosen to highlight; just the bit about antenna polarization and why circular polarization makes sense for space communications was really useful. I’m keen to dig into the rest of the series playlist soon.
The 2021 session of Hackaday U may be wrapped up now, but fear not — there’s plenty of material available to look over and learn from. Head over to the course list on Hackaday.io, pick something that strikes your fancy, and let the learning begin!
With a bit of luck, you’ll live your whole life without needing an implanted medical device. But if you do end up getting the news that your doctor will be installing an active transmitter inside your body, you might as well crack out the software defined radio (SDR) and see if you can’t decode its transmission like [James Wu] recently did.
Before the Medtronic Bravo Reflux Capsule was attached to his lower esophagus, [James] got a good look at a demo unit of the pencil-width gadget. Despite the medical technician telling him the device used a “Bluetooth-like” communications protocol to transmit his esophageal pH to a wearable receiver, the big 433 emblazoned on the hardware made him think it was worth taking a closer look at the documentation. Sure enough, its entry in the FCC database not only confirmed the radio transmitted a 433.92 MHz OOK-PWM encoded signal, but it even broke down the contents of each packet. If only it was always that easy, right?
Of course he still had to put this information into practice, so the next step was to craft a configuration file for the popular rtl_433 program which split each packet into its principle parts. This part of the write-up is particularly interesting for those who might be looking to pull data in from their own 433 MHz sensors, medical or otherwise
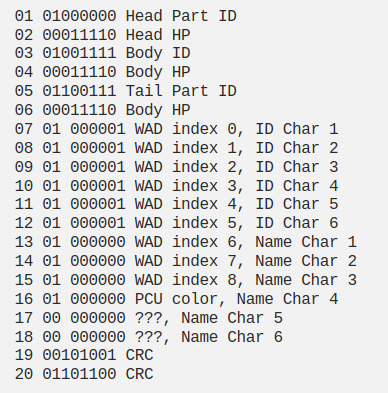
Unfortunately, there was still one piece of the puzzle missing. [James] knew which field was the pH value from the FCC database, but the 16-bit integer he was receiving didn’t make any sense. After some more research into the hardware, which uncovered another attempt at decoding the transmissions from the early days of the RTL-SDR project, he realized what he was actually seeing was the combination of two 8-bit pH measurements that are sent out simultaneously.
We were pleasantly surprised to see how much public information [James] was able to find about the Medtronic Bravo Reflux Capsule, but in a perfect world, this would be the norm. You deserve to know everything there is to know about a piece of electronics that’s going to be placed inside your body, but so far, the movement towards open hardware medical devices has struggled to gain much traction.
These days, we are spoiled for choice with regard to SDRs for RF analysis, but sometimes we’re more interested in the source of RF than the contents of the transmission. For this role, [Drew] created the RFListener, a wideband directional RF receiver that converts electromagnetic signal to audio.
The RF Listener is built around a AD8318 demodulator breakout board, which receives signals using a directional broadband (900 Mhz – 12 Ghz) PCB antenna, and outputs an analog signal. This signal is fed through a series of amplifiers and filters to create audio that can be fed to the onboard speaker. Everything is housed in a vaguely handgun shaped enclosure, with some switches on the back and a LED amplitude indicator. [Drew] demonstrates the RFListener around his house, pointing it at various devices like his router, baby monitor and microwave. In some cases, like with a toy drone, the modulation is too high frequency to generate audio, so the RF listener can also be switched to “tone mode”, which outputs audio tone proportional to the signal amplitude.
The circuit is completely analog, and the design was first done in Falstad Circuit Simulator, followed by some breadboard prototyping, and a custom PCB for the final version. As is, it’s already an interesting exploration device, but it would be even more so if it was possible to adjust the receiver bandwidth and frequency to turn it into a wideband foxhunting tool.
AM radios are relatively simple devices, and building one is a good way to start exploring the world of radio communications. [GreatScott] does exactly this in the video after the break, building both a transmitter and receiver.
At the most basic level, AM radio works by generating a carrier wave with an oscillator, and then modulating the amplitude with an audio signal. Around these parts, the venerable 555 timer is always brought up whenever things get to oscillating; so you’ll no doubt be happy to see [GreatScott] decided to give it a shot for his first experiments, testing two popular 555 transmitter circuits. One uses the control voltage pin to input the audio signal, while the other uses the reset pin. The CV-pin version worked slightly better, but it was still just barely possible to distinguish a voice over a standard commercial AM/FM receiver.
The next attempt was with a XR2206 function generator kit, which worked quite well when combined with a simple microphone amplifier circuit. But this time the receiving side was swapped out, as [GreatScott] built a basic circuit around a TA7642 AM amplifier/demodulator IC, with only six passive components and a hand-wound coil.
An SDR add-on for the Raspberry Pi isn’t a new idea, but the open source cariboulite project looks like a great entry into the field. Even if you aren’t interested in radio, you might find the project’s use of a special high-bandwidth memory interface to the Pi interesting.
The interface in question is the poorly-documented SMI or Secondary Memory Interface. [Caribou Labs] helpfully provides links to others that did the work to figure out the interface along with code and a white paper. The result? Depending on the Pi, the SDR can exchange data at up to 500 Mbps with the processor. The SDR actually uses less than that, at about 128 Mbps. Still, it would be hard to ship that much data across using conventional means.
On the radio side, the SDR covers 389.5 to 510 MHz and 779 to 1,020 MHz. There’s also a wide tuning channel from 30 MHz to 6 GHz, with some exclusions. The board can transmit at about 14 dBm, depending on frequency and the receive noise figure is under 4.5 dB for the lower bands and less than 8 dB above 3,500 MHz. Of course, some Pis already have a radio, but not with this kind of capability. We’ve also seen SMI used to drive many LEDs.