We don’t know art, but we know what we like. And this gizmo by [Johan Kanflo] is right up our alley.
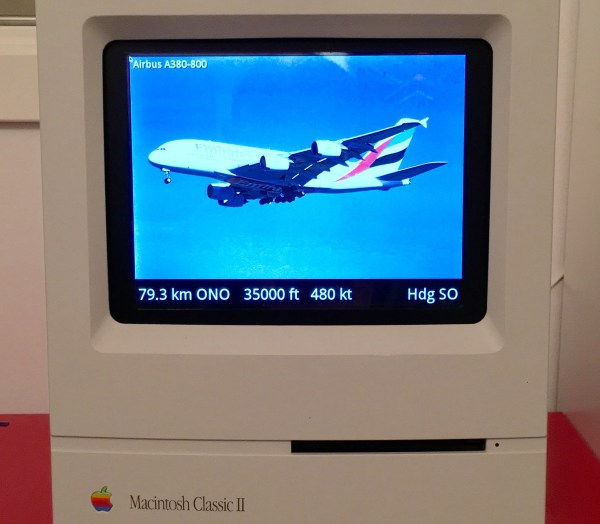
First, [Johan] gutted an old Macintosh Classic computer and stuffed a Raspberry Pi inside. Now this is not really a new idea, but [Johan] did a very nice job with the monitor and his attention to detail shows in the rebuilt floppy-drive eject mechanism. He gives it back that characteristic “schlurp” noise.
Then he outfitted the Raspberry Pi with an RTL dongle running dump1090 software to listen to the ADS-B radio signals. The data extracted from the SDR is piped off to an MQTT server with all sorts of data about the airplanes overhead. Another script subscribes to the MQTT topic and figures out which is the closest and runs an image search for the plane type in question, publishing the results back to another MQTT topic. One final script subscribes to this last topic and displays the relevant images on the screen. Pshwew!
The end result is a Macintosh Classic that’s continually updated with whatever planes are closest to being overhead. We’re not at all sure if this is fine art, or part of the useful arts, or maybe even none of the above. But we really like the nice case job and think that using MQTT as a back-end for coordinating multiple concurrent Python scripts (on the same computer) is pretty cool.