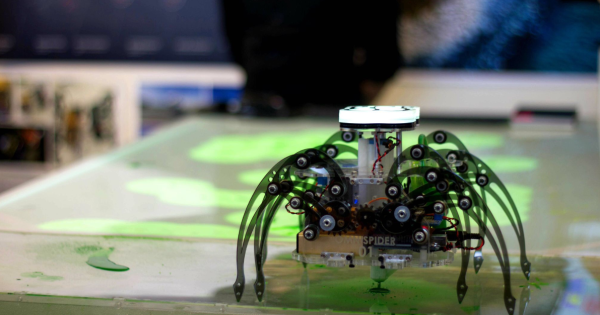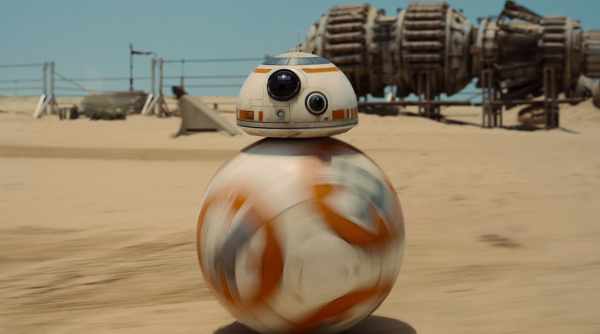
BB-8 the new droid in the star wars franchise made his first public appearance (YouTube link) at Star Wars Celebration last week. While cast and crew of the movie have long said that BB-8 is real, seeing it up on stage, driving circles around R2D2 takes things to a whole new level. The question remains, how exactly does it work?
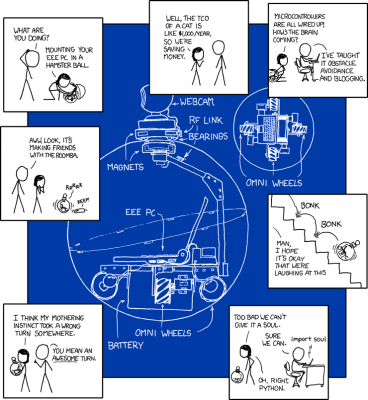 Our (and probably any other tech geek worth their salt’s) immediate reaction was to think of xkcd’s “New Pet” comic. All the way back in 2008, [Randall Munroe] suggested omnidirectional wheels and magnets could be used to create exactly this kind of ‘bot. Is this what’s going on inside BB-8? No one knows for sure, but that won’t stop us from trying to figure it out!
BB-8’s family tree may actually start with Sphero. Fortune reports that Sphero was part of Disney’s accelerator program in 2014. Each company in the accelerator program gets a mentor from Disney. Sphero’s mentor was Disney CEO Bob Iger himself.
The Head
So if BB-8’s body is based on a Sphero, how does the head work? The Disney crew has been mum on this so far, but there is plenty of speculation! If you watch the video in HD, several flashes can be seen between the body and head gap. These might be status LEDs on BB-8’s electronics, but they could also be IR LEDs – possibly part of an optical mouse style sensor. Sensor fusion between gyroscopes, accelerometers and the optical flow sensors would make for a robust solution to the inverted pendulum problem presented by BB-8’s head.
How do you think BB-8 works? Is it magnets, motors, or The Force? Let us know in the comments!