High Altitude Balloon Keeps Going

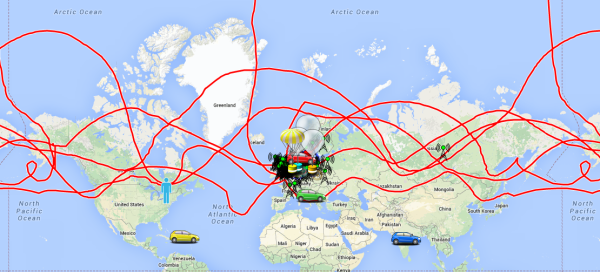
Here’s a post from the AMSAT-UK high altitude balloon blog. It’s a great story about a balloon cruising at about 12km above the Earth completing its sixth circumnavigation of the planet. That post is from October 4th, and two weeks later the balloon is still going strong. Right now it’s over the Baltic heading into Russia with no sign of stopping or popping any time soon.

globeThe balloon was launched July 12, 2014 from Silverstone, UK. In the 100 days since then, this balloon has covered 144168 kilometers and has crossed its launching longitude six times. Even if this balloon weren’t trapped at high latitudes (including coming within 9 km of the pole), this balloon has still travelled more than three times the equatorial circumference of the Earth.

The balloon was built by [Leo Bodnar] a.k.a. [M0XER] with a self-made plastic foil envelope. The solar-powered payload weighs only 11 grams. It’s an exceptional accomplishment and one that has smashed all the amateur high altitude balloon distance records we can find.

Stun Baton

Shocking Idea: Prank Stun Baton

[Christopher] has put together a Prank Stun Baton to annoy his friends. It delivers a slight shock to the person on the business end of the device. Oddly, it’s powered solely by static electricity, there is no battery here and the resulting injury is no worse than touching a door knob after scooting your socks around on some shag carpet.

The design is super simple and is effectively just a rudimentary capacitor. The main housing is a PVC pipe that acts as a dielectric in the ‘cap’ system. Two separate pieces of tin foil are wrapped around the inside and outside of the PVC pipe. These layers of tin foil provide a conductive path up to the a couple of screws stuck in the end of the baton. A ping-pong ball and some foam act as an insulator between the PVC and the screws.

To charge the baton it only has to be brought close to a source of static electricity, a tube TV will do the trick. Rubbing it with a piece of wool will also work. When this is done an electrostatic field is stored in the PVC between the two pieces of tin foil, one side takes on a positive charge and the other a negative charge creating an electric potential between the two screws at the end of the baton. When something (with a low-enough resistance) shorts the screws, the stored energy on the positive screw tries to go to the negative screw, shocking the unsuspecting victim.

Need something a little more powerful? You may want to check out this other stun baton.

Hackaday Links Column Banner

Hackaday Links: October 19, 2014

Introducing the Hayes Smartmodem 1200. The era of the single station microcomputer…. is over. The Hayes Smartmodem offers advanced features like auto answer and auto dial. Now if we could only find an ‘RS-232 Computer.’

Have a 3D printer and an old router? How about controlling your printer with Octoprint? For some cases, it might be better than using a Raspberry Pi and OctoPi, but you won’t get a camera for streaming pics of your builds to the web.

Last year, [CNLohr] built a microscope slide Minecraft thing and in the process created the smallest Minecraft server ever. The record has now been bested with the Intel Edison. There’s a bit of work to install Java, but the performance is pretty good for one player. Bonus: Minecraft is a single threaded app, so you have another core for garbage collection.

Remember the Scribble pen, that showed just how gullible people are and how crappy tech journalism is? They’re back with a beta program. A mere $15 guarantees you a scribble pen for their beta program. I wouldn’t give these guys $15 of someone else’s money, but lucky for us [ch00f] bit the bullet. He’ll be updating everyone on the status of his fifteen dollars, I’m sure.

Hey, guess what will eventually be in the Hackaday store? Keycaps for your mechanical keyboard. Yes, we actually figured out a way to do this that makes sense and won’t lose money. Pick your favorite, or suggest new ones in the comments:
keycaps

BSAPEDWLOVKTUB.YBKAB

iPhone trace repair

Using The Wrong Screw: A Painful Lesson In IPhone Repair

If you’ve ever had to repair an iPhone for a friend, you’ll know they have a ridiculous number of screws. Most companies standardize screws in their products, but since Apple doesn’t expect you to fix a phone yourself… they may have let this one slide.

You see, each of these screws is different.iPhone screws 
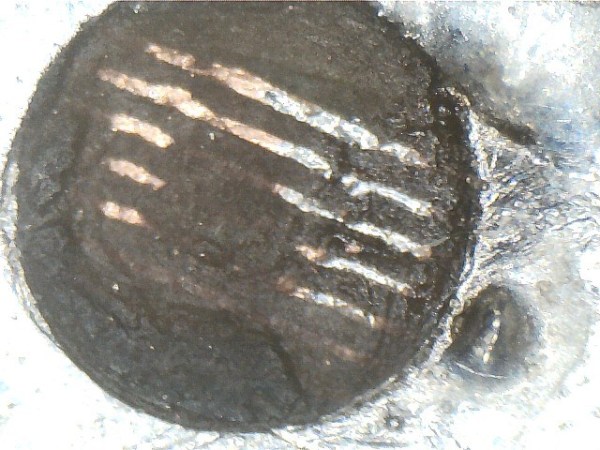
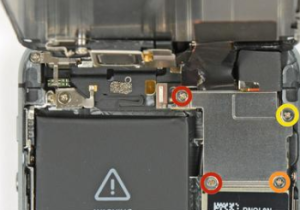
The red ones are 1.7mm long, the yellow one, 1.3mm, and the orange one, 1.2mm.

Guess what happens if you install either red or yellow screws into the orange spot, since your eyesight isn’t good enough to notice a 0.1mm difference? The screw will cut into the PCB and break several 50 micron traces, as shown in the picture above, causing a blue screen error on the phone.

Fun stuff.

[Sam Schmidt] is the owner of a repair outfit called iRepairNational, and he and his team spent a day trying to figure out the problem – it’s not exactly easy to spot. They’ve managed to repair it by cutting thin strips  of copper foil (the width of a human hair) and floating it into place using the surface tension of the flux they were using for soldering. On average it takes them around 2 hours to do the repair, though they’ve done a few in just under an hour.

Since discovering and sharing the problem, they’ve had customers around the world sending in phones for repair – often at the fault of someone else trying to repair something completely different in the phone, and then using the wrong screw as they put it all back together.

DIY Robot Arm

Robot Arm You Can Build At Home

[jjshortcut] has created an easy to make robot arm that has 6 degrees of freedom. There is not much to it, the frame is made out of 4mm thick hardboard, hobby servos provide the power and a handful of hardware holds it together. The frame has been successfully cut out on both a laser cutter and a cnc router, making this design even more obtainable for any aspiring roboticist.

To control the robot arms movements [jjshortcut] plans to use a standard Arduino. There are certainly plenty of servo motor shields available but he still decided to design his own. In addition to the standard motor power and servo connections, a header for an infrared receiver was added for potential future communication options.

DIY Robot Arm Gripper
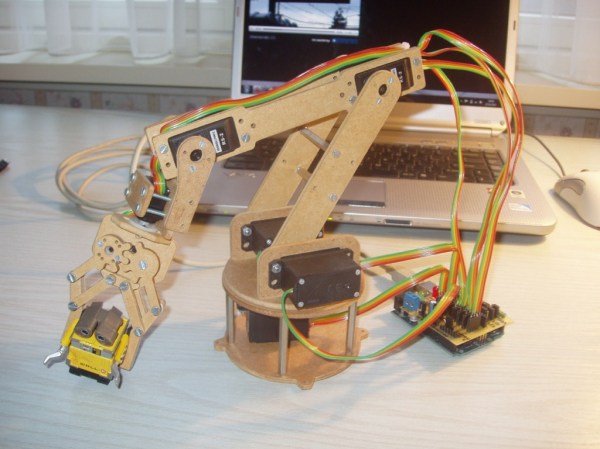
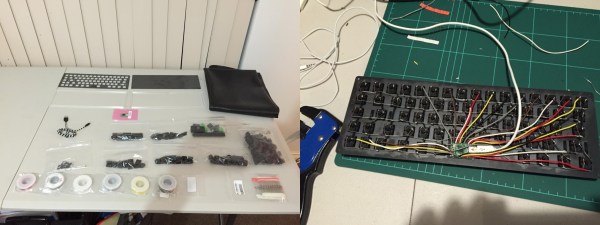
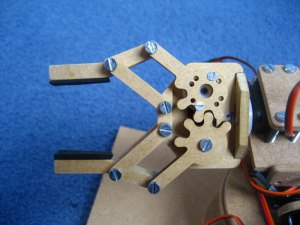
Like any project, there were some hiccups along the way. First, several revisions of the gripper were necessary to get the correct tooth profile that resulted in smooth and tight movement. Also, while making the shield the spacing between banks of headers came out one header too close! On this first board [jjshortcut] just bent the pins so they would fit into the Arduino. You can’t let some minor snafu prevent forward momentum of a project!

[jjshortcut] has done the hard part; the design. He has made all his mechanical and electronic files available… so go and build one! Check out the video after the break.

Continue reading “Robot Arm You Can Build At Home”

home made keyboard

Delving Into The Design And Manufacture Of A Keyboard

A while back [Dave] decided he wanted to build his own keyboard. [Dave] has no experience in design, or dealing with manufacturing companies, or even sourcing materials – he just wanted to see if he could do it.

That’s the beauty of the DIY world – most of the time, you can do it, you just don’t know it yet. The keyboard is made out of laser cut steel and acrylic sheets. The switches and key caps are Cherry MX Browns, supplied by GONSKeyboards Works. A Teensy 2.0 lies at the heart of the keyboard acting as an HID device, and the whole thing assembled looks pretty slick – but it wasn’t easy getting to that point.

Continue reading “Delving Into The Design And Manufacture Of A Keyboard”

Playing Doom (Poorly) On A VoCore

Last May brought the unastonishing news that companies were taking the Systems on Chip found in $20 wireless routers and making dev boards out of them. The first of these is the VoCore, an Indiegogo campaign for a 360MHz CPU with 8MB of Flash and 32MB or RAM packaged in a square inch PCB for the Internet of Things. Now that the Indiegogo rewards are heading out to workbenches the world over, it was only a matter of time before someone got Doom to run on one of them.

After fixing some design flaws in the first run of VoCores, [Pyrofer] did the usual things you would do with a tiny system running Linux – webcams for streaming video, USB sound cards to play internet radio, and the normal stuff OpenWrt does.

His curiosity satiated, [Pyrofer] turned to more esoteric builds. WIth a color LCD from Sparkfun, he got an NES emulator running. This is all through hardware SPI, mind you. Simple 2D graphics are cool enough, but the standard graphical test for all low powered computers is, of course, Doom.

The game runs, but just barely. Still, [Pyrofer] is happy with the VoCore and with a little more work with the SPI and bringing a framebuffer to his tiny system, he might have a neat portable Doom machine on his hands.