A 3D – To – 2D Converter To Make Plots From STLs.

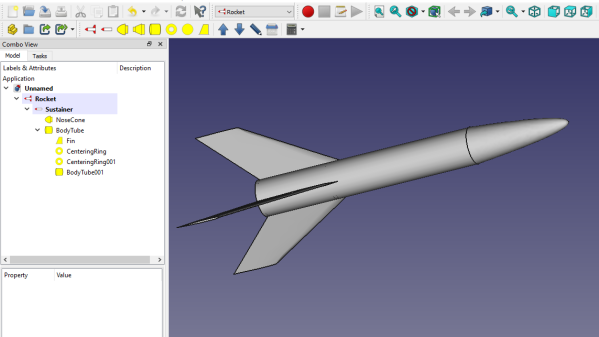
We’ve become used to finding models on websites such as Thingiverse and downloading them to print. After all, whose hackerspace doesn’t have a pile of novelty prints? How about printing them on paper? For the plotter enthusiast that can be particularly annoying. Never fear, [Trammell Hudson] is here with an online 3D to 2D converter just for plotters. [Trammell’s] creation makes a vector image suitable for a plotter while eliminating spurious behind-the-scenes lines.

Plotter drawings are the pen-and-paper equivalent of a vector CRT display, in which the graphics are printed as continuous strokes. Rendering a 3D model as a wireframe for a plotter requires the removal of any pen strokes that comes from the 3D space behind the surface in view. Loading various models into the web page seemed to do a pretty good job of this, though the ubiquitous Benchy 3d printer test model lived up to its billing as a torture test in taking several minutes to render.

As anyone who has followed the #PlotterTwitter social media hashtag will know, there is a considerable community of pen plotter enthusiasts who are pushing the boundaries of what their machines can do. [Trammell] has posted his plotter producing some of the work created with this tool, and we can see that it’s likely to work better with lower-poly models.

We’ve featured a lot of plotters over the years as they seem to be a popular project. If you’d like one then they can be made from the most available parts, including those scavenged from scrap DVD drives, or printers.

Inside CHIP-8

Certain old computers — most frequently those using the RCA 1802 — were fond of using an early form of byte-code interpreter for programs, especially games. The interpreter, CHIP-8, was very simple to create but offered high-level features that were tedious to recreate in the native assembly language. Because there are a fair number of simple games written in CHIP-8, there are of course, emulators for it, and [River Gillis] decided to look inside the CHIP-8 byte code interpreter.

Part of the power of CHIP-8 was it only had 35 virtual instructions. That was important when you were trying to shoehorn a game and the interpreter into a very small memory. Remember, in those days 1K of memory wasn’t an unusual number, although the prototypical CHIP-8 host would have 4K.

Continue reading “Inside CHIP-8”

Audio Fingerprinting Skips A Show’s Intro, Reliably

Lacking a DVD drive, [jg] was watching a TV series in the form of a bunch of .avi video files. Of course, when every episode contains a full intro, it is only a matter of time before that gets too annoying to sit through.

Chapter breaks reliably inserted around the intro, even when it doesn’t always occur in the same place.

The usual method of skipping the intro on a plain video file is a simple one:

  1. Manually drag the playback forward past the intro.
  2. Oops that’s too far, bring it back.
  3. Ugh reversed it too much, nudge it forward.
  4. Okay, that’s good.

[jg] was certain there was a better way, and the solution was using audio fingerprinting to insert chapter breaks. The plain video files now have a chapter breaks around the intro, allowing for easy skipping straight to content. The reason behind selecting this method is simple: the show intro is always 52 seconds long, but it isn’t always in the same place. The intro plays somewhere within the first two to five minutes of an episode, so just skipping to a specific timestamp won’t do the trick.

The first job is to extract the audio of an intro sequence, so that it can be used for fingerprinting. Exporting the first 15 minutes of audio with ffmpeg easily creates a wav file that can be trimmed down with an audio editor of choice. That clip gets fed into the open-source SoundFingerprinting library as a signature, then each video has its audio track exported and the signature gets identified within it. SoundFingerprinting therefore detects where (down to the second) the intro exists within each video file.

Marking out chapter breaks using that information is conceptually simple, but ends up being a bit roundabout because it seems .avi files don’t have a simple way to encode chapters. However, .mkv files are another matter. To get around this, [jg] first converts each .avi to .mkv using ffmpeg then splices in the chapter breaks with mkvmerge. One important element is that the reformatting between .avi and .mkv is done without completely re-encoding the video itself, so it’s a quick process. The result is a bunch of .mkv files with chapter breaks around the intro, wherever it may be!

The script is available here for anyone to play with, and the project page is a good learning reference because [jg] kindly provides all the command-line options used for each tool. Interested in using audio fingerprinting in your own projects? Remember to also check out Olaf, the Overly Lightweight Acoustic Fingerprinting method that can be implemented in embedded systems and web browsers.

Roll Your Own Photo Sharing, Minus The Social Networking Baggage

[Niklas Roy] rolled his own photo diary, because he found the core functionality of something like instagram attractive, but didn’t want the social network baggage that it came with. His simple system is called my own insta ;) and it consists of some javascript and PHP to create a nice progressive web app photo diary and backend that can be accessed just fine from a mobile device. It is available on GitHub for anyone interested in having their own.

This project came up because [Niklas] sometimes found himself working on small projects or experiments that aren’t destined for proper documentation, but nevertheless could benefit from being shared as a photo with a short description. This dovetails with what many social networks offer, except that those platforms also come with other aspects [Niklas] doesn’t particularly want. His online photo diary solves this by having a simple back end with which he can upload, sort, and caption photos in an easy way even from a mobile device.

Rolling one’s own solution to some small core functionality offered by a social network is one way to avoid all the extra baggage, but another method is to simply automate away all the pesky social bits with a robot.

A Computer In The Game Of Life

We often hear the term “Turing-complete” without giving much thought as to what the implications might be. Technically Microsoft PowerPoint, Portal 2, and Magic: the Gathering all are Turing-complete, what of it? Yet, each time someone embarks on an incredible quest of perseverance and creates a computer in one of these mediums, we stand back in awe.

[Nicolas Loizeau] is one such individual who has created a computer in Conway’s Game of Life. Unlike electricity, the Game of Life uses gliders as signals. Because two orthogonal gliders can cancel each other out or form a glider eater if they intersect with a good phase shift, the basic logic gates can be formed from these interactions. This means the space between gates is crucial as signals need to be in phase alignment. The basic building blocks are a period-60 gun, a 90-degree glider reflector, a glider duplicator, and a glider eater.

All the Python code that generates these structures is on GitHub as the sheer size of the machine couldn’t possibly be placed by hand. The Python includes scripts to assemble the basic programs as a bank of selectable glider generators. It’s all based on Golly, which is an excellent program for simulating Conway’s Game of Life, among other things. While this isn’t the first computer in the Game of Life as [Paul Rendell] published a design in 2000 and [Adam Goucher] published a Spartan universal computer constructor in 2009, we think this is a particularly beautiful one.

The actual architecture has an 8-bit data bus, a 64-byte memory with two read ports, a ROM with 21 bits per line, and a one-hot encoded ALU supporting 8 different operations. Instructions have a 4-bit opcode which is decoding in a few different instructions. The clock is four loops, formed by the glider reflectors as the glider beams rotate. This gives the computer four stages: execution, writing, increment PC, and write PC to memory.

The Game of Life is an excellent example of Cellular Automaton (CA). There are several other types of CA’s and the history behind them is fascinating. We’ve covered this field before and delved into this beautiful fringe of computer science. Check out the video below to truly get a sense of the scale of the machine that [Nicolas] has devised.

Continue reading “A Computer In The Game Of Life”

Procedurally Generated Trees

As the leaves fall from the trees here in the Northern Hemisphere, we are greeted with a clear view of the branches and limbs that make up the skeleton of the tree. [Nicolas McDonald] made a simple observation while looking at trees, that the sum of the cross-sectional area is conserved when a branch splits. This observation was also made by Leonardo Da Vinci (according to Pamela Taylor’s Da Vinci’s Notebooks). Inspired by the observation, [Nicolas] decided to model a tree growing for his own curiosity.

The simulation tries to approximate how trees spread nutrients. The nutrients travel from the roots to the limbs, splitting proportionally to the area. [Nicolas’] model only allows for binary splits but some plants split three ways rather than just two ways. The decision on where to split is somewhat arbitrary as [Nicolas] hasn’t found any sort of rule or method that nature uses. It ended up just being a hardcoded value that’s multiplied by an exponential decay based on the depth of the branch. The direction of the split is determined by the density of the leaves, the size of the branch, and the direction of the parent branch. To top it off, a particle cloud was attached at the end of each branch past a certain depth.

By tweaking different parameters, the model can generate different species like evergreens and bonsai-like trees. The code is hosted on GitHub and we’re impressed by how small the actual tree model code is (about 250 lines of C++). The power of making an observation and incorporating it into a project is clear here and the results are just beautiful. If you’re looking for a bit more procedurally generation in your life, check out this medieval city generator.

Turning GitHub Into A URL Shortening Service

URL shortening services like TinyURL or Bitly have long become an essential part of the modern web, and are popular enough that even Google killed off their own already. Creating your own shortener is also a fun exercise, and in its core doesn’t require much more than a nifty domain name, some form of database to map the URLs, and a bit of web technology to glue it all together. [Nelsontky] figured you don’t even have to build most of it yourself, but you could just (ab)use GitHub for it.

Using GitHub Pages to host the URL shortening website itself, [nelsontky] actually repurposes GitHub’s issue tracking system to map the shortened identifier to the original URL. Each redirection is simply a new issue, with the issue number serving as the shortening identifier, and the issue’s title text storing the original URL. To map the request, a bit of JavaScript extracts the issue number from the request, looks it up via GitHub API, and if a valid one was found (and API rate limits weren’t exceeded), redirects the caller accordingly. What’s especially clever about this is that GitHub Pages usually just serves static files stored in a repository, so the entire redirection logic is actually placed in the 404 error handling page, allowing requests to any arbitrary paths.

While this may not be as neat as placing your entire website content straight into the URL itself, it could be nicely combined with this rotary phone to simply dial the issue number and access your bookmarks — perfect in case you always wanted your own website phone book. And if you don’t like the thought of interacting with the GitHub UI every time you want to add a new URL, give the command line tools a try.