More Radiation Test Gear

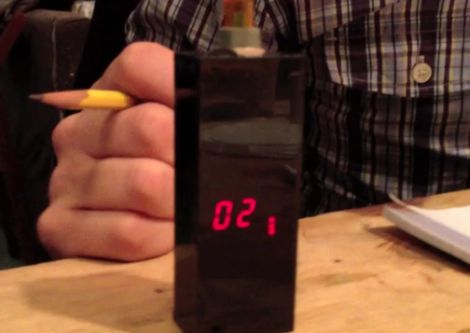
This is a multifunction too for measuring radiation (translated). The measurements center around gas discharge tubes that react when ionizing particles pass through them. After reading about the counting circuit for the pair of tubes used in this handheld it’s easy to understand why these are tricky to calibrate. The handheld features a real-time clock as well as a GPS module. This way, it can not only give a readout of the radiation currently measured, but can record how much radiation exposure has accumulated over time (making this a dosimeter). An accompanying dataset records the location of the exposure. An ATmega128 drives the device, which is composed of two separate boards, a series of five navigation buttons, and a salvaged cellphone LCD for the readout. The translated page can be a bit hard to read at times, but there’s plenty of information including an abundance of schematic breakdowns with accompanying explanations of each.

This is certainly feature-rich and we think it goes way beyond the type of device that Seeed is trying to develop.

[Thanks Andrew]

Direct To PCB Resist Printing Requires Minimal Additional Components

epson_inkjet

Printing PCBs using the toner transfer method works pretty well, but there are some downsides, such as incomplete trace transfers and the like. HackHut user [rucalgary] decided to go the inkjet route instead, and picked up an Epson printer on clearance at his local electronics shop. This method is not new by any means, but his printer conversion is one of the simplest we’ve seen as it does not rely on any additional sensors to function.

Once he got home, he tore the printer down immediately, removing the paper input and output trays as well as the scanner bed. After all of the extraneous parts were removed, he got to work raising up the printer head, as well as the printer head rest mechanism. He mentions that the latter component is absolutely crucial to proper functionality down the line. Once the print head and its associated components were relocated, he added a pair of aluminum rails for feeding his print tray into the machine.

With everything complete, he filled up a spare cartridge with ink (he says that MISPRO yellow works best) and ran some test boards through. He is quite pleased with how things turned out, and is more than happy to give you a quick tour of his completed printer via the video below.

Continue reading “Direct To PCB Resist Printing Requires Minimal Additional Components”

DIY Camera Dolly Frees Up Your Hands To Take Care Of The Important Stuff

diy_camera_dolly

Documenting your build process can sometimes be an incredible pain, as it’s quite difficult to take pictures or video while you are in the middle of soldering. Professionals who demonstrate things on TV for a living have the benefit of a camera crew and special rigs to catch the action from every angle – the rest of us don’t have that luxury.

[Steve] felt the same frustrations as many of us do, and decided to do something about it. He built a movable camera dolly that can be suspended from the ceiling above his work surface for less than $30. The bulk of his camera dolly is built from PVC piping, with assorted bolts and washers holding things together. Skateboard bearings were used as rollers to provide smooth 2-axis motion for the entire rig, then he hung the entire apparatus from the ceiling joists over his workspace.

According to [Steve], the build process seems relatively easy and should take no more than an hour or so, and it can support pretty much any full-size DSLR camera you can find.

Stick around for a quick video tour of his camera dolly build.

[via Make]

Continue reading “DIY Camera Dolly Frees Up Your Hands To Take Care Of The Important Stuff”

AV Test Box Meets The Incredible Shrink Ray

mini_avtester

[Chris] recently finished building a miniscule AV Test Box, capable of fitting inside a standard Altoids tin. It is a revision of a project he constructed a few years ago. His previous test box worked well, but was large and cumbersome – definitely not something you would want to carry around from place to place with any frequency.

The new test box does everything its predecessor is capable of, which includes displaying an 800×600 VGA test pattern as well as generating sound signals for testing audio systems. He updated the circuit design a bit, employing a newer PIC processor to run the show, otherwise most of the design details have remained the same, form factor aside.

His build log is full to the brim with details as usual. You will find thorough descriptions of all the components he used, schematics, source code, as well as the theory behind the build.

Be sure to check out the video embedded below of his new AV tester in action.

Continue reading “AV Test Box Meets The Incredible Shrink Ray”

Lego Minifig Multimeter Makes Resistor Sorting A Lot More Fun

lego_minifig_multimeter

While there’s typically not much room on our work bench for toys, [David] over at Robot Room has put together a pretty cool multimeter for which we would make an exception.

His Lego Minifig multimeter is constructed using mostly standard off-the-shelf Legos, and a pair of Minifigs he modified to suit his needs. Translucent Minifig heads were sourced online to allow the neck-mounted LEDs to shine through, and each of the bodies were drilled out in several places to accommodate the wires he uses to take measurements.

The multimeter will display the resistance of any item from 10 – 10,000,000 Ω, as well as measure the voltage of any battery you can manage to fit under the Minifig’s metal wrench. The multimeter takes measurements using an ATmega168, and relays that data through a serial to USB converter connected to a nearby computer. The computer is host to a .NET application he wrote which displays and speaks both the resistance and voltage values.

Keep reading to see a quick video walkthrough and a demonstration of the multimeter at work.

Continue reading “Lego Minifig Multimeter Makes Resistor Sorting A Lot More Fun”

Adding Digital Storage To An Analog Scope

This is a hack in the finest sense of the term. It not only allows you to capture data from an analog oscilloscope for later analysis, but provides you with a great tool if you’re posting on the Internet about your projects. [J8g8j] used an empty cashew container to add a camera mount to the front of his scope. This is possible because the bezel around the display has a groove in it. A bit of careful measuring helped him make an opening that was just right.

You can see that the red cap for the jar holds the camera and gave him a bit of trouble in the original prototype. This version has a tray where camera sits, which replaces the Velcro with didn’t hold the camera level the first time around. He’s also painted the inside of the clear plastic to reduce glare on the oscilloscope readout. Black and white images seem to come out the clearest, but it can be difficult to make out the grid lines. The addition of LEDs to help them stand out is one of the improvements we might see in the future.

Beginner Project: Super Cheap Magnetic Mixer

[wesdoestuff]’s mother needed a clean way to mix together fragrance oils. Being the stand up kinda guy he is, [Wes] threw together a few spare parts to make this Magnetic Stir Plate.

The whole setup is amazingly simple. Pry the fins off of an old computer fan, glue a couple magnets to the fan’s hub. Drill a hole for a DC connector, find some sort of cover and.. Bob’s your uncle! [Wes] advises that you test the spacing of the magnets on the hub before gluing them permanently, as they can be a bit tricky to align.

The stir bar for non food items is  a magnet bar from one of those crazy magnet and ball bearing toys, it is basically just a solid magnet covered in plastic.  Food safe bars can be acquired, though they are not as cheap.  With all that room under the hood we would love to see him throw in some kind of a PWM speed control but that could be a bit complicated. Most of us could throw this together from spare parts.  Video after the jump!

Continue reading “Beginner Project: Super Cheap Magnetic Mixer”