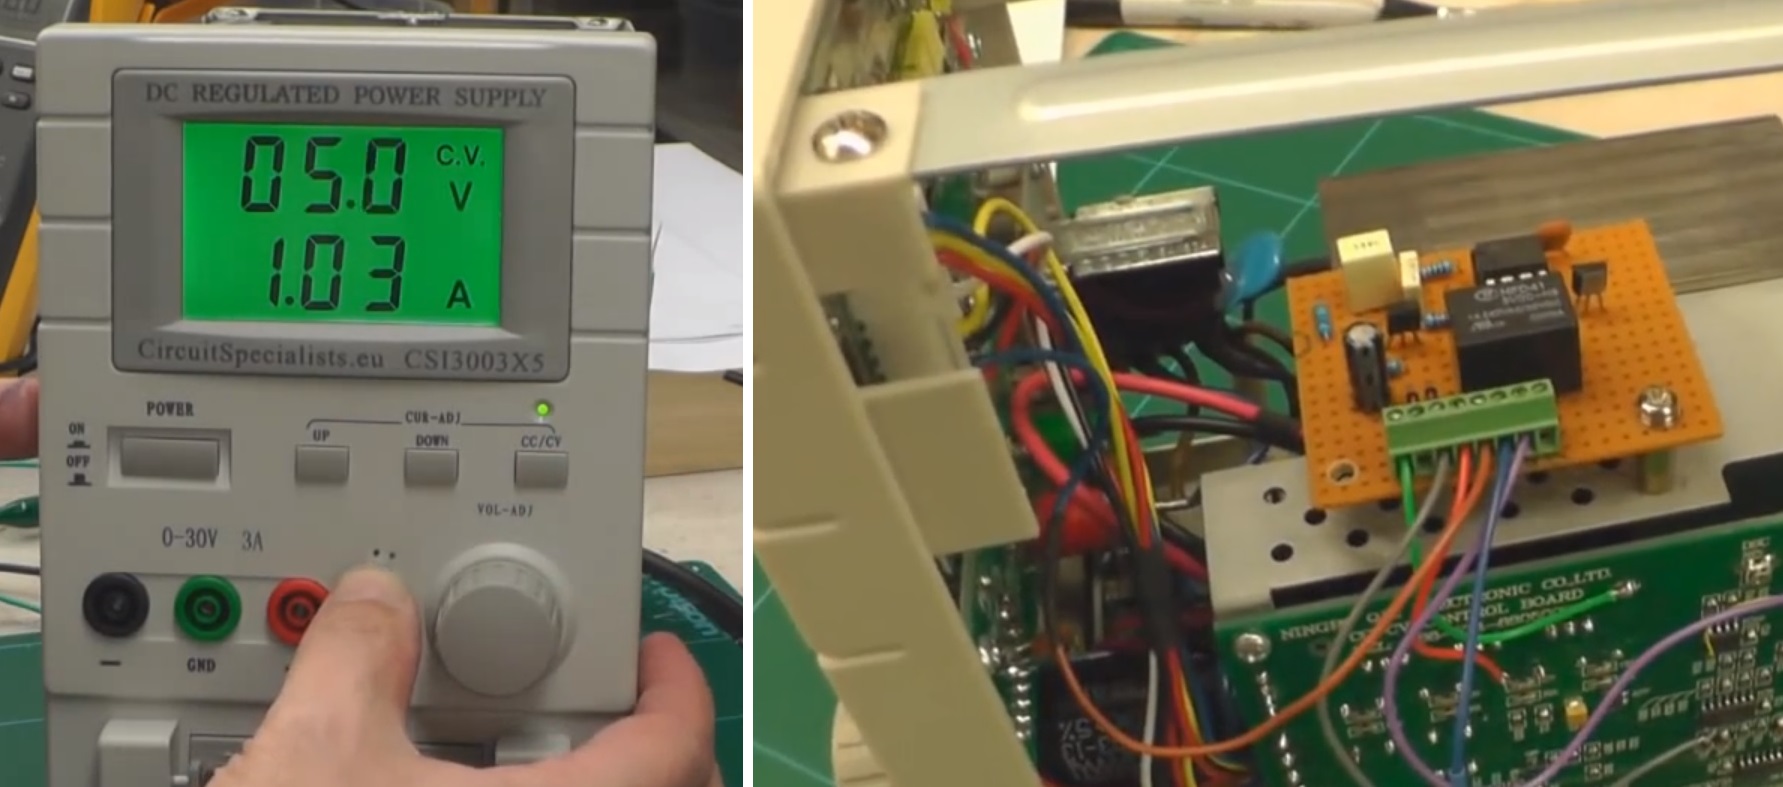
Here is a nice hack you may find very useful if you have a cheaper bench power supply that supports constant current limit protection (CC mode) and the only way to set or check your max current limit is to disconnect your circuit, short the power supply outputs and then check or set your limit. Yes, what a pain! [Ian Johnson] was enduring this pain with a couple of Circuit Specialist bench power supplies and decided to do something about it. After finding a download of the circuit diagram for his CSI3003X-5 supply he was able to reverse engineer a hack that lets you press a new button and dial-in the max current setting. Your first guess is that he simply added a momentary button to short the power supply outputs, but you would be wrong. [Ian’s] solution does not require you to remove the load, plus the load can continue running while you set your current limit. He does this by switching the current display readout from using 0–3 volts off an output shunt resistor to using the 0-3 volts output from a digital potentiometer which is normally used to set the power supplies’ constant current limit anyway. So simple it’s baffling why the designers didn’t include this feature.
Granted this is a simple modification anybody can implement, however [Ian] still wasn’t happy. A comment by [Gerry Sweeney] set him on the path to eliminate the tedious multi-button pressing by implementing a 555 momentary signal to switch the circuit from current load readout to current set readout. This 2nd mod means you just start pressing your up-down CC set buttons and it momentarily switches over the display to read your chosen max current and a few moments later the display switches back to reading actual load current. Brilliant! Just like the expensive big boy toys.
[Ian] doesn’t stop with a simple one-off hack job either. He designed up a proper PCB with cabling and connectors, making an easy to install kit that’s almost a plug-in conversion kit for Circuit Specialist bench power supplies (CSI3003X-5, CSI3005X5, CSI3003X3, CSI3005XIII). It is not a 100% plug-in kit because you do have to solder 3 wires to existing circuit points for signal and ground, but the video covering that task seemed trivial.
This hack could very well work with many other power supplies on the market being Circuit Specialist is just rebadging these units. For now, only the models listed after the break are known to work with this hack. If you find others please list in the comments.
After the break we will link to all three progressive mod videos incase you want to learn how to mod your own power supply or you could just order a prebuilt kit from [Ian].
Continue reading “Bench Power Supply Constant Current EZ-SET” →
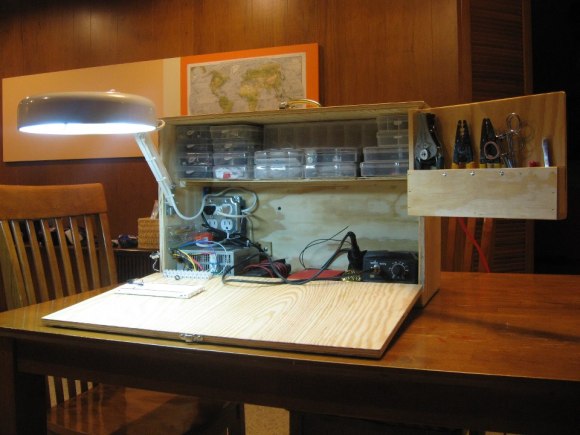
 Populating a large surface mount PCB can take forever. [craftycoder] from Freeside Atlanta has built a great looking
 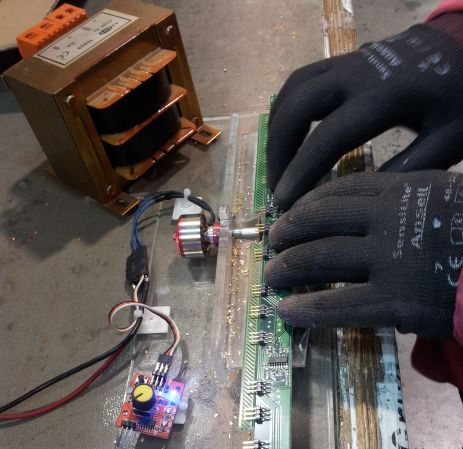 They say necessity is the mother of invention. Sometimes the necessity is simply avoidance of unpleasant tasks such as cutting down 3500 header pins by hand. [Nixieguy] and his coworkers were faced with 50 prototype boards bearing 70 overly long pins apiece. He saved them from cutting them all down by hand by making