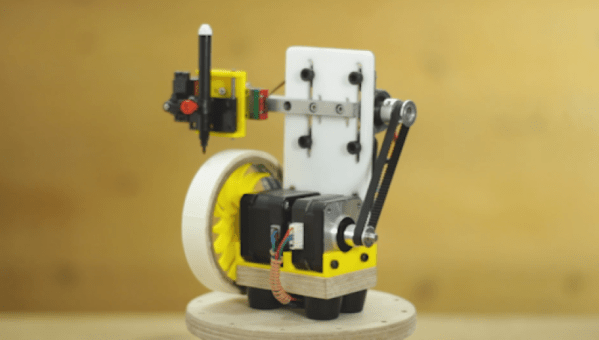
Like it or not, organizing your workspace from time to time is a necessary chore. Labels can go a long way towards taming the most unruly of benches, but writing them out by hand isn’t exactly ideal. Looking for something a bit neater, [sandy] built a simple pen plotter to write labels on a roll of tape.
The plotter uses the usual 3D printer components like steppers, drivers, belts, and rails. The tape holder is printed with flexible arms for a tight grip, and a servo is used to raise and lower the pen while writing.
The custom control board includes an Arduino Nano clone and a pair of stepper drivers, and an optional Bluetooth module and can be configured for a variety of machine control applications. A pair of Android apps are used to generate and send the G-code from a phone to the GRBL firmware loaded on the Arduino.
We techie types are quite often much more comfortable in front of a keyboard knocking out code, than out in the yard splitting logs for winter, and even the little jobs like cutting the grass are sometimes just too much like hard manual labour for our liking. The obvious solution is a robot mower, but they’re kinda boring, with their low-tech spinning metal blades. What we need is a big frickin’ laser. YouTuber [rctestflight] has been experimenting with using a 40W blue diode laser module to cut the weeds, (Video, embedded below) and it sort of works, albeit in a rather dangerous fashion.
A nice flat ‘cut’
The first test used a fixed assembly, mounting the laser to a camera lens, upon a rotating gear driven by a small stepper motor. An Arduino controls the beam scanning, very slowly, burning the grass in its sights. But with a range limited to around eight feet best case, sitting in one spot just isn’t going to cut it. (sorry) The obvious next step was to mount one of the tested laser modules onto a moveable platform. After tweaking one of his earlier projects — a tracked rover — with a new gearbox design, it could now drive slow enough to be useful for this slow task. The laser was mounted to a simple linear rail slider, with an attempt at a vacuum pickup system to suck up the clippings, removing them from the beam path, and stopping them impeding the cutting efficiency of the laser.
Obviously this vacuum idea didn’t work, and since the contraption takes the best part of a week to cut just one small area, we reckon it would likely be growing faster than that! Still, it must have been fun to build it anyway. It just goes to show that despite the march of technological progress, maybe the boring old spinning blades of old are still the best way to get the job done.
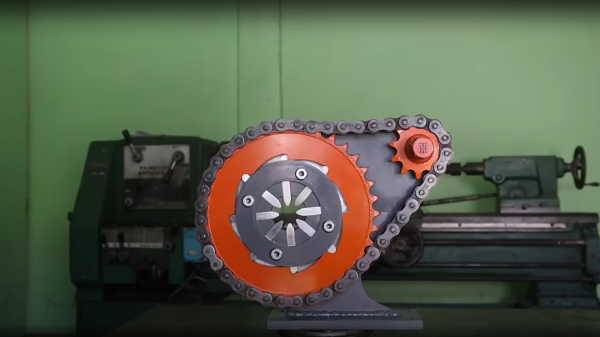
We love upcycling around these parts — taking what would be a pile of rusty scrap and turning it into something useful — and this project from YouTuber [Hands on Table] is no different. Starting with a pair of solid looking sprockets, one big, one small, and some matching chain, a few lumps of roughly hewn steel plate were machined to form some additional parts. A concentric (rear mounted) plate was temporarily welded to the sprocket so matching radial slots could be milled, before it was removed. Next, the sprocket was machined on the inside to add a smooth edge for the crimping fingers (is that the correct term? We’re going with it!) to engage with.
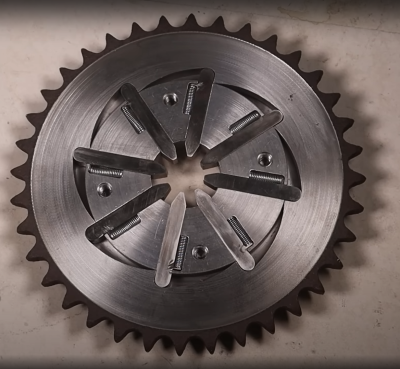
These fingers started life as an off the shelf 3/8″ HSS tool bit, ground down by hand, to produce the desired crimping profile. A small piece of steel was welded on to each, to allow a small spring to act on the finger, enabling it to retract at the end of the crimping action. We did spot the steel plate being held in place with a small magnet, prior to welding. The heat from that would likely kill off the magnetic field in a short space of time, but they’re so cheap as to be disposable items anyway.
A small ring rides on top of the assembly, bolted to the fixed rear plate. The prevents the crimping fingers from falling out . The fingers are constrained by the slots in the rear plate, so the result is that they can only move radially. As the big sprocket is rotated, they get progressively pushed towards the center, giving that nice, even crimping action. Extra mechanical advantage is provided by driving the small sprocket with a wrench. Super simple stuff, and by the looks of the device in action, pretty effective at crimping the hose fittings it was intended for.
[JSK-koubou] has quite the talent for creative woodwork, particularly building interesting tools or improving existing ones. This recent project (multiple build videos below: part 1, part 2, and part 3) is a very flexible type of guided pull saw, whereby a fine-toothed saw blade is fixed in the bed, and the workpiece is pulled over it it. By fixing it at a shallow angle, and enabling the blade to be raised up through the bed, the workpiece can be progressively cut by simply pulling it over the blade, then winding it up a little until the final cut length is achieved.
From a construction perspective, the tool is all-metal, built from a collection of the off-the-shelf parts, and thick, hand-cut aluminium alloy plate, nary a CNC tool in sight. The only unusual component is the saw blade itself, which might be a bit tricky to track down if you were so inclined to reproduce the build. It appears (well if you believe the auto-translation by Google Lens, anyway) to be a spare blade for a commercial guide saw available in Japan at least.
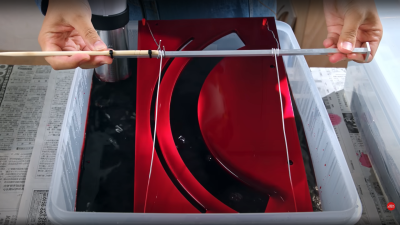
We found it particularly pleasing to see the use of a home-built anodizing setup to give it a bit of a jazzy color scheme for some of the plates, just because. Like with many of the build videos from this YouTuber, it is well worth watching all of them, if only just to gather a few ideas for one’s own workspace, if you can stop yourself getting distracted looking at all the other neat tools he uses on the way.
A couple of years ago we published a look at precision measurement tools, in particular vernier calipers and micrometer screw gauges. It featured a look at how they work and how they’re used, and a comparison of good and bad quality instruments. When comparing micrometers we had three of them, a Mitutoyo and a Moore & Wright representing decent quality, and an £8 ($9.41) Daniu from Banggood from the cheaper end of the market. As you might expect, the Daniu was laughably bad, with noticeable play in its thread and jaws that were not parallel to the extent you could see light between them. You might consider it case closed for cheap micrometers then, were it not that while on my summer travels through the Benelux countries I spied a Parkside micrometer in a Lidl supermarket for €8.99 ($8.92). I had to buy it and investigate.
Some Measuring Devices With Your Groceries?
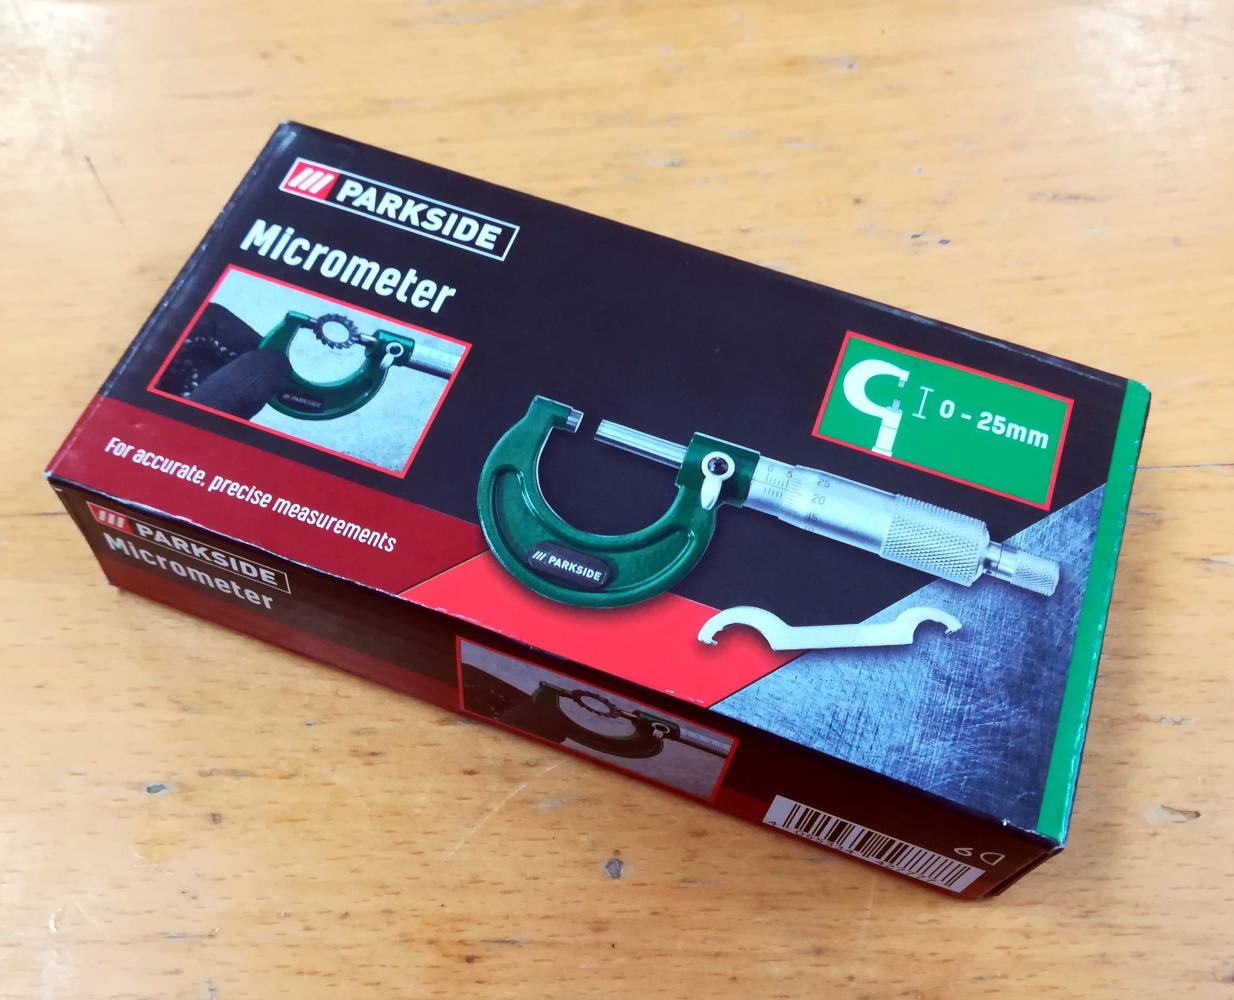
Lidl is a German supermarket chain that can be found all over Europe, and like their arch-competitor Aldi they feature the “Middle of Lidl” aisles full of all sorts of useful stuff that changes on a regular basis. Among this is a comprehensive range of tools under the Parkside brand, which is basically on par with the good stuff from Harbor Freight, and are in fact quite good for the price. Thus even though it’s about the same price as the Daniu I had higher expectations for the Parkside micrometer.
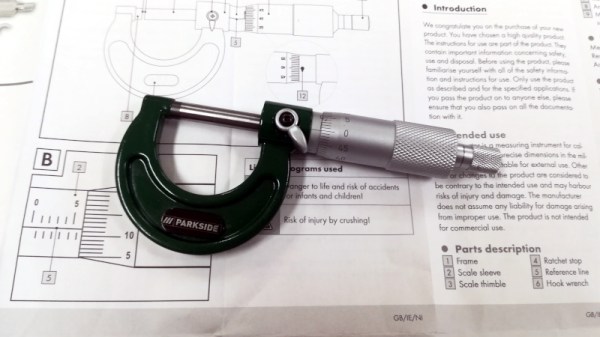
The micrometer is packaged in the usual plastic case in a small cardboard box, and comes with a large paper instruction sheet and a small spanner for zero adjustment. Taking it out of the case, it follows exactly as you’d expect from a micrometer with a solid drop-forged frame and an aluminium barrel on the micrometer head. It can measure up to 25 mm at a resolution of 0.01 mm, exactly like the others I tested in 2020. So my nine dollars or so has got me a micrometer, but is it any good? How do you evaluate a micrometer screw gauge? I re-borrowed the two comparison instruments from 2020, and set out to find out.
The Tiniest Sliver Of Light Gives It Away
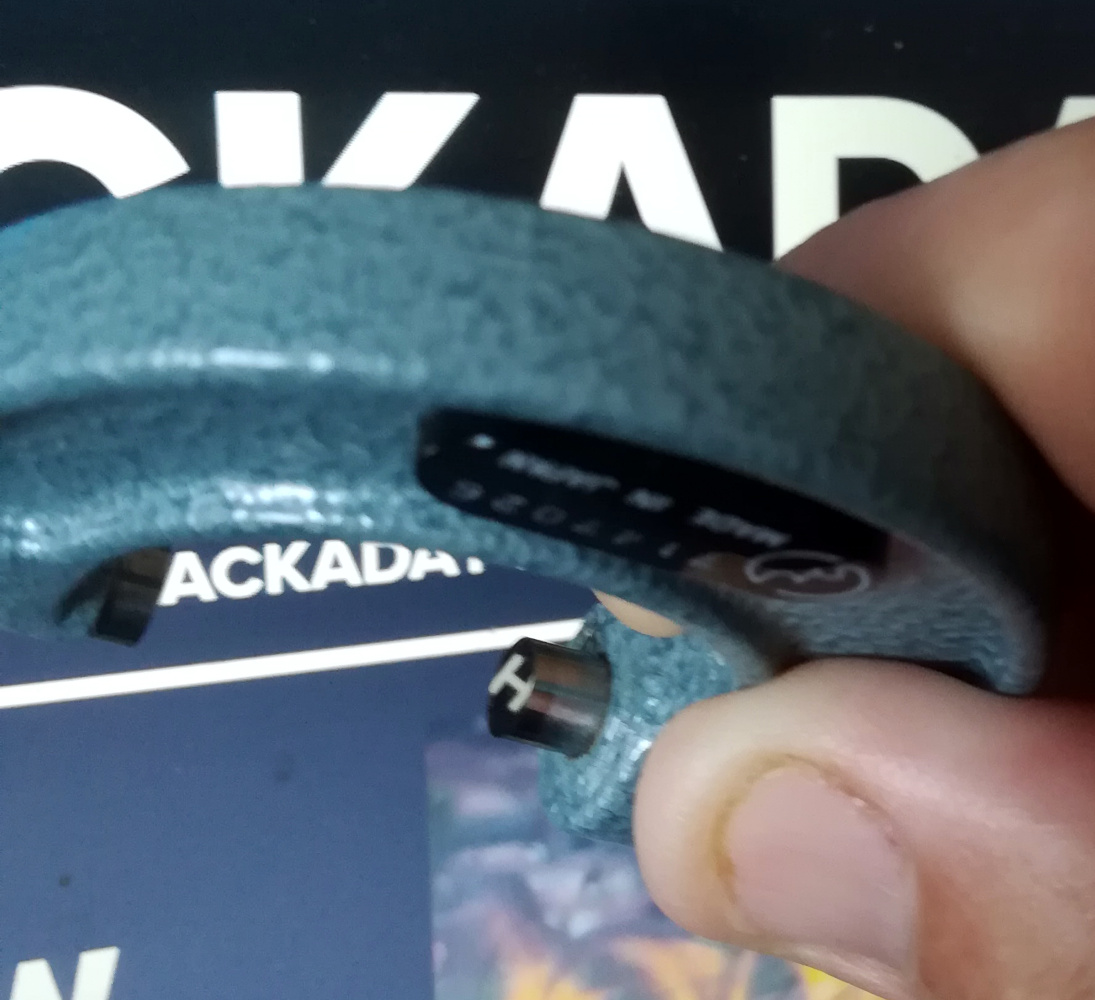
The mirror finish on the Mitutoyo jaw face reflecting the “H” of the Hackaday website.
It’s worth saying that the jaw faces are polished, but not to a mirror finish as those on the Mitutoyo and neither do they appear to have been hardened. In the first instance, comparing with the Daniu I closed the jaws against the force of the ratchet, and held it up against the light to spot any imperfections in the way they meet. Against the blue sky through my window I couldn’t see any, but a friend did the same thing against the more intense point source of an electric light and indeed there was the tiniest discernable sliver of light. Not the obvious wedge of light I caught with the Daniu back in 2020 and less than the visible sliver of light when it is measuring a human hair, but definitely enough to knock a few hundredths of a milimetre off my trust in its accuracy.
The next step in the evaluation involves opening the jaws about half way, and feeling for any play in the thread. None discernable, at least one win over the Daniu which had the barrel flapping around with significant play. Then a zero test, after adjusting the zero position with the spanner a few repeated closings with the ratchet, to check that it always returns to the same zero point. In this case as with all micrometers it’s possible to overshoot the zero and damage the thread if you apply too much force, but just on the ratchet it would land in the same place. A pass on a couple of tests then, so while it’s not the worst micrometer ever it’s obvious that the low price brings at least one compromise.
A Tiny Discrepancy In Measurement
Opening up the three micrometers from the 2020 piece again it’s immediately obvious in the silky feel of the thread and the lack of wobble in the ratchet just where the money goes in an expensive micrometer, and just how comedically bad the Daniu was by comparison. But it’s the Parkside in our sights today, so it’s time to make a few comparitive measurements between it and the Mitutoyo. First up were the old standbys of a piece of paper and a human hair in which the Parkside returned the same as the Mitutoyo, and then the machined shaft of the Moore & Wright which returned a difference of 0.01 mm.
Parkside
Mitutoyo
Sheet of paper
0.12 mm
0.12 mm
Human hair
0.05 mm
0.05 mm
Moore & Wright shaft
6.79 mm
6.80 mm
The discrepancy in this table when measuring the shaft may be small, but it harks back to that sliver of light from imperfectly aligned jaws. As expected if the shaft meets the jaws at anything but the highest point of the jaw it will return a slightly smaller reading, thus it immediately has an error on everything it returns. Discussing it with friends there was raised the intriguing possibility of lapping the faces by drawing a sheet of exceptionally fine abrasive through the closed jaws, however I have my doubts as to whether this would do anything but make the gap worse.
What I can say about the Parkside micrometer screw gauge is that it appears reasonably well-built, but I can’t present it as the equal of the more expensive instruments when its faces are anything but parallel. I would say therefore that it would be good for basic measurements when machining or in CAD work where an error of 0.01 mm or 0.02 mm wouldn’t matter too much, but perhaps I wouldn’t quite trust it when working with extremely fine tolerances. Still, it’s not the worst among cheap micrometers and it’s on sale for a very reasonable price even if it’s not in the same precision instrument league as the Mitutoyo. If you don’t have a micrometer screw gauge yet then you could do a lot worse at this end of the market.
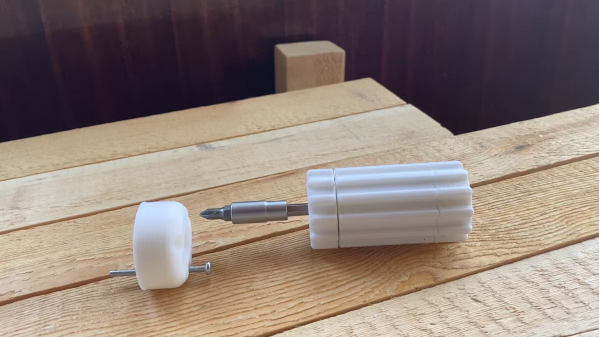
Ratcheting screwdrivers can help you work faster, even if their bulk means they’re not the best option for working in tight spaces. [ukman] decided to build a similar device of his own, relying on a slightly different mechanism — an overrunning clutch.
The design is similar to a freewheel used on a bicycle, allowing free movement in one direction while resisting it in the other. As the screwdriver is turned in one direction, the shaft is wedged by a series of cylinders that lock it in place. However, the geometric shape of the clutch allows the shaft to turn in the other direction without getting wedged in place. The result is a screwdriver that can be turned, rolled back, and turned further. Thus, screws can be tightened without loosening one’s grip on the tool.
We think of digital displays as something you see on relatively modern gear. But some old gear had things like nixies or numitrons to get cool-looking retro digital displays. The HP 521A frequency counter, though, uses four columns of ten discrete neon bulbs to make a decidedly low-tech but effective digital display. [Usagi Electric] has been restoring one of these for some time, but there was a gap between the second and third videos as his workshop became a kitten nursery. You can see the last video below.
In previous videos, he had most of the device working, but there were still some odd behavior. This video shows the final steps to success. One thing that was interesting is that since each of the four columns are identical, it was possible to compare readings from one decade to another.
However, in the end, it turned out that the neon bulbs were highly corroded, and replacing all the neon bulbs made things work better. However, the self-check that should read the 60 Hz line frequency was reading 72 Hz, so it needed a realignment. But that was relatively easy with a pot accessible from the back panel. If you want to see more details about the repair, be sure to check out the earlier videos.
We love this old gear and how clever designers did so much with what we consider so little. We hate to encourage your potential addiction, but we’ve given advice on how to acquire old gear before. If you want to see what was possible before WS2812 panels, you could build this neon bulb contraption.


 crimping profile. A small piece of steel was welded on to each, to allow a small spring to act on the finger, enabling it to retract at the end of the crimping action. We did spot the steel plate being held in place with a small magnet, prior to welding. The heat from that would likely kill off the magnetic field in a short space of time, but they’re so cheap as to be disposable items anyway.
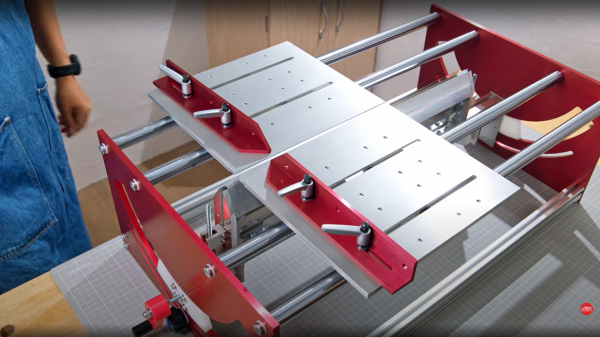
 which might be a bit tricky to track down if you were so inclined to reproduce the build. It appears (well if you believe the auto-translation by Google Lens, anyway) to be a spare blade for a commercial guide saw available in Japan at least.