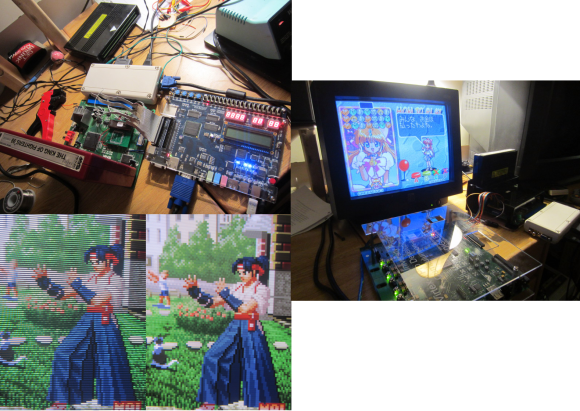
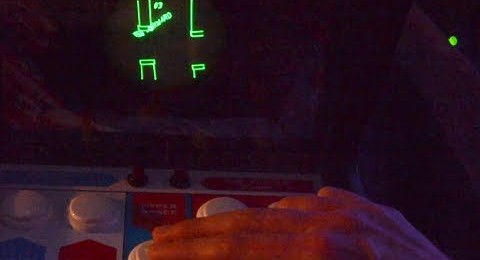
CastAR Comes To Maker Faire NY 2013

castAR-2

If there was one sentence heard over and over at Maker Faire NY, it was “Did you see castAR yet?” The Technical Illusions team was at Maker Faire in full force. [Jeri Ellsworth], [Rick Johnson,] and team brought two demos:  the tried and true Jenga simulator, and a newer overhead shooter based on the Unity 3D engine. We didn’t see any earth shattering changes from the previous demos of castAR, as [Jeri] has moved into optimization of the Hardware, and [Rick] toward even more immersive demos of the software. Optimization and preparing for market are considered the “hard yards” of any product design. This is the place where a huge amount of work goes in, but the changes are subtle to the layperson.

In addition to her development of castAR’s ASIC, [Jeri] has been hard at work on the optics. The “old” glasses used a solid plastic optical path. The newer glasses use a hollow path for the twin 720p projectors. This makes them even lighter than the previous generation. Weight on the castAR glasses can’t be overstated. They feel incredibly light. There was no perceptible pressure on the nose or ears when wearing them. Also missing was the motion sickness people often experience with VR. This is because castAR doesn’t replace the user’s vision field, it only augments the vision. Peripheral motion cues are still there, which makes for a much more comfortable experience. Continue reading “CastAR Comes To Maker Faire NY 2013”

Giant Video Walls Powered By A Raspberry Pi

There’s no denying that giant video walls are awesome, but creating one usually means a fairly complex setup with either multiple computers or very expensive video cards. Now, with Pi Wall, you can make a video wall as large as your wallet will allow with only one Raspi per monitor, and a single master pi to control the whole shebang.

As long as you have a few displays with an HDMI input, it’s easy to turn them into a giant monitor. Just plug one Pi per monitor into a network switch, have a Pi (or other Linux box) transmit a video to all the video tiles, and sit back and enjoy the show.

Right now there is an installation guide for creating a Pi Wall, but there are a few limitations; this software only works with the video player provided with the Raspberry Pi, omxplayer. If you’re looking to create an enormous display for a flight simulator or what have you, you might need to do a bit of tinkering under the hood.

TightLight: A 3D Projection Mapping Assistant

tightLight

Anyone can grab a projector, plug it in, and fire a movie at the wall. If, however, you want to add some depth to your work–both metaphorical and physical–you’d better start projection mapping. Intricate surfaces like these slabs of styrofoam are excellent candidates for a stunning display, but not without introducing additional complexity to your setup. [Grady] hopes to alleviate some tedium with the TightLight (Warning: “music”).

The video shows the entire mapping process of which the Arduino plays a specific role toward the end. Before tackling any projector calibration, [Grady] needs an accurate 3D model of the projection surface, and boy does it look complicated. Good thing he has a NextEngine 3D laser scanner, which you’ll see lighting the surface red as it cruises along.

Enter the TightLight: essentially 20 CdS photocells hooked up to a Duemilanove, each of which is placed at a previously-marked point on the 3D surface. A quick calibration scan scrolls light from the projector across the X then Y axis, hitting each sensor to determine its exact position. [Grady] then merges the photocell location data with the earlier 3D model using the TouchDesigner platform, and bam: everything lines up and plays nice.

Here Be Dragons, And VR…and Sheep.

dragonVR

This may qualify less as a hack and more as clever combination of video game input devices, but we thought it was well worth showing off. [Jack] and his team built Dragon Eyes from scratch at the 2013 Dundee Dare Jam. If you’re unfamiliar with “Game Jams” and have any aspirations of working in the video game industry, we highly recommend that you find one and participate. With only 48 hours to design, code, build assets and test, many teams struggle to finish their entry. Dragon Eyes, however, uses the indie-favorite game engine Unity3D to smoothly coordinate its input devices, allowing players to experience dragon flight. The Kinect reads the player’s arm positions (including flapping) to direct the wings for travel, while the Oculus Rift performs its usual job as immersive VR headgear.

Combining a Kinect and a Rift isn’t particularly uncommon, but the function of the microphone is. By blowing into a headset microphone, players activate the dragon’s fire-breathing. How’s that for interactivity? You can see [Jack] roasting some sheep in a demonstration video below. If you have a Kinect and Rift lying around and want some first-person dragon action, [Jack] has kindly provided a download of the build in the project link above.

We’re looking forward to more implementations of the Rift; we haven’t seen many just yet. You can, however, check out a Rift used as an aerial camera on a drone.

Continue reading “Here Be Dragons, And VR…and Sheep.”

Easy LCD Control For Arduino Mega

arduino-mega-easy-lcd-adapter

[Andy Brown] wrote in to show off the TFT LCD adapter he’s been working on for connecting inexpensive displays to an Arduino Mega.

These TFT LCD screens can be picked up on eBay for a few dollars. But they’re more suited for 16-bit microcontrollers which operate at 3.3V levels. His adapter board, which plugs directly into the Mega’s dual-row pin header, makes it easier to control these with an 8-bit chip that is running at 5V.

There’s a couple of things that make this happen. First off, he’s included level converter chips to managed the 3.3V/5V issues. Second, he uses latch chips to translate eight pins on the Arduino Mega to sixteen pins on the display. Those chips have a latch pin which holds the output values in memory while the input pins are changed. He manages to drive the latch on just one of the chips using the chip select (CS) line called for by the LCD protocol. This means you don’t lose any extra pins.

Another way to uses the displays with Arduino is to use a smart controller for TFT screens.

Continue reading “Easy LCD Control For Arduino Mega”

Multiple Raspberry Pi Boards Used To Create Video Wall

Five Rasberry Pi’s are used to drive this four-display video wall. This screenshot shows the system playing back some BBC documentaries. The sync, alignment, and video quality all seem to be spot on which makes it quite easy for your eye to assemble the images into one picture.

Each screen has its own Raspberry Pi which generates the HDMI video shown on the screen. These are fed from one central RPi board which acts as the controller. Video is pushed between the boards using the Real Time Streaming Protocol (RTSP) available through the Linux GStreamer package. Synchronization between the different video boards is taken care of using network time. [Samer] mentions that this system is scalable — each additional screen simply requires one more RPi to drive it.

The team also did some experiments with live video. They added a sixth RPi board with the camera module in order to display a live feed.

Computer Monitor Ambilight Clone Shows Remarkable Performance

ambilight-project-discreet-led-boards

Check out this fantastic Ambilight clone for a computer monitor which [Brafilus] has been working on for a few years. It’s actually the third revision and watching the demo video below left our jaws agape.

Details are only available as comments on the YouTube page. But he’s given us just enough to be satisfied. His self-etched board hosts a PIC 18F14K50 microcontroller. It is talking to each of the 28 LED pixels which themselves live on tiny hunks of diy PCB as well. He wrote his own PC software in C# to capture the colors around the edges of the screen. He also worked hard to ensure there are plenty of tweaks available for true color matching between the monitor and what your eye sees bouncing off of the wall.

If you’re looking for something like this on your television set go back a couple of days and check out that standalone unit.

Continue reading “Computer Monitor Ambilight Clone Shows Remarkable Performance”