Temperature Logger

Logging Engine Temperature For RC Models

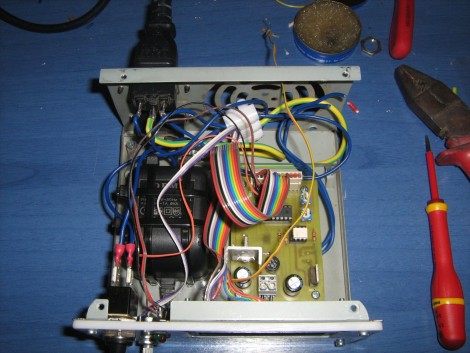
[Rui] enjoys his remote-controlled helicopter hobby and he was looking for a way to better track the temperature of the helicopter’s engine. According to [Rui], engine temperature can affect the performance of the craft, as well as the longevity and durability of the engine. He ended up building his own temperature logger from scratch.

The data logger runs from a PIC 16F88 microcontroller mounted to a circuit board. The PIC reads temperature data from a LM35 temperature sensor. This device can detect temperatures up to 140 degrees Celsius. The temperature sensor is mounted to the engine using Arctic Alumina Silver paste. The paste acts as a glue, holding the sensor in place. The circuit also contains a Microchip 24LC512 EEPROM separated into four blocks. This allows [Rui] to easily make four separate data recordings. His data logger can record up to 15 minutes of data per memory block at two samples per second.

Three buttons on the circuit allow for control over the memory. One button selects which of the four memory banks are being accessed. A second button changes modes between reading, writing, and erasing. The third button actually starts or stops the reading or writing action. The board contains an RS232 port to read the data onto a computer. The circuit is powered via two AA batteries. Combined, these batteries don’t put out the full 5V required for the circuit. [Rui] included a DC-DC converter in order to boost the voltage up high enough.

Scratch-built Smart Flashlight

scratch-built-smart-flashlight

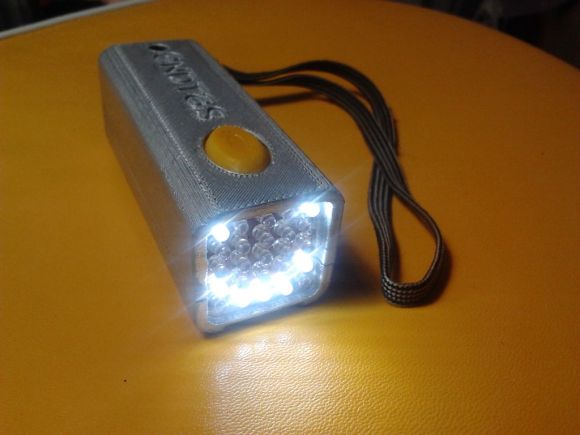
This flashlight has a face; one of the many tricks which [Hobbyman] included during the development process. The smart flashlight build turned out to be a great way to practice so many different aspects of product development.

It was envisioned as a light for use when walking or biking that could do more than just light your way or flash on and off. Of course we know it’s really just a reason to spend way too much time in his lair. He started with the electronics, driven by a PIC 16F88. The 5×5 LED matrix gives him just enough to work with for patterns and rudimentary text. The prototype is wrapped up into a pretty tight package which leaves enough room in the 3D printed case for 4 AAA batteries. As the project progressed more and more features were added in. The most current offering includes a temperature sensor as well as the ability to react to ambient sound. See for yourself after the break.

Continue reading “Scratch-built Smart Flashlight”

TinyMatrix Derivative Uses PIC Instead Of AVR

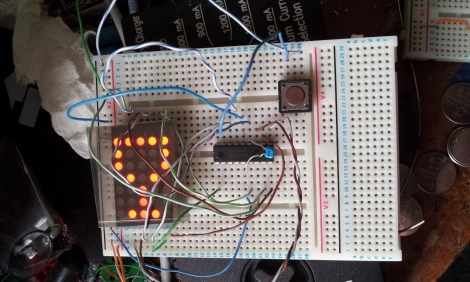
[Stu] has a teenage niece whose birthday is coming up and he wanted to give her something unique as a gift. He’s working on an LED matrix pendant that can display pixel graphics, play animations, and scroll messages.

He began the work after drawing inspiration from the TinyMatrix project. That clever design uses a DIP AVR chip soldered directly to the legs of a 5×7 LED matrix. It was powered by a coin cell with the power and ground wires acting as the necklace for the pendant. [Stu] is more comfortable developing using PIC chips, so he based his project on a 16F88. It will not run from a 3V source so he’s got a few issued to work out before the final design is finished.

One thing that’s quite interesting is his side project. After growing weary of hand coding the arrays for each frame of an animation he wrote a GUI in C# that let him design the image and output the code with a few clicks of the mouse.

Full-featured Battery Tester Puts Them Through Their Paces

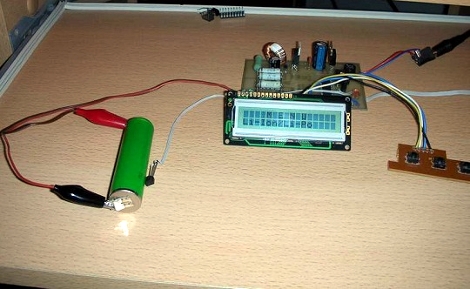
When working on battery-dependent projects you want accurate performance information where a datasheet may not be available. [E. Lelic] set out to build a device that would meter internal battery resistance but ended up with a bench tool that can do much more than that.

A PIC 16F88 microcontroller takes center stage on the meter, taking voltage level readings, monitoring a DS1820 temperature sensor, and controlling an LM2575 step-down regulator. The components provide functionality for measuring Lithium Ion, Lithium Polymer, Nickel Cadmium, Nickel Metal Hydride, and Alkaline batteries. It is capable of fully discharging and fully charging the batteries, measuring time and power consumption during this cycle, and monitoring temperature changes for the NiMH and NiCad versions.

Look for the little red ‘Download’ icon at the bottom of the post linked above. That archive includes a schematic (which we’ve also embedded after the break), board layout in .LAY format, and a HEX firmware file.

If you enjoyed this build you might want to look at this other battery capacity tester.

Continue reading “Full-featured Battery Tester Puts Them Through Their Paces”

Building A Home Automation Mesh Network

[Ian Harris] designed a bunch of home automation for his parents using X10 hardware. He was a bit disappointed by the failure rate of the modules and the overall performance of the system so he set out to replace it with his own hardware. Lucky for use he’s documented the journey in a four-part series about mesh networks.

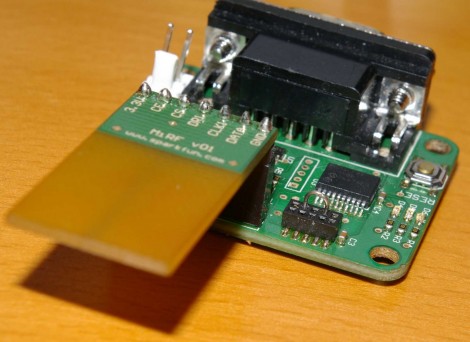
The hardware seen above is his test rig. He’s using a couple of Sparkfun breakout boards to develop for nrf2401a RF transceiver chips. These could be used as slave modules, with a central command device, but due to the home’s architecture wireless signals don’t propagate well from one end of the house to the other. The solution is to build a mesh network that will allow each module to act as a network node, receiving and passing on messages until they arrive at the target device. He’s trying to do this with cheap hardware, selecting the PIC 16F88 which boasts 7 KB or program memory and 368 bytes of ram. In the end it doesn’t take much code to get this running, it’s the concepts that take some time and research before you’ll be comfortable working with them.

[Thanks Oakkar7]

Solder Station Hack Adds Temperature Control

Take that cheap fire stick you call a soldering iron and turn it into a real tool. [Giorgos Lazaridis] turned his 30 watt soldering iron into a temperature controlled soldering station by adding a thermistor just above the tip to monitor how hot things are getting. A MAX6675 takes care of the thermocouple and shoots a digital temperature value off to the PIC 16F88 which controls the unit by taking user input from a potentiometer and displaying the settings on an HD44780 character display. His use of a dissected ‘wall wort’ inside of the ATX power supply carcass used as the case for the station is a clever hack. See it melt some metal in the clip after the break.

This makes a nice upgrade to our solder station guide, which had a temperature controlled iron but lacked the sensor and automation seen here. Continue reading “Solder Station Hack Adds Temperature Control”

Build Your Own Wristwatch

surface-mount-wristwatch

[rgbphil] has done a great job detailing how he built his Microdot wristwatch.This project is a lot more approachable than the pong watch we saw last month. If you’ve made a few printed circuit boards, but haven’t yet tried working with surface mount component, this is a great way to give it a try.

The parts count is pretty low, a few switches, resistors, capacitors, LEDs, a watch crystal, and a PIC 16F88 microcontroller.[rgbphil] is using a charlieplex so that a separate shift register is not needed to drive all of the LEDs. He goes into detail about the process of laying out the circuit. Some of the problems he encounters include how to manage all of the charlieplex connections in a simple way, how to program the chip once it’s on the board, and how to layout the controls for the device.

The display looks great in the video we’ve embedded after the break. We’re going to add these components to our next parts order and make this project part of the plan for getting us through the long cold winter ahead.

Continue reading “Build Your Own Wristwatch”