With as cheap and versatile as RTL-SDR devices are, it’s a good idea to have a couple of them on hand for some rainy day hacking. In fact, depending on what signals you’re trying to sniff out of the air, you may need multiple interfaces anyway. Once you’ve amassed this arsenal of software defined radios, you may find yourself needing a way to transport and deploy them. Luckily, [Jay Doscher] has you covered.
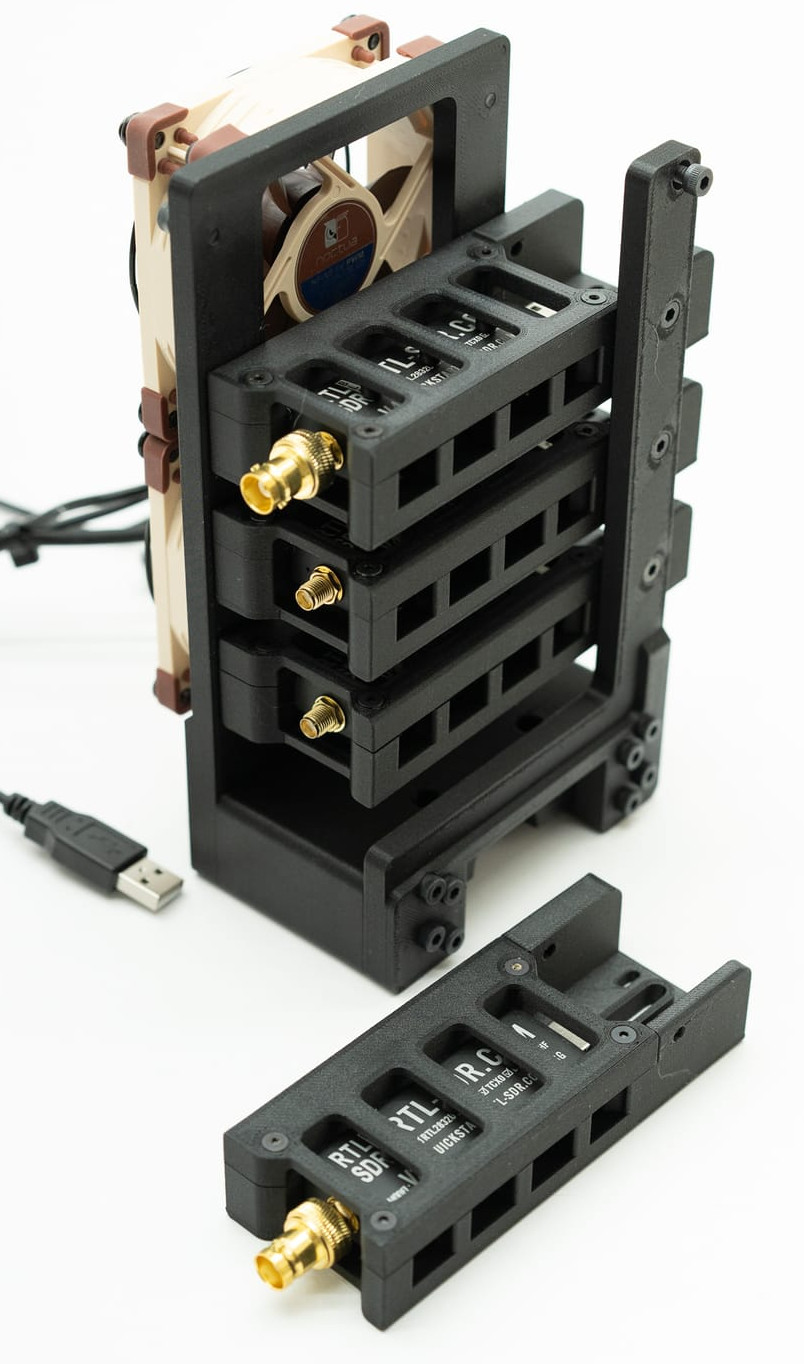 His latest creation, the SDR SOLO, is a modular system for mounting RTL-SDRs. Each dongle is encased in its own 3D printed frame, which not only protects it, but makes it easy to attach to the base unit. To keep the notoriously toasty radios cool, each frame has been designed to maximize airflow. You can even mount a pair of 80 mm fans to the bottom of the stack to really get the air moving. The current design is based around the RTL-SDR Blog V4, but could easily be adapted to your dongle of choice.
In addition to the row of SDR dongles, the rig also includes a powered USB hub. Each radio connects to the hub via a short USB cable, which means that you’ll only need a single USB cable running back to your computer. There’s also various mounts and adapters for attaching antennas to the system. Stick it all on the end of a tripod, and you’ve got a mobile radio monitoring system that’ll be the envy of the hackerspace.
As we’ve come to expect, [Jay] put a lot of thought and effort into the CAD side of this project. Largely made of 3D printed components, his projects often feature a rugged and professional look that really stands out.