Going all the way hack to the heady days of Eee PC modding, hardware hackers have been on the hunt for small USB hubs that can easily be liberated from their enclosures and integrated into whatever project they happen to be working on. From time to time you see recommendations out there for makes and models which lend themselves to this sort of repurposing, but it’s seemed more difficult than necessary to source such a basic component.
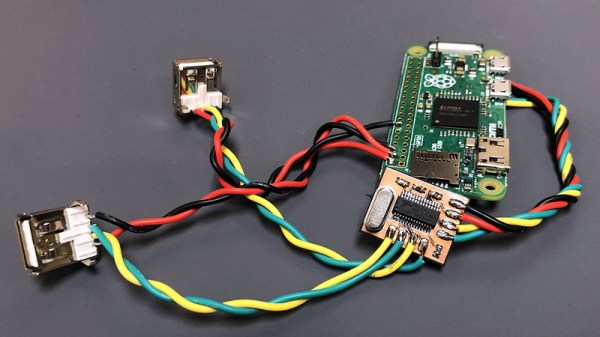
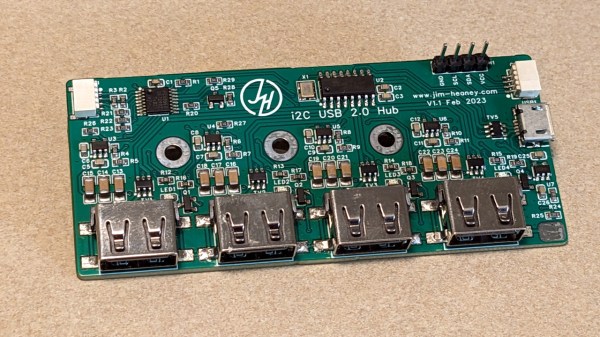
 Which is why [RETROCUTION] has developed a USB hub that’s not only extremely small, but relatively easy to assemble with only six components. Plus best of all, they are dirt cheap.
When you add up the cost of getting the PCBs made and buying all the SMD components, the per-unit price of these hubs is only going to be a few dollars. If you’ve got what it takes to make the PCBs in-house, even better. Considering how much easier these things could make other projects, it seems more than worth the upfront cost.
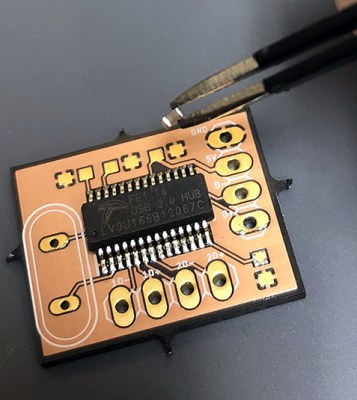
The star of the show is the FE1.1s, a four port USB 2.0 controller in a SSOP-28 package. As of this writing, it goes for about 25 cents from the usual overseas sources (even less, for larger orders). Add to the mix a few 10 μF ceramic capacitors, a 2.7 kΩ resistor, and a 12 MHz crystal.
There’s no provision for actual USB ports in the design, but they would just take up space anyway; this hub is intended to be directly soldered to the other devices. Incidentally, to reduce the number of traces and pads on the PCB, there aren’t power lines for the downstream devices either. So you’ll need to power them separately.
The passives are 0603, but the crystal is a good old fashioned through-hole component. [RETROCUTION] assembles the boards with a solder paste stencil and a hot air station, but if you’ve got a little practice, it’s certainly something you could do with an iron. With such a straightforward design, you could build a lifetime supply of these itty-bitty hubs in an afternoon. That’s certainly our plan, anyway.
Continue reading “A Tiny USB Hub For All Your Hardware Modding Needs” →

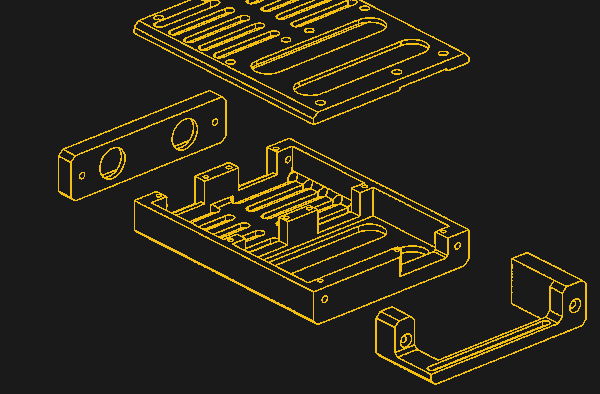
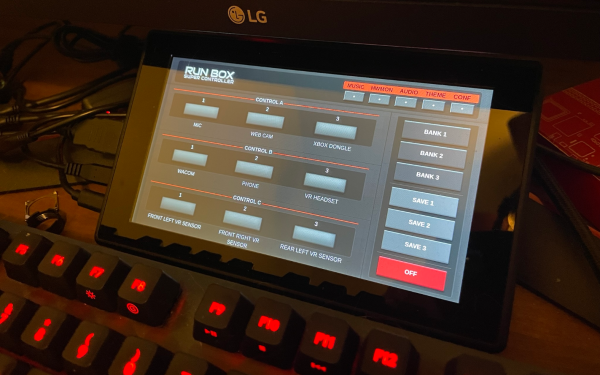
 The modified USB hub is housed in a laser-cut enclosure with plenty of space to hook up a variety of USB devices. The touchscreen neatly fits just above [Matt]’s keyboard; this setup was inspired by head-down displays used in aircraft which similarly use a small additional screen for peripheral functions.