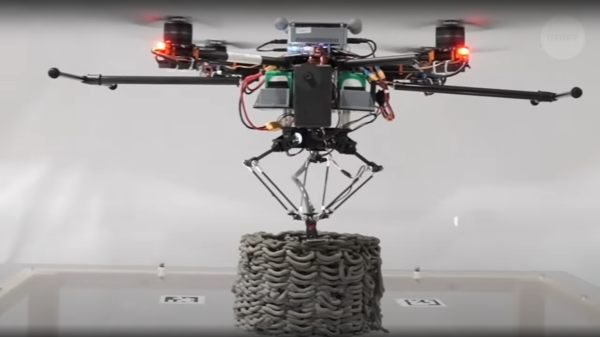
Even in technical disciplines such as engineering, there is much we can still learn from nature. After all, the endless experimentation and trials of life give rise to some of the most elegant solutions to problems. With that in mind, a large team of researchers took inspiration from the humble (if rather annoying) wasp, specifically its nest-building skills. The idea was to explore 3D printing of structures without the constraints of a framed machine, by mounting an extruder onto a drone.
As you might expect, one of the most obvious issues with this attempt is the tendency of the drone’s to drift around slightly. The solution the team came up with was to mount the effector onto a delta bot carrier hanging from the bottom of the drone, allowing it to compensate for its measured movement and cancel out the majority of the positional error.
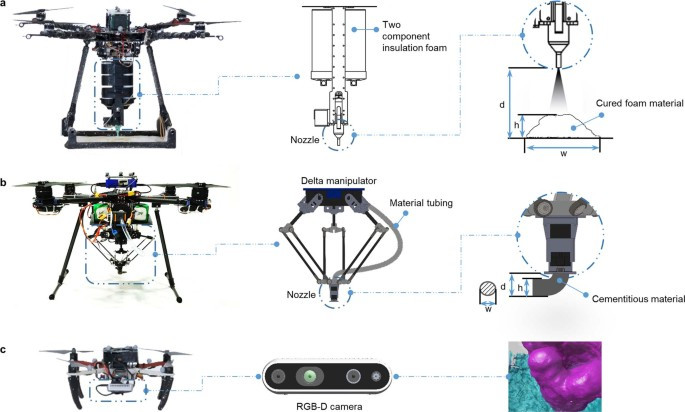 The printing method relies upon the use of two kinds of drone. The first done operates as a scanner, measuring the print surface and any printing already completed. The second drone then approaches and lays down a single layer, before they swap places and repeat until the structure is complete.
Multiple drones can print simultaneously, by flying in formation. Prints were demonstrated using a custom cement-like material, as well as what appeared to be expanding foam, which was impressive feat to say the least.
The goal is to enable the printing of large, complex shaped structures, on any surface, using a swarm of drones, each depositing whatever material is required. It’s a bit like a swarm of wasps building a nest, into whatever little nook they come across, but on the wing.
We’ve been promised 3D printed buildings for some time now, and while we’re not sure this research is going to bring us any closer to living in an extruded house, we’re suckers for a good drone swarm here at Hackaday.
Continue reading “3D Printing With A Drone Swarm?” →