Small synth held in two hands

3D Printed Synth Kit Shares Product Design Insights

We’ve always been delighted with the thoughtful and detailed write-ups that accompany each of [Tommy]’s synth products, and the background of his newest instrument, the Scout, is no exception. The Scout is specifically designed to be beginner-friendly, hackable, and uses 3D printed parts and components as much as possible. But there is much more to effectively using 3D printing as a production method than simply churning out parts. Everything needed to be carefully designed and tested, including the 3D printed battery holder, which we happen to think is a great idea.

3d printed battery holder, showing inserted spring contacts
3D printed battery holder, with spring contacts inserted by hand.

[Tommy] also spends some time explaining how he decided which features and design elements to include and which to leave out, contrasting the Scout with his POLY555 synth. Since the Scout is designed to be affordable and beginner-friendly, too many features can in fact be a drawback. Component costs go up, assembly becomes less straightforward, and more complex parts means additional failure points when 3D printing.

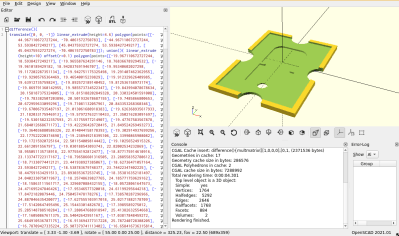
[Tommy] opted to keep the Scout tightly focused, but since it’s entirely open-sourced with a hackable design, adding features is made as easy as can be. [Tommy] designed the PCB in KiCad and used OpenSCAD for everything else. The Scout uses the ATmega328, and can be easily modified using the Arduino IDE.

STL files can be downloaded here and all source files are on the project’s GitHub repository, which also contains detailed assembly and modification guides. Watch it in action in the video, embedded below.

Continue reading “3D Printed Synth Kit Shares Product Design Insights”

a man sits on top of a motorcycle simulation rig

Motorcycle Simulation Rig Is Off To The Races

Many arcade machines can be emulated and handily controlled with the standard joystick and button combos. However, a few don’t feel quite right without some extra equipment, motorcycle racing games being one of them. So, no longer content to go to an arcade to get his fix, [The Q] welded his own motorcycle simulation rig for playing racing games at home.

After an initial design was sketched out, rectangular tube steel was cut to size and welded together with a MIG welder. A central shaft linked to some secured bearings made the central pivot point. A few pistons offered the resistance needed for leaning into the curves. To the central shaft, a seat and an old bicycle fork were attached. A clever linkage from the handlebars to the base causes the bike to tilt when turning the handlebars and vice versa.

The bike was ready for prime time after some grinding, orange paint, a license plate, and some lights and grips. [The Q] just needed to get the angle of the bike into the simulation of their choice. While we expected a teensy or other microcontroller emulating a controller, [The Q] went for a somewhat simpler approach, and 3D printed a cradle to hold a PlayStation controller. Little levers pull strings to articulate the joystick, and a cable from the throttle grip pulls back the trigger on the controller. All in all, the experience looks pretty decent, particularly when you’re comparing it to a motocross arcade machine. What it really needs are some fans blowing for the effect of the air stream coming at you.

If you’re thinking about busting out the MIG to make a rig of your own, maybe consider making a homemade car racing rig to complement the bike.

Continue reading “Motorcycle Simulation Rig Is Off To The Races”

New Part Day: DLP300s The Next Big Thing For Low Cost Resin Printing?

The majority of non-SLA resin 3D printers, certainly at the hacker end of the market, are most certainly LCD based. The SLA kind, where a ultraviolet laser is scanner via galvanometers over the build surface, we shall consider no further in this article.

What we’re talking about are the machines that shine a bright ultraviolet light source directly through a (hopefully monochrome) LCD panel with a 2, 4 or even 8k pixel count. The LCD pixels mask off the areas of the resin that do not need to be polymerised, thus forming the layer being processed. This technique is cheap and repeatable, hence its proliferance at this end of the market.

They do suffer from a few drawbacks however. Firstly, optical convergence in the panel causes a degree of smearing at the resin interface, which reduces effective resolution somewhat. The second issue is one of thermal control – the LCD will transmit less than 5% of the incident light, so for a given exposure at the resin, the input light intensity needs to be quite high, and this loss in the LCD results in significant internal heating and a need for active cooling.  Finally, the heating in the LCD combined with intense UV radiation degrades the LCD over time, making the LCD itself a consumable item.

Continue reading “New Part Day: DLP300s The Next Big Thing For Low Cost Resin Printing?”

Test For 3D Printer Runaway

A few 3D printers have had a deserved reputation for bursting into flames. Most — but apparently not all — printers these days has firmware that will detect common problems that can lead to a fire hazard. If you program your own firmware, you can check to see if you have the protection on, but what if you have a printer of unknown provenance? [Thomas] shows you how to check for a safe printer. Also check out his video, embedded below.

The idea is to fake the kind of failures that will cause a problem. Primarily, you want to have the heaters turned on while the thermistor isn’t reading correctly. If the thermistor is stuck reading low or is reading ambient, then it is possible to just drive the heating element to get hotter and hotter. This won’t always lead to a fire, but it could lead to noxious fumes.

Continue reading “Test For 3D Printer Runaway”

Printing Ceramics Made Easier

Creating things with ceramics is nothing new — people have done it for centuries. There are ways to 3D print ceramics, too. Well, you typically 3D print the wet ceramic and then fire it in a kiln. However, recent research is proposing a new way to produce 3D printed ceramics. The idea is to print using TPU which is infused with polysilazane, a preceramic polymer. Then the resulting print is fired to create the final ceramic product.

The process relies on a specific type of infill to create small channels inside the print to assist in the update of the polysilazane. The printer was a garden-variety Lulzbot TAZ 6 with ordinary 0.15mm and 0.25mm nozzles.

Continue reading “Printing Ceramics Made Easier”

Can Metal Plated 3D Prints Survive 400,000 Volts?

It appears they can. [Ian Charnas] wanted his very own Thor Hammer. He wasn’t happy to settle on the usual cosplay methods of spray painting over foam and similar flimsy materials. He presents a method for nickel plating onto a 3D printed model, using conductive nickel paint to prepare the plastic surface for plating. In order to reduce the use of hazardous chemistry, he simplifies things to use materials more likely to be found in the kitchen.

As the video after the break shows, [Ian] went through quite a lot of experimentation in order to get to a process that would be acceptable to him. As he says, “after all, if something is worth doing, it’s worth over-doing” which is definitely a good ethos to follow. Its fairly hard to plate metals and get a good finish, and 3D printed objects are by their nature, not terribly smooth. But, the effort was well rewarded, and the results look pretty good to us.

But what about the 400 kV I hear you ask? Well, it wouldn’t be Thor’s hammer, without an ungodly amount of lightning flying around, and since [Ian] is part of a tesla coil orchestra group, which well, it just kinda fell into place. After donning protective chainmail to cover his skin, he walks straight into the firing line of a large pair of musical tesla coils and survives for another day. Kind of makes his earlier escapade with jet-powered roller skates look mundane by comparison.

Continue reading “Can Metal Plated 3D Prints Survive 400,000 Volts?”

Deceptively Simple Process Turns Bottles Into Filament

If you know that most soda bottles are made from PET plastic, you’ve probably thought about how you could make filament from them and have an endless supply of cheap printing material. [Mr3DPrint] says he has a method and shares a few videos that make it look easy. We wonder if the quality of the filament is up to par with commercial products, but assuming the videos are accurate, it appears that the resulting filament gets the job done.

The details are a little sketchy, but it looks simple enough. THe first step is to get any indentations out of the bottle. He has several demonstrations of this some using pressurized air in the bottle and some without. In each case, though, a drill holds the bottle through the cap and spins it over a flame until the surface is smooth.

Continue reading “Deceptively Simple Process Turns Bottles Into Filament”