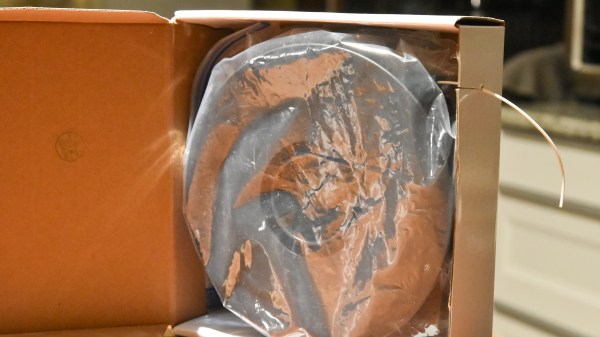
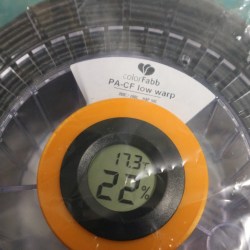
This $0 Filament Drybox Needs Nearly No Parts

All 3D printer filament benefits from being kept as dry as possible, but some are more sensitive to humidity than others. The best solution is a drybox; a sealed filament container, usually with some desiccant inside. But in a pinch, [Spacefan]’s quick and dirty $0 drybox solution is at least inspiring in terms of simplicity.

The only added part is this 3D-printed fitting.

[Spacefan]’s solution uses a filament roll’s own packing materials and a single 3D-printed part to create a sealed environment for a single roll. The roll lives inside a plastic bag (potentially the same one it was sealed in) and filament exits through a small hole and 3D-printed fitting that also uses a bit of spare PTFE tubing. The box doubles as a convenient container for it all. It doesn’t have as much to offer as this other DIY drybox solution, but sure is simple.

While we appreciate the idea, this design is sure to put a lot of friction on the spool itself. It will be a lot of extra work to pull filament off the spool, which needs to turn inside a bag, inside a box, and that extra work will be done by the 3D printer’s extruder, a part that should ideally be working as little as possible. The re-use of materials is a great idea, but it does look to us like the idea could use some improvement.

What do you think? Useful in a pinch, or needs changes? Would adding a spindle to support the spool help? Let us know what you think in the comments.

3D-Printed Desiccant Container Exploits Infill

Desiccant is common in 3D printing because the drier plastic filament is, the better it prints. Beads of silica gel are great for controlling humidity, but finding a porous container for them that is a convenient size is a little harder. 3D printing is a generally useful solution for custom containers, but suffers from a slight drawback in this case: printing dense grills or hole patterns is not very efficient for filament-based printers. Dense hole patterns means lots of stopping and starting for the extruder, which means a lot of filament retractions and longer print times in general.

The green model is used as a modifier to the orange container (of which only the corners are left visible here)

[The_Redcoat]’s solution to this is to avoid hole patterns or grills altogether, and instead print large wall sections of the container as infill-only, with no perimeter layers at all. The exposed infill pattern is dense enough to prevent small beads of desiccant from falling through, while allowing ample airflow at the same time. The big advantage here is that infill patterns are also quite efficient for the printer to lay down. Instead of the loads of stops and starts and retractions needed to print a network of holes, infill patterns are mostly extruded in layers of unbroken lines. This translates to faster print speeds and an overall more reliable outcome, even on printers that might not be as well tuned or calibrated as they could be.

To get this result, [The_Redcoat] modeled a normal, flat-walled container then used OpenSCAD to create a stack of segments to use as a modifier in PrusaSlicer. The container is printed as normal, except where it intersects with the modifier, in which case those areas get printed with infill only and no walls. The result is what you see here: enough airflow for the desiccant to do its job, while not allowing any of the beads to escape. It’s a clever use of both a high infill as well as the ability to use a 3D model as a slicing modifier.

There’s also another approach to avoiding having to print a dense pattern of holes, though it is for light-duty applications only: embedding a material like tulle into a 3D print, for example, can make a pretty great fan filter.

Heated DryBox Banishes Filament Moisture For Under $20

There has been a lot of activity from [Richard Horne] regarding 3D printing filaments lately; most recently he has shared two useful designs for upping one’s filament storage and monitoring game. The first is for a DIY Heated DryBox for 3D printing filament. It keeps filament dry not just by sealing it into a plastic box with some desiccant, but by incorporating a mild and economical heater intended for reptile habitats inside. Desiccant is great, but a gently heated enclosure can do wonders for driving away humidity in the right environment. The DryBox design also incorporates a handy little temperature and humidity sensor to show how well things are working.

Spool-mounted adapter for temperature and humidity sensor (and desiccant) to monitor storage bag conditions.

The second design is a simple spin-off that we particularly liked: a 3D printed adapter that provides a way to conveniently mount one of the simple temperature and humidity sensors to a filament spool with a desiccant packet. This allows storing a filament spool in a clear plastic bag as usual, but provides a tidy way to monitor the conditions inside the bag at a glance. The designs for everything are on Thingiverse along with the parts for the Heated DryBox itself.

[Richard] kindly shares the magic words to search for on eBay for those seeking the build’s inexpensive key components: “15*28CM Adjustable Temperature Reptile Heating Heater Mat” and “Mini LCD Celsius Digital Thermometer Hygrometer Temperature Humidity Meter Gauge”. There are many vendors selling what are essentially the same parts with minor variations.

Since the DryBox is for dispensing filament as well as storing it, a good spool mounting system is necessary but [Richard] found that the lack of spool standardization made designing a reliable system difficult. He noted that having spool edges roll on bearings is a pretty good solution, but only if one doesn’t intend to use cardboard-sided spools, otherwise it creates troublesome cardboard fluff. In the end, [Richard] went with a fixed stand and 3D printable adapters for the spools themselves. He explains it all in the video, embedded below.

Continue reading “Heated DryBox Banishes Filament Moisture For Under $20”

Heatless Compressed Air Dryer

The pressurized air from a standard air compressor is fine for most uses. But some applications like plasma cutting call for low-humidity air and the hardware available to facilitate this can cost a bundle. [Roland] and his cohorts at TX/RX Labs (a Houston, Texas Hackerspace) just built this air drying system.

It works using a desiccant; a substance that sequesters moister. It’s the stuff in those little packets you find in shoe boxes and the like with a warning that you shouldn’t eat it. The image above shows two chambers which house the desiccant. Only one is used at a time, so that as it’s ability to remove moisture drops, the system can switch over to the other chamber. There’s even an automatic recharging system built in that uses a portion of the dried air to remove the humidity from the unused desiccant chamber.

There’s a functional diagram at the link above. It’s resolution is low enough that the text is almost unreadable but we’ve asked [Roland] if he can repost the image. This seems like a build in which other hackerspaces will be interested.