A Standing Desk On The Cheap

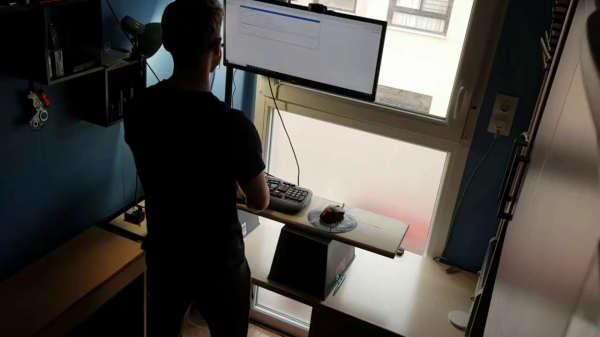
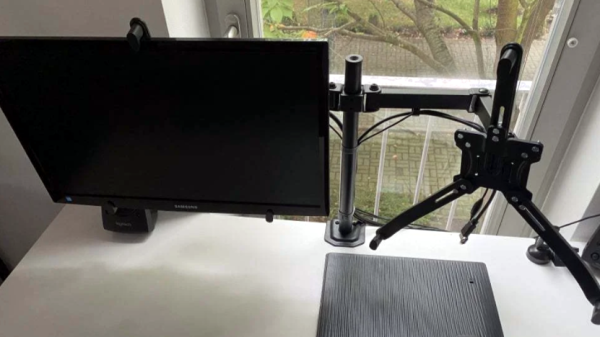
A programmer forced to work from home during the pandemic, [MrAkpla] was having back pains from sitting in front of the computer all day. He considered buying a standing desk, but all the various options didn’t fit with either his desk or his budget. Not to be deterred, he devised one of the simplest standing desk implementations that we’ve seen. It clearly works for him, because he’s been using it for one year now with great success. [MrAkpla] espouses three main benefits of his approach:

  • Cheap as heck
  • Five minute set up time
  • Uses your existing desk

These goals were accomplished. You can see in the video below that transition from sitting to standing is indeed as quick as he claims, is clearly inexpensive, and indeed it doesn’t require any modifications to his desk or furniture.

This design centers on a having an 80 cm long monitor arm, which is quite a range of adjustment. He’s using a monitor arm pole mount from UK manufacturer Duronic. Although they are having delivery problems these days because of Brexit issues, [MrAkpla] was able to get one delivered from existing inventory outside of the UK.

Admittedly, this is a crude design — in effect two trash bins and a board. But even if this doesn’t fit well with your office decor, its a great way to try out the concept of a standing desk without the up-front investment. By the way, [MrAkpla] is on the lookout for similar monitor mounting poles from non-UK manufacturers. If you have any recommendations, put them in the comments below. If you’re interested in a DIY standing desk that is on the opposite side of the complexity spectrum, check out this beauty that we covered back in the pre-pandemic era.

Continue reading “A Standing Desk On The Cheap”

Repurpose A Monitor Arm As Microscope Mount

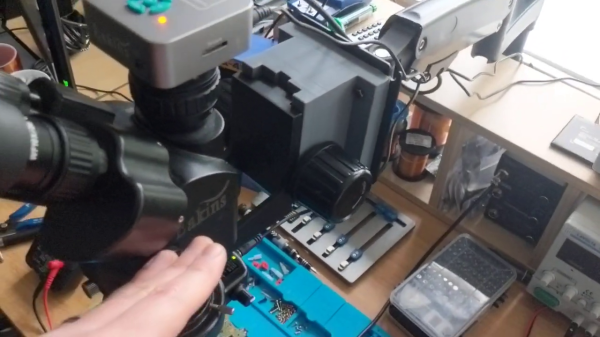
Being a bit shocked at the prices of articulating arm microscope mounts, not to mention the shipping fees to the UK, [CapTec] realized they looked substantially similar to your typical computer monitor arm mount. Thinking he could adapt a monitor arm for much less money, he fired up FreeCAD and started designing.

[CapTec] is using this to support his Amscope / Eakins camera-equipped trinocular microscope, but notes that the same mechanical bracket / focus rack interface is found on binocular ‘scopes as well. He observes that the mount is no more stable than your desk or lab bench, so keep that in mind.

Ultimately the monitor arm set him back less than $40, and all told he reckons the whole thing was under $55. Based on prices he’s been researching online, this represents a savings of well over $200. In his calculations, the shipping fee comprised quite a hefty percentage of the total cost. We wonder if they are artificially high due to coronavirus — if so, the make / buy price comparison might yield different results in the future.

This type of project is a perfect use-case for a home 3D printer — making your own parts when the normal supply channels are unavailable or overpriced. Are articulating arms that are purpose-built for microscopes significantly different than those designed for big computer monitors? If you know, please comment down below.

Continue reading “Repurpose A Monitor Arm As Microscope Mount”

VESA Arm Turned Low-Cost Overhead Camera Rig

Whether you’re live streaming builds or just want to take your project photography to the next level, you can’t beat an overhead camera setup. Unfortunately, they tend to be cumbersome and more often than not quite pricey. Looking for an affordable solution that could easily be moved out of the way when not in use, [Jay Doscher] had the clever idea of adapting a common VESA monitor arm to give his camera a bird’s eye view of the action.

If you think about it, one of these monitor arms is a nearly perfect base for a camera rig. They’re easily mounted to a desk or work bench, can be quickly repositioned by design, and perhaps best of all, you don’t have to spend a lot of money to get a decent one. A camera is also a far lighter and less awkward payload than the arm was designed to hold, so you don’t have to worry about it potentially dropping your expensive gear. Or cheap webcam, as the case may be.

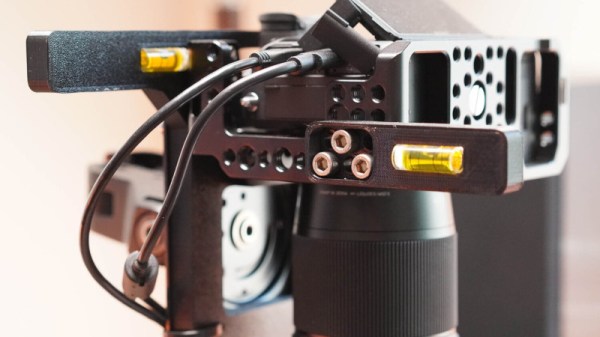
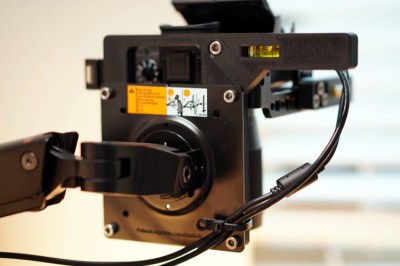
All [Jay] had to do was come up with a way to securely mount his Sony A7R3 on the end of one. While there’s certainly a few ways you could solve this particular problem, he went the extruded plastic route and 3D printed a beefy adapter plate with the standard VESA bolt pattern. His Smallrig camera cage attaches to the plate, and thanks to a pair of press-fit bubble levels from McMaster Carr, he’s able to get everything lined up properly over the bench.

Of course, there’s an excellent chance you don’t have the same camera as [Jay]. But that doesn’t mean you can’t modify the design of his adapter to fit your own gear. To that end, he’s not only shared the final STLs, but he’s provided a link to the TinkerCAD project that you can actually edit right in the browser.

If you’ve got a light enough camera, you could put something similar together with PVC pipes or even an articulated arm intended for a desk lamp. But if you’ve got a DSLR or other full-sized camera, we think it’s more than worth the $30 USD one of these will cost you on Amazon to make sure your gear doesn’t end up smashing into the deck during a live stream.

Monitor Not VESA-Compliant? It Is Now!

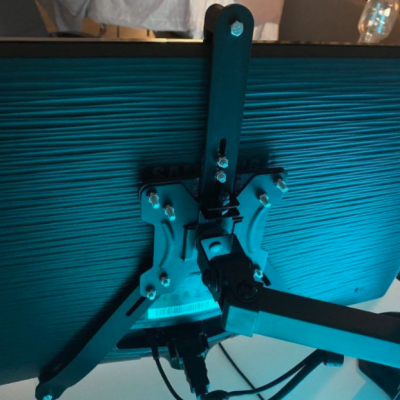
Some monitors lack the holes on the back that make them VESA-compliant, so mounting them on a monitor arm can be a non-starter. To handle this, [Patrick Hallek] designed and 3D printed these adapter arms to make flat monitors mount to VESA hardware whether they want to or not.

How does it work? When a monitor can’t attach directly to a VESA mount, this assembly attaches to the mount instead. The three arms extend around the edge of the monitor to grip it from the bottom and top. Some hex-head M5 bolts and nuts are all that are required to assemble the parts, and the top arm is adjustable to accommodate different sizes of monitor. As long as the screen size is between 17 and 27 inches diagonal, and the monitor thickness falls between 30 mm and 75 mm, it should fit.

It’s a smart design that leverages one of the strengths of 3D printing: that of creating specialized adapters or fixtures that would be troublesome to make by hand. That is not to say that there’s no other way to make exactly what one wants when it comes to mounting monitors: check out this triple-monitor setup using some common metal struts, no welding required.

[via reddit]