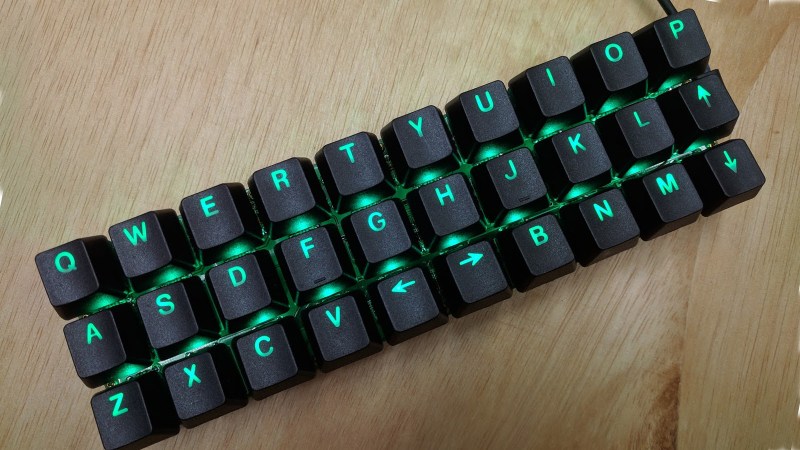
For some applications, smaller is better and that is precisely the thinking behind a diminutive keyboard like the PiPi Gherkin, which is designed to use the Raspberry Pi Pico as its controller. This keyboard may have only 30 keys in total, but they are full-sized for comfort and don’t let the scant layout mislead you. It has more functionality than it would seem to at first glance; the entire bottom row acts as dual function tap/hold keys, allowing the keyboard to shift layers on the fly.
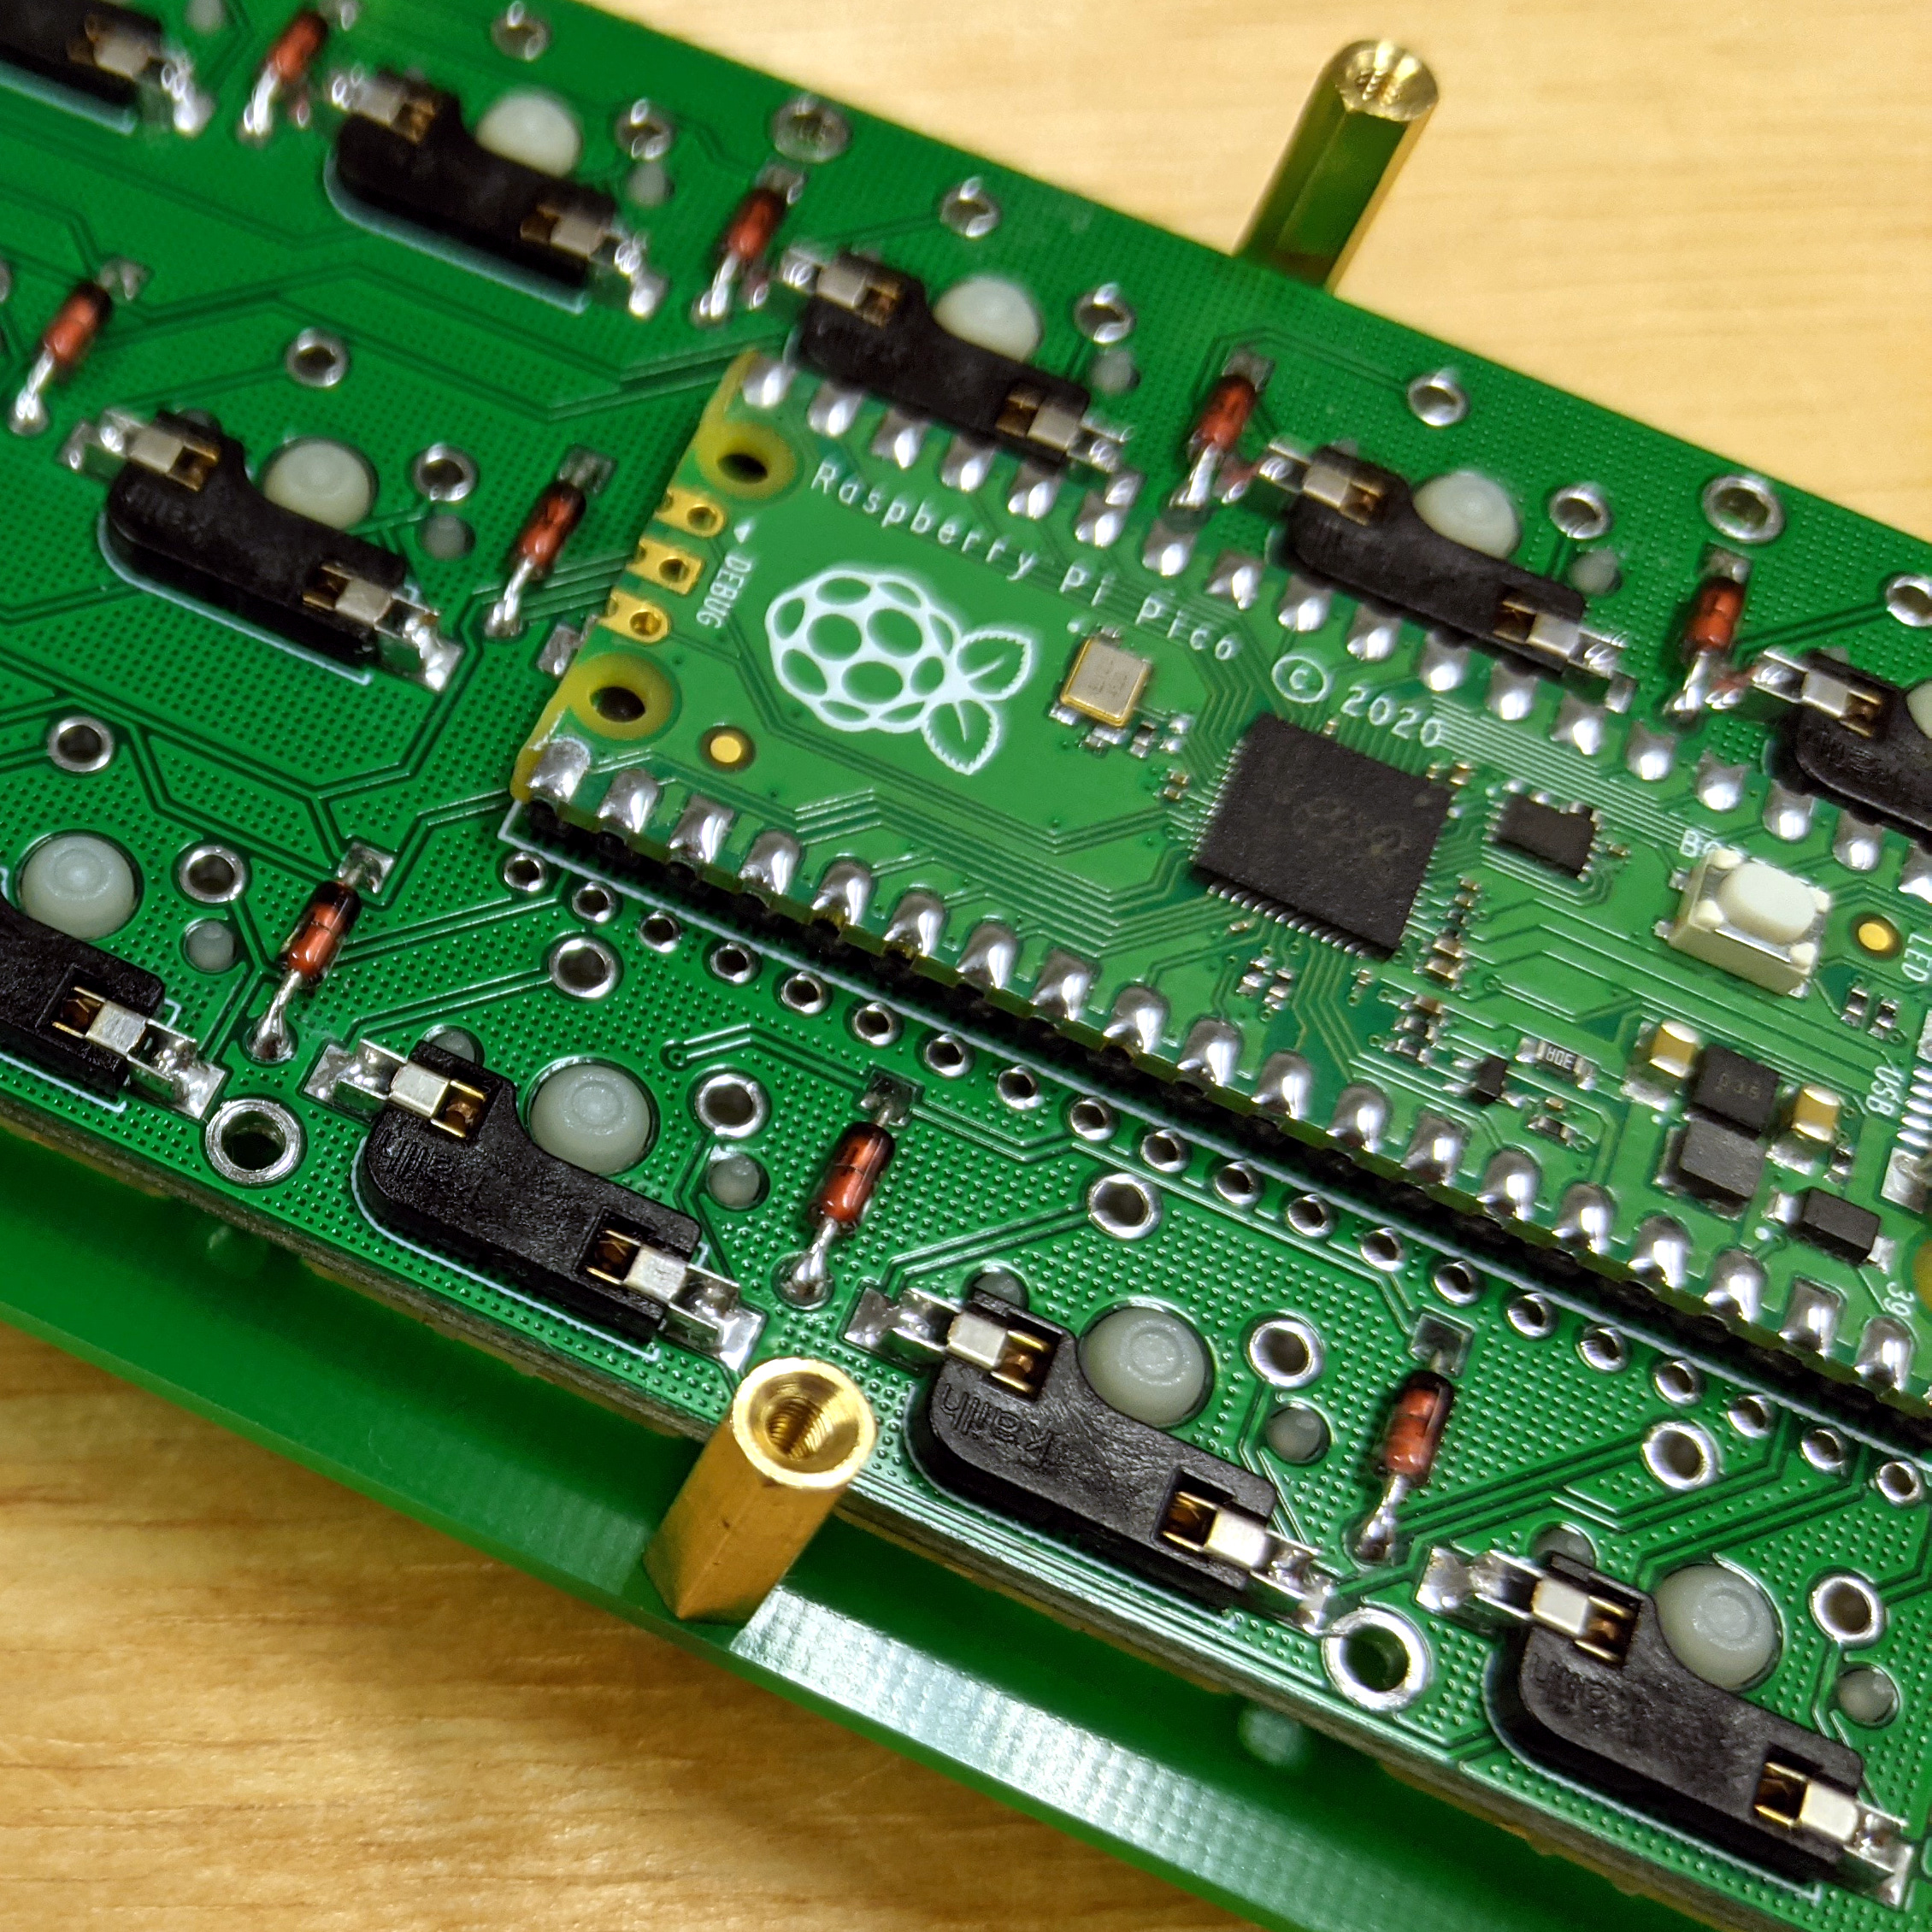
This keyboard definitely has a a thoughtful layout, and we’re not just talking about the tap/shift functionality. We especially like the way the Pi Pico is tucked neatly underneath the main PCB, taking up very little room while exposing its USB connector between two standoffs for easy access without requiring an adapter, or wiring a separate plug.
If the Gherkin sounds familiar, we’ve seen it before as part of this lunchbox cyberdeck build, where the small size allowed it to take up impressively little room. The shifting might take a little getting used to, but it’s a clean design that uses full sized keys, so when it comes to small keyboards one could certainly do worse.
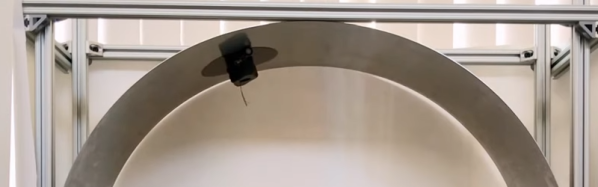
Imagine you are at the movies and you see a Roomba-like robot climbing a wall or clinging to a ceiling. How would that work? If you are like us, you might think of suction cups or something mechanical or magnetic in the wall. Then again, it is a movie, so maybe it is just a camera trick. The robots from the Bioinsipired Robotics and Design Lab at UCSD are no camera trick, though. As [Evan Ackerman] mentions in a post on IEEE Spectrum, “It’s either some obscure fluid effect or black magic.” You can watch a video about the bots, below.
It turns out, the answer is closer to a suction cup than you might think. According to the paper from the lab, a small flexible disk vibrates at 200 Hz. This generates a thin (less than 1 mm) layer of low pressure air in between the disk and the underlying surface. The robot can resist a force of up to 5 newtons from the suction from the disk.
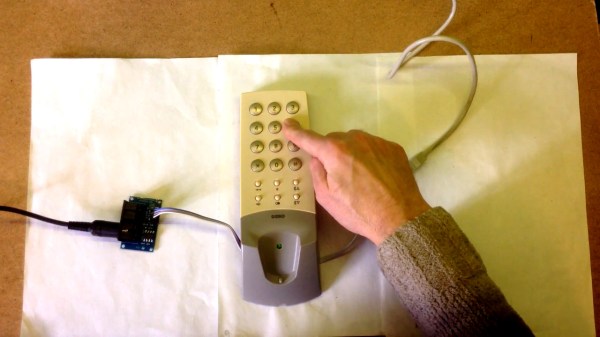
MIDI controllers come in all shapes and sizes. Commercial products based on keyboards or matrixes of buttons are popular, but there’s nothing stopping you from whipping up your own creations out of whatever strikes your fancy. [Kevin] has done just that, turning an old telephone into a working MIDI device.
The phone in question is a Doro X20 wired landline phone. Being surplus to [Kevin’s] requirements left it ripe for the hacking. A Raspberry Pi Pico was wired in to the phone’s keypad, slimmed down with a hacksaw in order to allow it to neatly fit inside the original enclosure. Then it was a simple matter of whipping up some code to read the buttons and output MIDI data via the Pico’s serial output.
It’s a fun build, and one that shows how you can easily build your own MIDI hardware using nothing but a soldering iron, some buttons, and a modern microcontroller. From there, the sky really is the limit. Whether you like big knobs, easy playing, or have your own personal tastes, you can build what you like to suit your own style. When you do, drop us a line! Video after the break.
It can be difficult for modern eyes to make much sense of electronics from the 1960s or earlier. Between the point-to-point soldering, oddball components, and the familiar looking passives blown up to comical proportions like rejected props from “Honey, I Shrunk the Kids”, even experienced hardware hackers may find themselves struggling to understand what a circuit is doing. But that didn’t stop [Cat0Charmer] from taking the time to lovingly restore this Hickok Cardmatic KS-15874-L2 tube tester.
The good news was that the machine had nearly all of its original parts, down to the Hickok branded tubes in the power supply. Unfortunately it looks like a few heavy handed repairs were attempted over the years, with a nest of new wires and components intermixed with what [Cat0Charmer] actually wanted to keep. The before and after shots of individual sections of the machine are particularly enlightening, though again, don’t feel to bad if you still can’t make heads or tails of the cleaned up version.
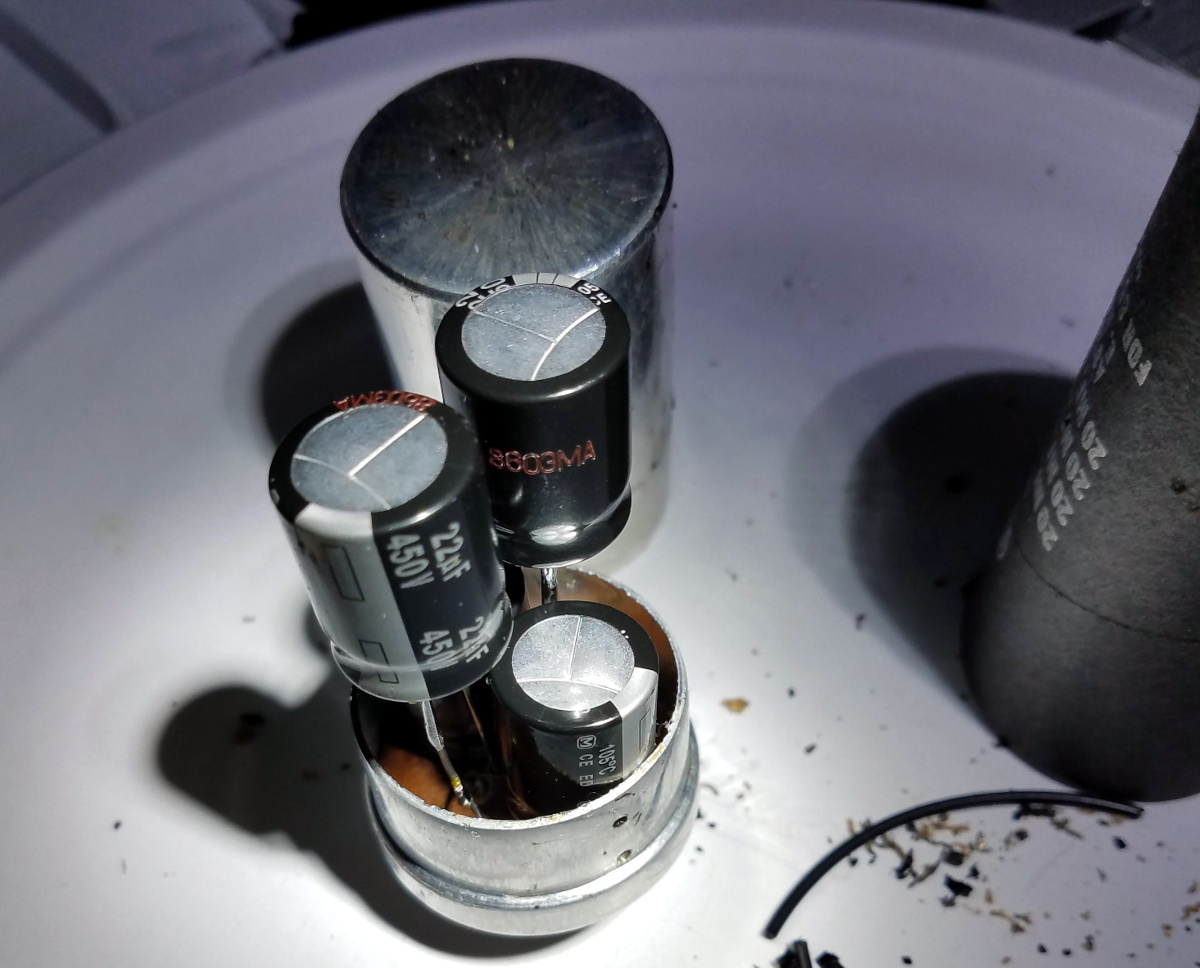
Hiding new capacitors inside of the old ones.
As you’d expect for a machine of this age, many of the original components were way out of spec. Naturally the capacitors were shot, but even the carbon composition resistors were worthless after all these years; with some measuring 60% away from their original tolerances.
We particularly liked how [Cat0Charmer] hollowed out the old capacitors and installed the new modern ones inside of them, preserving the tester’s vintage look. This trick wasn’t always feasible, but where it was applied, it definitely looks better than seeing a modern capacitor adrift in a sea of 60’s hardware.
After undoing ham-fisted repairs, replacing the dud components, and installing some new old stock tubes, the tester sprung to life with renewed vigor. The previously inoperable internal neon lamps, used by the tester’s voltage regulation system, shone brightly thanks to all the ancillary repairs and changes that went on around them. With a DIY calibration cell built from the schematics in an old Navy manual, [Cat0Charmer] got the tester dialed in and ready for the next phase of its long and storied career.
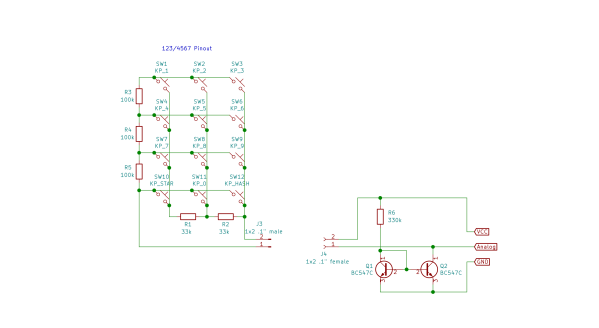
The usual method involves building a resistive ladder that gives unique and equally spaced voltages for each keypress. If you have just four or five discrete buttons, it isn’t terribly difficult, but if you have a 12- or 16-keypad matrix, things get complicated. [Lauri] looked into the past to come up with a better way, specifically a 646 page, 1 kg textbook from 1990 — Analogue Ic Design: The Current-Mode Approach by Toumazou, Lidgey, and Haigh. He learned that sometimes what’s hard to do in the voltage domain is easy in the current domain.
Normally you’d throw in some resistors to form different voltage dividers depending on which key is pressed, and read the resulting voltage off of a voltage divider with an ADC. But that means using the voltage divider equation, and the difference in voltage between keys can get very small. Dropping the voltage divider and measuring the current through a current mirror generates a linear voltage across its output load resistor that can be easily read by your microprocessor. And [Lauri] has posted an example of just such a program on his GitHub repository for an Arduino.
Heavy analog electronics, for sure, but something to keep in mind if you’re reading more than 12 keys. Do you have any examples of solving problems by looking into old and/or less-common techniques? Let us know in the comments below.
People are obsessed with the time and the weather. We’ve talked about the weather since we were all cave dwellers hunting with spears. But the time is a different matter. Sure, people always had the idea of the passage of time. The sun rising and setting gives a natural sense of days, but daylight and dark periods vary by the time of year and to get an accurate and linear representation of time turns out to be rather difficult. That is unless you are a Greek engineer living in Alexandria around 250 BC.
Legend has it that and engineer working in his father’s barbershop led him to discover not only the first working clock, but also the pipe organ, launching the field of pneumatics in the process. That engineer was named Ctesibius and while his story is mostly forgotten, it shows he has a place as a historical hacker.
You might think there were timekeeping devices before 250 BC, and that’s sort of true. However, the devices before Ctesibius had many limitations. For example, a sundial can tell time, but only if the sun is shining. At night or during a storm it is worthless.
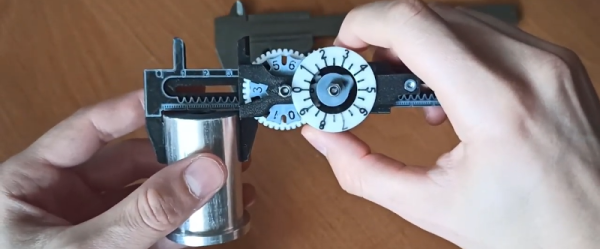
Most of us use calipers when working with our 3D printers. Not [Albert]. He has a clockwork caliper design that he 3D printed. The STL is available for a few bucks, but you can see how it works in the video below. We don’t know how well it works, but we’ll stick with our digital calipers for now.
The digital readout on this caliper is more like a sophisticated watch. A window shows 10s of millimeters and two dials show the single digits and the number after the decimal point.
 For some applications, smaller is better and that is precisely the thinking behind a diminutive keyboard like the PiPi Gherkin, which is designed to use the Raspberry Pi Pico as its controller. This keyboard may have only 30 keys in total, but they are full-sized for comfort and don’t let the scant layout mislead you. It has more functionality than it would seem to at first glance; the entire bottom row acts as dual function tap/hold keys, allowing the keyboard to shift layers on the fly.