V-Synch Detector Lets You Use 3D Shutter Glasses On Linux Systems

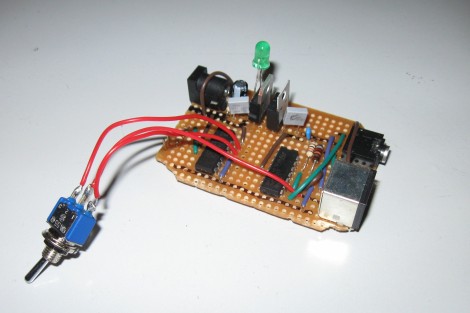
This circuit is how [John Tsiombikas] makes his cheap 3D shutter glasses work with a Linux machine. It’s not that they were incompatible with Linux. The issue is that only certain video cards have the stereo port necessary to drive the head-mounted hardware.

Shutter glasses block light from one eye at a time, so that different renderings can be shown to create the stereoscopic effect. Since stimulating the muscles in the eye doesn’t actually work, you need to find a way to drive the glasses in perfect time with the video signal. His circuit watches for the V-Sync signal, then uses it to toggle the shutter glasses. Since the hardware has no way of knowing whether the left or right frame is being generated, he included the toggle switch as a user-controlled adjustment. If the 3D isn’t coming together, you’re probably viewing the frames with the wrong eye and need to flip the switch.

There’s really no way to show the effect without trying out the hardware in person. But [John] reports that it works like a charm when used with the OpenGL stereo wrapper.

Build Your Own Line Laser For 3D Scanning

diy-line-laser

[Valentin] wanted to experiment with 3D scanning some objects he had around the house, but says he didn’t want to buy a line laser for the project since they are pretty expensive. Fortunately, he had some random components sitting in his parts bin, and he was able to build his own line laser without spending a ton of money.

His tutorial actually covers two different methods of building line lasers, both of which use parts that you likely have on hand already.

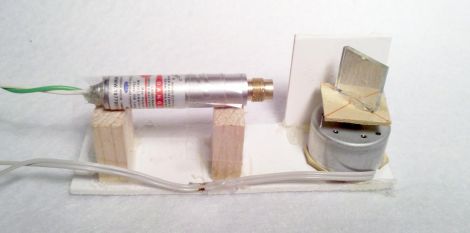
His first build involves gluing a small square mirror to a flat platform, which he then mounted on a salvaged DC motor. Once the motor starts spinning, the cheap laser pointer he has aimed at the mirror draws a perfect line across whatever medium he is scanning.

His second line laser uses parts donated from an old hard drive that he no longer used. He removed the drive’s read head from the chassis and mounted a small mirror on the actuator arm before firing up his laser. With the laser aimed at the mirror, he applied an unspecified AC current to the motor, which caused it to oscillate and draw a line similar to his first setup.

While they might not be professionally-built scanning lasers, [Valentin’s] efforts produced some decent images, as you can see on his site.

Continue reading to see a short video of his DC motor laser line in action.

Continue reading “Build Your Own Line Laser For 3D Scanning”

Microsoft Shows Off Their Transparent 3D Desktop Prototype

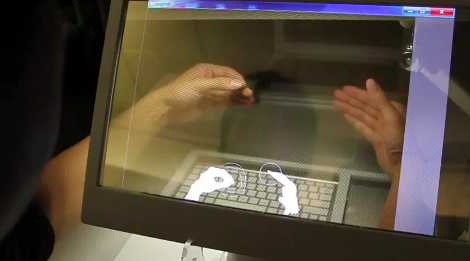
We think most would agree that the Microsoft Kinect is a miraculous piece of hardware. The affordable availability of a high-quality depth camera was the genesis of a myriad of hacks. And now it seems that type of data is making an intriguing 3D display possible.

What you see above is a 3D monitor concept that Microsoft developed. It starts off looking much like a tablet PC, but the screen can be lifted up toward the user whose arms reach around it to get at the keyboard underneath. There is as depth camera that can see the hands and fingers of the user to allow manipulation of the virtual environment. But that’s only part of the problem. You need some way to align the user’s eyes with what’s on the screen. They seem to have solved that problem too, using another depth camera to track the location of the user’s head. This means that you can lean from one side to the other and the perspective of the virtual 3D desktop will change to preserve the apparent distance of each object.

Don’t miss the show-and-tell video after the break. As long as there’s only one viewer this looks like a perfect non-glasses alternative to current 3D hardware offerings. Continue reading “Microsoft Shows Off Their Transparent 3D Desktop Prototype”

Make Any Photo 3D Using The Gimp

Put your face close to the screen and cross your eyes until the two images above become one. You may need to adjust the tilt of your chin to make it happen, but when they come together you’ll see [John Lennon] pop out in 3D. This was made using a 3D rendering script for The Gimp.

The process is not entirely automatic, but it won’t take too long to mask off the outlines for different depth layers. The script makes three different layers from the image. One of them is a color-coded depth map that uses a custom color palatte to choose distance for each item. If you paint the background dark blue it will be processed at the furthest distance from the viewer’s cross-eyed perspective, yellow is the nearest.

[Don] mentions a parallel output and a cross-eyed output in his write up. We understand the cross-eyed version, but are just guessing that the parallel version would be used in a stereoscopic viewer that puts a partition between the two images so that each eye sees a different frame. You know, like a View-Master.

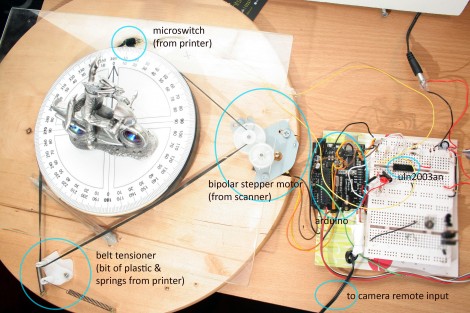
diy-laser-scanner

Cheap DIY Laser Scanner Is Quite Impressive

With the introduction of the Kinect, obtaining a 3D representation of a room or object became a much easier task than it had been in the past. If you lack the necessary cash for one however, you have to get creative. Both the techniques and technologies behind 3D scanning are somewhat complicated, though certainly still within reach as maker [Shikai Chen] shows us. (Google Translation)

He wanted to create 3D scanned images, but he didn’t have the resources to purchase a Kinect. Instead, he built his own scanner for about 1/6th the cost. Interestingly enough, the scanner resembles what you might imagine a very early Kinect prototype looked like, though it functions just a little bit differently than Microsoft’s creation. The scanner lacks any sort of IR emitter/camera combo, opting to use a laser and a USB VGA camera instead. While scanning, the laser shines across the target surface, and the reflected light is then picked up by the camera.

So how does this $25 DIY laser scanner measure up? Great, to be honest. Check out the video below to see how well his scanner works, and be sure to take a look through his second writeup (Google Translation) as well for more details on the project.

[via Seeedstudio]

[youtube=http://www.youtube.com/watch?v=jLZ-s9KRzG8&feature=player_embedded&w=470]

EagleUp Pulls Your PCBs Into SketchUp

[Karl] wrote in to tell us about a software package called EagleUp that will import your Eagle CAD PCB designs into Google SketchUp. It bridges the gap between the two using the open source image processing software ImageMagick.

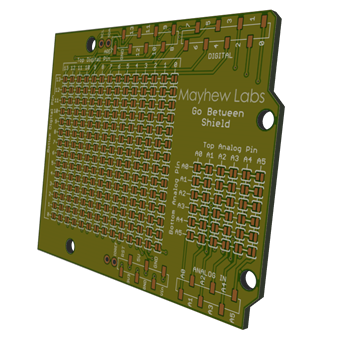
As you can see above, you’ll end up with a beautifully rendered 3D model of your hardware. This is a wonderful way to make sure that your enclosure designs are going to work without needing to wait for the PCBs to arrive from the fab house. It is available for Windows, OSX and Linux (although the last time we tried to run Sketchup under Wine nothing good came of it — perhaps it’s time to try again).

In [Karl’s] case, he’s working on an Arduino compatible board based around the Xmega. He mentions that EagleUp is a great way to get an idea of how component placement will end up, and to see if the silk screen layer is going to turn out well or not. Here’s a link to one of his test designs.