V-Synch Detector Lets You Use 3D Shutter Glasses On Linux Systems

This circuit is how [John Tsiombikas] makes his cheap 3D shutter glasses work with a Linux machine. It’s not that they were incompatible with Linux. The issue is that only certain video cards have the stereo port necessary to drive the head-mounted hardware.

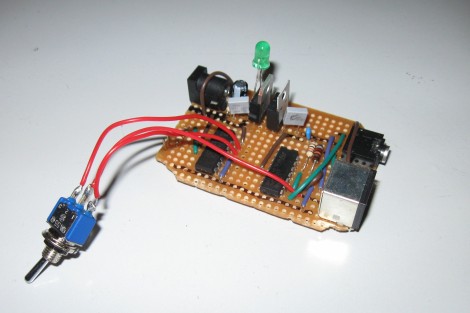
Shutter glasses block light from one eye at a time, so that different renderings can be shown to create the stereoscopic effect. Since stimulating the muscles in the eye doesn’t actually work, you need to find a way to drive the glasses in perfect time with the video signal. His circuit watches for the V-Sync signal, then uses it to toggle the shutter glasses. Since the hardware has no way of knowing whether the left or right frame is being generated, he included the toggle switch as a user-controlled adjustment. If the 3D isn’t coming together, you’re probably viewing the frames with the wrong eye and need to flip the switch.

There’s really no way to show the effect without trying out the hardware in person. But [John] reports that it works like a charm when used with the OpenGL stereo wrapper.

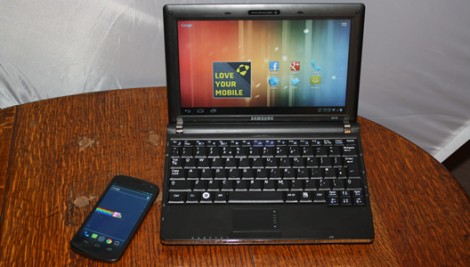
Android On Your Netbook

Looks like there’s a pretty easy way to install Ice Cream Sandwich, the newest version of Android, on your Netbook. Actually this is limited to a few types of hardware including netbooks like the eeePC. That’s because the ISO files used during installation have been tailored to the hardware used on those devices. As with other Linux distros, the ISO file can be loaded on a thumb drive using Unetbootin. From there you can give it a whirl as a Live CD (or USB as it were) or choose to install it on your hard drive. We haven’t given it a spin as the eeePC version doesn’t want to boot on our Dell Mini 9, but we don’t see a reason why this couldn’t be set up as a dual boot option.

Now why would you want to run Android on your netbook? We’ve already seen that there’s a way to run Android apps in Ubuntu. We bet some people just love Android, and others just hate the Unity desktop that Ubuntu now uses… especially when the Netbook Remix had a lot of good things going for it.

Coin Cell Battery Charger

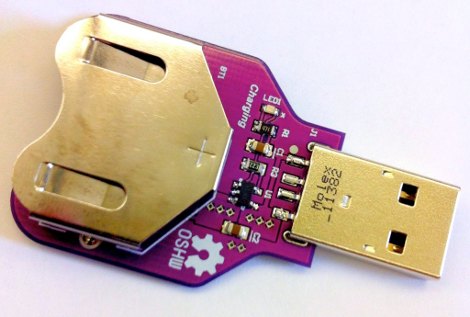
[Jay Kickliter] built his own coin cell battery recharger. This won’t work on the vast majority of coin cells as they are manufactured as disposable parts. But there are rechargeable options out there with model numbers that start with LR instead of CR. In this case he tailored the charging circuit around MCP73832 IC and chose components best suited for charging his 110 mAh LR2450. But we believe all of the LR options out there are rated for 3.6V so altering his design for use with different models should be a breeze.

We’ve been unhappy with the use of disposable coin cell batteries for some time. Sure, in a real-time clock where the cell might last 6-8 years this is not very wasteful. But in an Apple TV remote that gets a lot of use, we hate the choice of a disposable battery. All of our less-hip remotes which use AA or AAA have NiMH rechargeables in them and have used the same pair for year and years. So we’re happy to see this charger project come along.

Now the bad news. We looked around and indeed you can find LR2032; a rechargeable replacement for the CR2032. But the capacity rating falls way flat. The model we looked at boasts only 50 mAh while the disposable CR2032 offers something along the lines of 240 mAh. Hopefully this will change as battery tech evolves.

ATtiny44 Drop-in Replacement For Ikea Dioder’s Stock PIC Controller

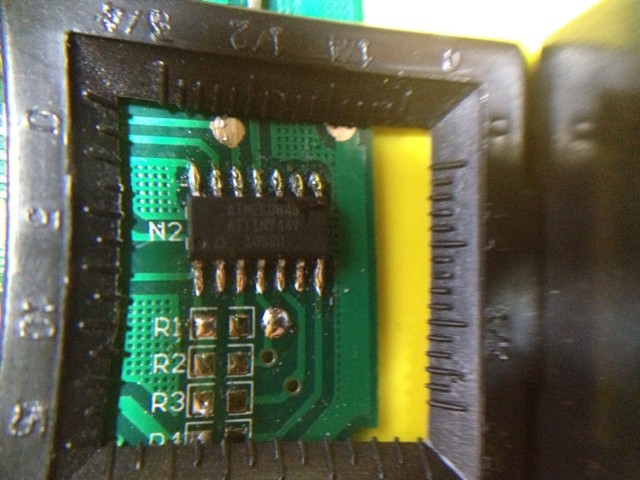
The Ikea Dioder is an LED light sold at the big blue and yellow building that lets you mix your own colors using a simple button and wheel controller. [Marco Di Feo] looked at all of the other projects out there that alter the controller and figured out that the IC can be directly replaced with an ATtiny44 microcontroller. With that chip soldered onto the board he added IR control so that he can change colors using his universal remote control (translated).

[Marco] removed the potentiometer normally responsible for selecting the color. This frees up one pin on the microcontroller which he then uses to receive signals from a TSOP1736 IR receiver. The video after the break shows the device, which illuminates the back of his home entertainment center, reacting to commands from his remote control.

Of course this can be done without the chip swap as the PIC 16F684 that comes with it can be reprogrammed in place. But [Marco] didn’t have a PICkit or other programmer on hand. Continue reading “ATtiny44 Drop-in Replacement For Ikea Dioder’s Stock PIC Controller”

Building A Better Circuit For Renewable Energy Harvesting

[David], [Ian], and [Sajjad] finished and submitted their entry to the ChipKIT challenge just under the wire. They designed and built a maximum power tracking circuit for use with renewable sources. That is to say, this is a voltage regulator for use with solar cells and other generative sources like wind or water power. The idea is to use the best concepts of switch-mode power supply design, but replace the more wasteful parts with circuits that can harness and roll the loss back into the output.

We have to admit, following their development choices from the write-up at the top is a bit rocky. But luckily they filmed an in-depth description of the design choices, as well as a demonstration of the circuit along with various test measurements. If you’ve got twenty minutes and some patience all will become clear in the video after the break.

This will go along great with that bucket-based hydro generator you built.

Continue reading “Building A Better Circuit For Renewable Energy Harvesting”

Ask Hackaday: Building Nano Scale Antennas

As an RF engineering student, [Camerin] is usually tasked with pointless yet educational endeavors by his advisor and professors. Most of the time (we hope) he sees the task through and ends up pulling something out of his hat, but a few days ago a professor dropped a bombshell on him. After reading this article on nano scale antenna fabrication, a professor asked [Camerin] if it was possible to build a 3D inkjet printer with a ludicrous amount of accuracy and precision.

The full article, Conformal Printing of Electrically Small Antennas on Three-Dimensional Surfaces, was recently published in Advanced Materials and is available via Google Scholar. The jist of the article is that three-dimensional antennas printed on a sphere approach the physical limits of how good an antenna can be. To test out these small, spherical antennas, the authors of the paper built an extremely high-precision 3D inkjet printer that draws antenna traces on a glass sphere with conductive ink.

The positional accuracy of this printer is 50 nanometers, or about half the size of an HIV virus. The conductive silver ink is delivered by a nozzle with a diameter of 100 to 30 µm and prints onto a glass sphere about 6 mm in diameter. This is a level of precision that companies and research institutions pay top dollar for, so we’re left wondering how the authors built this thing.

We’re turning this question over to the astute readers of Hackaday: how exactly would you build a 3D inkjet printer with this much accuracy and precision? Would it even need to be that precise? Post your answer in the comments.

Building The Worst Linux PC Ever

Linux is generally considered the go-to OS for under powered computers. Wanting to challenge the preconceived notion that Linux requires ‘a computer made in the last 20 years,’ [Dmitry] built the worst Linux PC ever around a simple 8-bit microcontroller.

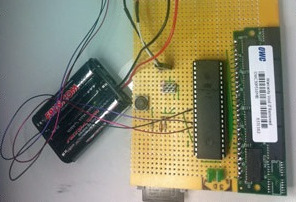
The ATMega1284p [Dmitry] used doesn’t have a lot to offer as far as RAM and storage goes; just 16 kilobytes of SRAM and a paltry 128 kilobytes of Flash storage. While this may be voluminous in the embedded world, it’s peanuts compared to the gigabytes of RAM and hard drive space on even a low-end netbook. To solve this problem, [Dmitry] threw an antique 30-pin RAM SIMM at the problem. It’s wired up directly to the microcontroller, as is the 1 Gigabyte SD card that serves as the PC’s hard drive.

Linux requires a 32-bit CPU and a memory management unit, something the puny microcontroller doesn’t have. For [Dmitry], the best course of action was emulating an ARM processor on an AVR. We’re not sure if we’re dealing with genius or madness here, but it did prove to be a valuable learning exercise in writing a modular ARM emulator.

How fast is it? [Dmitry] tells us it takes two hours to boot up to a bash prompt, and four more to load up Ubuntu and login. If you want a Megahertz rating, good luck; the effective clock speed is about 6.5 kilohertz. While the worst Linux PC ever won’t win any races, its simple construction puts it within the reach of even the klutziest of hardware builders; the entire device is just a microcontroller, RAM, SD card, a few resistors, and some wire.

If you’d like to build your own worst Linux PC, [Dmitry] has the firmware and disk image available to download. If you want to watch the time-lapse of this thing booting, check out the video after the break.

Continue reading “Building The Worst Linux PC Ever”