Reverse Engineer PCBs With SprintLayout

[Bwack] had some scanned pictures of an old Commodore card and wanted to recreate PC boards from it. It’s true that he could have just manually redrawn everything in a CAD package, but that’s tedious. Instead, he used SprintLayout 6.0 which allows you to import pictures and use them as a guide for recreating a PCB layout.

You can see the entire process including straightening the original scans. There are tools that make it very easy to place new structures over the original scanned images.

Continue reading “Reverse Engineer PCBs With SprintLayout”

From Audio, To 3D Printed Sculpture, And Back Again

Have you ever wondered what a song looks like? What it feels like in your hands?

Those odd questions have an answer that has taken shape over at [Reify], which has developed a way to turn sound waves into 3D-printed sculptures. These visualizations made manifest can be made from any audio — speeches, the ambience of a forest, classical music, a rocket launch — and rendered in coconut husk, plastic, bronze and more.

Continue reading “From Audio, To 3D Printed Sculpture, And Back Again”

One-button Scan To Email Using Raspberry Pi

one-button-scan-to-email-raspberry-pi

We’ve come across extremely expensive photocopiers that also fax, scan to email, and generally have too many features to list. [Eduardo Luis] figured out how to implement some of this type office magic using very inexpensive components. Specifically, he can press one button to scan a document and send it to an email address.

The user controls patch into the RPi GPIO header. There’s the button we already mentioned, a red LED for “System Busy”, and a green one for “System Status”. A set of scripts montor the button and drive the LEDs. When it’s time to scan, the RPi uses the scanimage package to capture a .PNM file, then converts it to .JPG before sending it via email using the mutt package.

We’d love to see a character LCD and a few more buttons added to the setup. This way you could select between different recipients (or even send via fax). And there’s always the possibility of connecting a printer to the other USB port on the RPi to make it work as a photocopier too.

You can catch a demo video after the jump.

Continue reading “One-button Scan To Email Using Raspberry Pi”

Build Your Own Line Laser For 3D Scanning

diy-line-laser

[Valentin] wanted to experiment with 3D scanning some objects he had around the house, but says he didn’t want to buy a line laser for the project since they are pretty expensive. Fortunately, he had some random components sitting in his parts bin, and he was able to build his own line laser without spending a ton of money.

His tutorial actually covers two different methods of building line lasers, both of which use parts that you likely have on hand already.

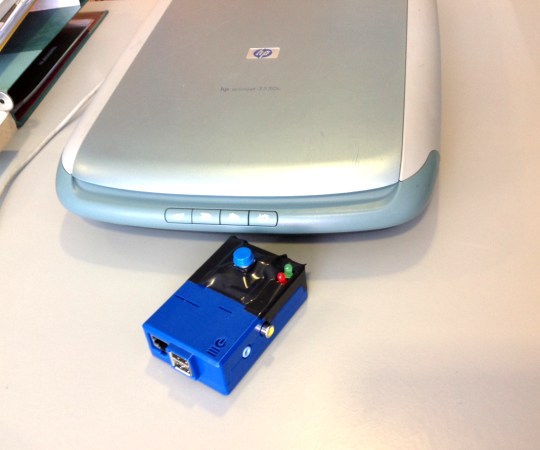
His first build involves gluing a small square mirror to a flat platform, which he then mounted on a salvaged DC motor. Once the motor starts spinning, the cheap laser pointer he has aimed at the mirror draws a perfect line across whatever medium he is scanning.

His second line laser uses parts donated from an old hard drive that he no longer used. He removed the drive’s read head from the chassis and mounted a small mirror on the actuator arm before firing up his laser. With the laser aimed at the mirror, he applied an unspecified AC current to the motor, which caused it to oscillate and draw a line similar to his first setup.

While they might not be professionally-built scanning lasers, [Valentin’s] efforts produced some decent images, as you can see on his site.

Continue reading to see a short video of his DC motor laser line in action.

Continue reading “Build Your Own Line Laser For 3D Scanning”

Make Your Own TSA “Naked” Scanner

Have you ever wanted to ability to see through objects? Perhaps you have been looking for something special for your own personal TSA role playing adventures? Well, [Jeri Ellsworth] has your back. She has managed to cobble together her own millimeter centimeter wave scanner using a hacked set of Feed Horns (like from a satellite dish) to create the image. By reversing the power transistor on one of the Feed Horns, one of the horns is made into a transmitter, while one of the other horns stays as a receiver. This data is then fed into a FPGA by way of an A2D converter, where an image is assembled when the scanner is moved over a surface. X and Y axis tracking is handled by an optical mouse also controlled by the FPGA, and the whole setup is output to a monitor.

Right now there is no text write up, or any specific details as the hack will vary by whatever Feed Horn is available. However, the video does a great job of explaining some of the electrical concepts, as well as some very useful schematics. Be sure to watch the whole video after the break, and don’t blame us for any health complications, whether the radiation is ionizing or not.

Continue reading “Make Your Own TSA “Naked” Scanner”

Preserving Old Stuff With The Library Of Congress

Take a few moments and browse this gallery from the Library of Congress. Tasked with the job of preserving the roughly 150 million historical items, they are constantly developing new methods using bleeding edge technology. There is an odd balance of some of the oldest documents in tandem with some of the newest technology evident in these pictures. From doing spectral scans of ancient books to laser mapping warped phonographs, everything must be preserved and documented.

Flip-book Style Digitization

[youtube=http://www.youtube.com/watch?v=tCOXC5PTJj8]

This method of book digitization allows you to scan an entire book by fanning through the pages. It uses a high-speed camera that captures 500 frames per second to get a good look at each page. Processing software isolates each pages, analyzes any curve in the paper due to the flipping, and smooths out the image for better optical character recognition results. The greatly reduces the time it takes to digitize a book, even compared to setups that automatically flip pages.

[Thanks Erico]