Watch Bondo Putty Get Sprayed Onto 3D Prints

3D prints destined for presentation need smooth surfaces, and that usually means sanding. [Uncle Jessy] came across an idea he decided to try out for himself: spraying Bondo spot putty onto a 3D print. Bondo spot putty comes from a tube, cures quickly, and sands smoothly. It’s commonly used to hide defects and give 3D prints a great finish. Could spraying liquified Bondo putty onto a 3D print save time, or act as a cheat code for hiding layer lines? [Uncle Jessy] decided to find out.
Gaps and larger flaws still need to be filled by hand, but spray application seems to be a big time saver if nothing else.

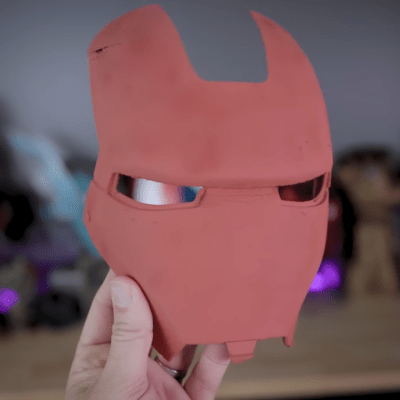
The first step is to turn the distinctive red putty into something that can be sprayed through a cheap, ten dollar airbrush. That part was as easy as squeezing putty into a cup and mixing in acetone in that-looks-about-right proportions. A little test spray showed everything working as expected, so [Uncle Jessy] used an iron man mask (smooth surfaces on the outside, textured inside) for a trial run.

Spraying the liquified Bondo putty looks about as easy as spraying paint. The distinctive red makes it easy to see coverage, and it cures very rapidly. It’s super easy to quickly give an object an even coating — even in textured and uneven spots — which is an advantage all on its own. To get a truly smooth surface one still needs to do some sanding, but the application itself looks super easy.

Is it worth doing? [Uncle Jessy] says it depends. First of all, aerosolizing Bondo requires attention to be paid to safety. There’s also a fair bit of setup involved (and a bit of mess) so it might not be worth the hassle for small pieces, but for larger objects it seems like a huge time saver. It certainly seems to cover layer lines nicely, but one is still left with a Bondo-coated object in the end that might require additional sanding, so it’s not necessarily a cheat code for a finished product.

If you think the procedure might be useful, check out the video (embedded below) for a walkthrough. Just remember to do it in a well-ventilated area and wear appropriate PPE.

An alternative to applying Bondo is brush application of UV resin, but we’ve also seen interesting results from non-planar ironing.

Continue reading “Watch Bondo Putty Get Sprayed Onto 3D Prints”

Building A Half Toy Half Model Tank Robot

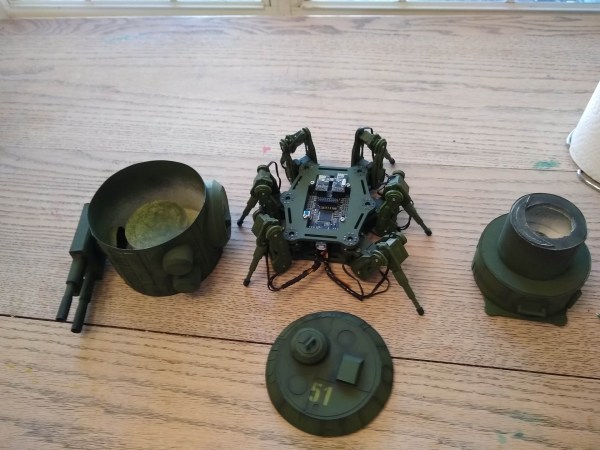
For some, the idea of several hours of painting and designing intricate models with minute details and features sounds like a delightful afternoon spent. Some of us would much rather just have it come already painted with motors so that it can move. [Cory Collins] sought to combine these two hobbies by building a highly detailed motorized tank dubbed Tankbot 2.3. (Video, embedded below.)

It’s based on a simple hexapod kit ordered online that includes a built-in Arduino compatible board (it’s based on the Arduino 2560 Mega). The legs were redesigned to match the aesthetic that [Cory] was going for. The redesign allows for an extra pivot in the leg mechanism. The turret section was designed and built on top of the base with support for a servo to turn it (though the firmware isn’t quite there yet). After all the parts were 3d printed, the laborious process of painting began. With some delicate airbrushing and some quick stencils cut for the decals, it was complete.

We are amazed by the types of kits and parts that you can find online and the fact that they’re usually inexpensive to boot. We’ve come a long way since 2013 when we covered a much simpler Arduino based tank.

Continue reading “Building A Half Toy Half Model Tank Robot”

High Detail 3D Printing With An Airbrush Nozzle

On a fused deposition modeling (FDM) 3D printer, the nozzle size dictates how small a detail you can print. Put simply, you can’t print features smaller than your nozzle for the same reason you’d have trouble signing a check with a paint roller. If the detail is smaller than the diameter of your tool, you’re just going to obliterate it. Those who’ve been around the block a few times with their desktop 3D printer may have seen this come up in practice when their slicer refused to print lines which were thinner than the installed nozzle (0.4mm on the vast majority of printers).

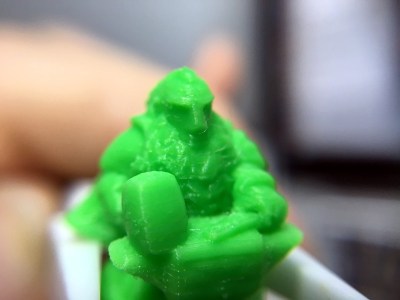
Smaller nozzles exist for those looking to improve their printer’s detail on small objects, but [René Jurack] wasn’t happy with just putting a finer nozzle on a stock E3D-style hotend. In his opinion it’s still a hotend and arrangement intended for 0.4mm printing, and doesn’t quite fully realize the potential of a smaller diameter nozzle. After some experimentation, he thinks he’s found the solution by using airbrush nozzles.

As [René] sees it, the hotend is too close to the subject being printed when using nozzles finer than 0.4mm. Since you’re working on tiny objects, the radiant heat from the body of the hotend being only a few millimeters away is enough to deform what you’re working on. But using the long and tapered airbrush nozzle, the hotend is kept at a greater distance from the print. In addition, it gives more room for the part cooling fan to hit the print with cool air, which is another critical aspect of high-detail FDM printing.

Of course, you can’t just stick an airbrush nozzle on your E3D and call it a day. As you might expect, they are tiny. So [René] designed an adapter that will let you take widely available airbrush nozzles and thread them into an M6 threaded hotend. He’s now selling the adapters, and judging by the pictures he posted, we have to say he might be onto something.

If you’re more about brute strength than finesse, you might be interested in outfitting your E3D with a ruby nozzle instead.

Continue reading “High Detail 3D Printing With An Airbrush Nozzle”