Commodore SX-64 Keyboard Upgraded From Trash To Treasure

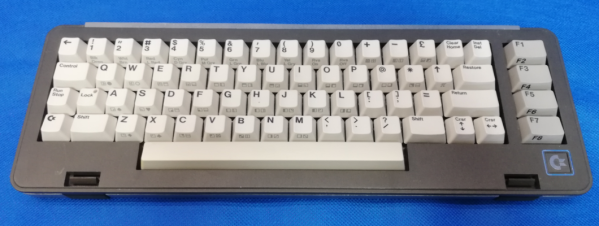
Released in 1984, the Commodore SX-64 Executive Computer was one of the first portable luggable color computers. It cost twice as much as a Commodore 64, had a tiny 5″ diagonal screen, and couldn’t actually support both 5¼” drives as advertised. On the upside, people say it had a slightly better keyboard than its classic cousin.

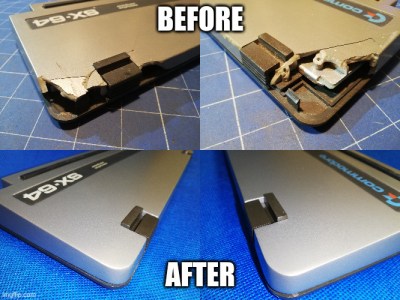
[Drygol] agreed to restore the keyboard from a friend’s Commodore SX-64 sight-unseen, and boy was this thing in bad shape. Most people would probably consider the condition a shame and write it off as a lost cause, since two of the corners were missing most of their plastic. But [Drygol] isn’t most people. [Drygol] had mad restoration skills to begin with, and this project honed them to a razor’s edge.

Plenty of the other vintage computer restorations [Drygol] has done required plastic welding, which uses heat or a lot of friction to smooth over cracks. Some of those have not stood the test of time, so he’s now in the habit of stabilizing cracks with brass mesh before filling them with fiberglass putty.

The best part is how [Drygol] managed to rebuild the corners using the same methods, soldering the brass mesh at the 90° joins, and reinforcing them with thick copper wire before beginning the painstaking putty/sand/putty process. The use of blank copper clad boards as straight edges and thickness gauges is genius.

There’s a whole lot to learn here, and the adventure beings with something that probably keeps a lot of people from trying stuff like this in the first place: how do you safely remove the badges?

You’re right, plastic welding is awesome. There even used to be a toy plastic welder. But there’s no need to troll the electronic auction bay to give it a try — just use a cheap soldering iron.

Watch The Day Inch Along With A Tape Measure Clock

If we asked you to rattle off all the tools at your own personal disposal, you’d probably leave your timepieces off the list. But we say clocks are definitely tools — cool tools that come in countless forms and give meaning to endless days.

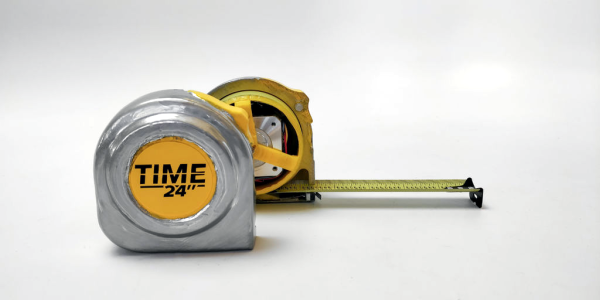
A clock form we hadn’t considered was that of an actual tool. So we were immeasurably delighted to see [scealux]’s clock made from a measuring tape. At least, the time-telling part of the clock is made from a measuring tape. The case isn’t really from a tape measure — it’s entirely printed, Bondo’d, sanded, and painted so well that it’s quite easy to mistake it for the real thing.

Tightly packed inside this piece of functional art is an Arduino Nano and a DS3231 precision RTC module, which we think is fitting for a tool-based clock. The Nano fetches the time and drives a stepper motor that just barely fits inside. There’s just enough tape wound around the printed hub to measure out the time in increments of one hour per inch. Take 1/16″ or so and watch the demo and brief walk-through video after the break.

Not all tools are sharp, and not all clocks are meant to be precise. Here’s a clock for the times that gives you the gist.

Continue reading “Watch The Day Inch Along With A Tape Measure Clock”

How To Put The ‘Pro’ In Prototype

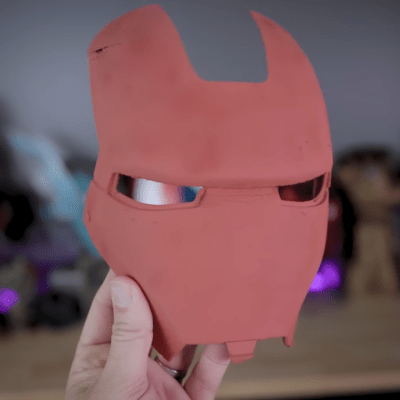
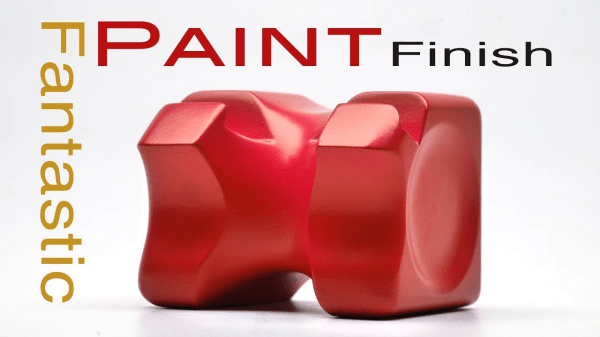
It’s easy to get professional-quality finishes on your prints and prototypes if you take the right steps. In the final installment of his series about building with Bondo, product designer [Eric Strebel] shows us how it’s done no matter what the substrate.

How does he get such a smooth surface? A few key steps make all the difference. First, he always uses a sanding block of some kind, even if he’s just wrapping sandpaper around a tongue depressor. For instance, his phone holder has a round indent on each side. We love that [Eric] made a custom sanding block by making a negative of the indent with—you guessed it—more Bondo and a piece of PVC. The other key is spraying light coats of both primer and paint in focused, sweeping motions to allow the layers to build up.

If you need to get the kind of surface that rivals a baby’s behind, don’t expect to prime once, paint once, and be done with it. You must seek and destroy all imperfections. [Eric] likes to smooth them over with spot putty and then wet sand the piece back to smooth before applying more primer. Then it’s just rinse and repeat with higher grits until satisfied.

There’s more than one way to smooth a print, of course. Just a few weeks ago, our own [Donald Papp] went in-depth on the use of UV resin.

Continue reading “How To Put The ‘Pro’ In Prototype”

You Can Build Anything Out Of What Is Holding Your 97 Eagle Talon Together

We all know it, we all love it, and the guy parked outside of the 7-11 covered his car in it. What is it? Polyester body filler, better known by the almost generic trademark, Bondo. There’s a lot more you can do with Bondo than fairing in that sweet body kit, bro, and [Eric Strebel] is here to show you how far you can push the mechanical properties of polyester body filler.

We didn’t always have polyester body filler. In the days before OSHA, auto body workers would use a torch, bricks of lead, and a grinder. You can check out a video of the era before OSHA here. Needless to say, vaporizing and grinding lead in your shop isn’t the greatest idea, and there had to be a better way. This led Robert ‘Bondo Bob’ Spink to invent a much less toxic auto body filler that we now know as Bondo.

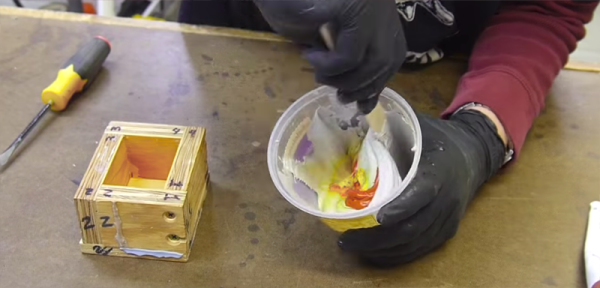
For the beginning of the demonstration, [Eric] mixes up a cup of polyester body filler with a few special additions: he’s using printer ink to get his mixture to something other than that one shade of pink we all know. Although Bondo is a bit too thick to cast, he did manage to put a little bit of it in a square mold, a PVC pipe, and applied a little to foam and wood. It’s enough for a demonstration, but for the actual ins and outs of machining Bondo we’re going to have to wait until [Eric]’s next video. Until then, you can check out this introduction below, or look at his previous work on free-form sculpting of uncured Bondo.

Continue reading “You Can Build Anything Out Of What Is Holding Your 97 Eagle Talon Together”

Reverse Engineering Bottle Threads For Fun And Profit

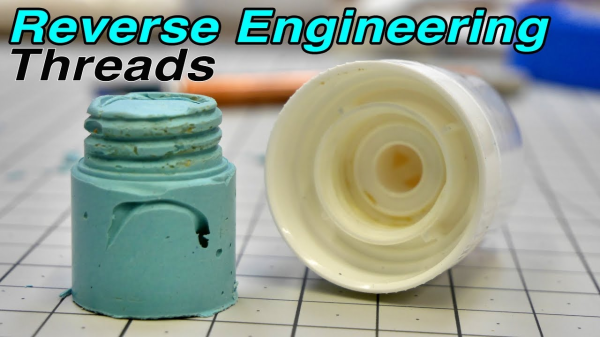
Recently, one of [Eric]’s clients asked him to design a bottle. Simple enough for a product designer, except that the client needed it to thread into a specific type of cap. And no, they don’t know the specs.

But that’s no problem, thought [Eric] as he turned on the exhaust fan and reached for the secret ingredient that would make casting the negative image of the threads a breeze. He mixed up the foul-smelling body filler with the requisite hardener and some lovely cyan toner powder and packed it into the cap with a tongue depressor. Then he capped off the cast by adding a small PVC collar to lengthen the cast so he has something to grab on to when it’s time to take it out.

Bondo does seem like a good choice for casting threads. You need something workable enough to twist out of there without breaking, but rigid enough that the small detail of the threads isn’t lost. For the release agent, [Eric] used Johnson’s Paste Wax. He notes from experience that it works particularly well with Bondo, and even seems to help it cure.

Once the Bondo hardened, [Eric] made sure it screwed in and out of the cap and then moved on to CAD modeling and 3D printing bottle prototypes until he was satisfied. We’ve got the video screwed in after the break to cap things off.

Did you know that you can also use toner powder to tint your epoxy resin? Just remember that it is particulate matter, and take precautions.

Continue reading “Reverse Engineering Bottle Threads For Fun And Profit”

Gramazon Gives Your Echo Dot A 1920’s Makeover

Unless you’re particularly fond of hockey pucks, you probably aren’t really keen on the aesthetics of the NSA’s Amazon’s diminutive listening device, the Echo Dot. It’s not exactly ugly, but if anyone at Amazon spent more than ten minutes considering the visual design of the thing when it was being developed, we’d be shocked.

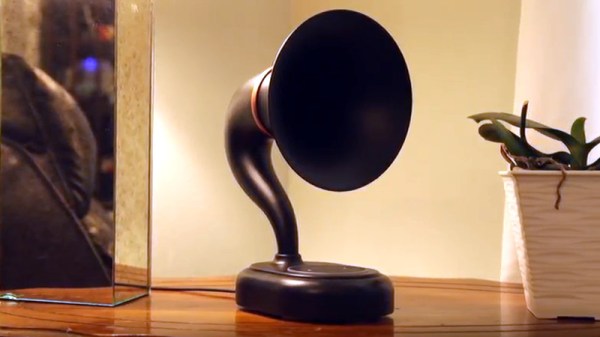
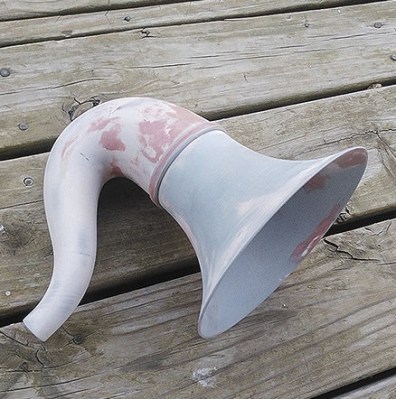
Luckily for us, there are hackers and makers who not only have the artistic chops to come up with visually appealing designs, but are kind enough to share them with those of us who are a few crayons short of a full box in that department. Such is the case with the jaw-dropping Gramazon by [Bård Fleistad], a 3D printed acoustic amplifier for the Echo Dot that converts the ho-hum looking device into a classic 1920’s style “horn” speaker.

[Bård] has wanted a horn speaker for awhile, but the prices on a real one in decent condition are getting pretty high. If he couldn’t have the real deal he figured the next best thing would be to 3D print his own version, but he’d still need electronics to put into it. Since the Echo is readily available and works as a Bluetooth speaker (not to mention plays audio from various online sources), it made sense to use it as the heart of his faux-horn.

The design he came up with is very slick, but the finish work on the printed parts is really what puts this project over the edge. [Bård] used Bondo and multiple primer coats to smooth the outside of the horn, and XTC-3D for the hard-to-reach internal curves. Plus sanding. Lots, and lots, of sanding.

If you’re looking for more information on putting high quality finishes on your 3D printed parts like this, check out our Visual 3D Print Finishing Guide. Or if you’d rather just find a swanky home for your always-listening hockey puck, we’ve got plenty of inspiration for you there as well.

Continue reading “Gramazon Gives Your Echo Dot A 1920’s Makeover”

Skull Cane Proves Bondo Isn’t Just For Dents

[Eric Strebel] is quickly becoming a favorite here at Hackaday. He’s got a fantastic knack for turning everyday objects into something awesome, and he’s kind of enough to document his builds for the viewing pleasure of hackers and makers everywhere. It also doesn’t hurt that his voice and narration style gives us a real Bob Ross vibe.

The latest “Happy Accident” out of his workshop is a neat light-up cane made from a ceramic skull found at a local store. But while the finished cane itself might not be terribly exciting, the construction methods demonstrated by [Eric] are well worth the price of admission. Rather than using Bondo like the filler we’re all accustomed to, he shows how it can be used to rapidly build free-form structures and components.

After building up layers of Bondo, he uses a cheese grater to smooth out the rough surface and a hobby knife to clean up the edges. According to [Eric], one of the benefits of working with Bondo like this is that it’s very easy to shape and manipulate before it fully hardens; allowing you to really make things up as you go.

[Eric] also shares a little secret about how he makes his gray Bondo: he mixes some of the toner from a laser printer cartridge into it. This allows you to very cheaply augment the color of the filler, and is definitely something to file away for future reference.

If the video below leaves you hungry for more [Eric Strebel], check out his fantastic series on working with foam core, which should lead you right down the rabbit hole to his DIY foam core spray painting booth.

Continue reading “Skull Cane Proves Bondo Isn’t Just For Dents”