Kid-friendly RFID Media Center Playlist Control

rfid-dreambox-control

While young children have the tiny hands and fingers that most hackers/tinkerers wish they possessed from time to time, their fine motor skills aren’t always up to par when it comes to operating complicated electronics. People are always looking for ways to make their home entertainment systems accessible to their kids, and [Humpadilly] is no exception. Much like some of the other hacks we’ve seen this week, he has devised a way for his little ones (1 and 2 years old) to control his Dreambox Media Player using RFID, which seems to be the go-to technology for this sort of thing.

His RFID remote consists of three major components aside from the media player itself. An Arduino runs the show, and is connected to both an Ethernet shield and a breakout board fitted with an ID-20 RFID reader module. The Ethernet shield allows the Arduino to talk to his Dreambox over a telnet connection, while the RFID reader does what you would expect.

The device is in its infancy at the moment, and while [Humpadilly] hasn’t published a ton of details about the actual RFID devices he is using to control the system, he says that more details and improvements are forthcoming. In the meantime, you can check out his code here.

RFID Jukebox For The Kids

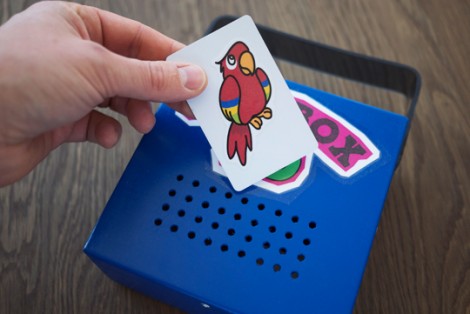
[Dominik] built a fun musical toy for his daughter [Anna]. It’s a jukebox that lets her play her favorite tunes using RFID tags to select between them.

The project is simple, yet robust. The enclosure is a wooden craft box that you can pick up for a couple of bucks. Inside there’s an Arduino with a Wave Shield which handles the audio playback. An RFID reader takes input from the set of card-tags he procured. An internal Lithium battery powers the device, with a USB port for charging.

Sure, those guts have some cost involved in them. But there’s no LCD which can be broken, and we thing the boards will hold up well to abuse if mounted correctly. Plus there’s a lot of future potential here. When we saw the cards we thought of those toys which make the animal sounds (“what does the cow say… mooo”). This could be used for that with really young children. Then repurposed into this jukebox as they get a bit older. If you put the guts in a new enclosure it will appear to be a brand-new toy, right?

See a demo of the project in the clip after the break.

Continue reading “RFID Jukebox For The Kids”

Robotic Doodle Clock

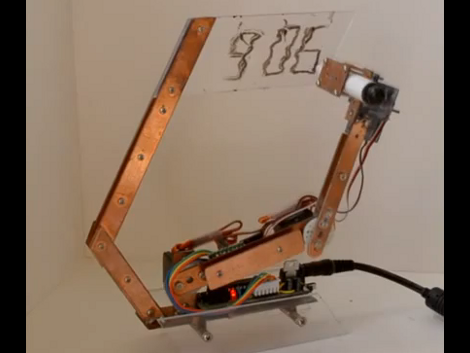
This clock has a robotic twist to it. It will show you the time by drawing it in dry-erase marker. There’s a bit of play in the arm joints and some loose motor precision which results in a wavy font that prompted [Ekaggrat] to name his project the Doodle Clock.

The shape and building material used here really make the timepiece look great. We think if the arm holding the acrylic writing surface had been at right angles this would not look nearly as pleasing. The video after the break shows the bot in action, at first flexing its wrist to switch back and forth between marker and eraser. From there it starts to draw the time, tracing the segments of each digit multiple times to achieve a readable number. The entire thing is driven by an Arduino compatible board mounted on the base of the clock.

This reminds us of that felt-tipped Turing Machine. A variation on that would also make a really nice clock display.

Continue reading “Robotic Doodle Clock”

A Mannequin Head + Arduino + Webcam = Lots Of Creepy Fun!

styrofoam head robot

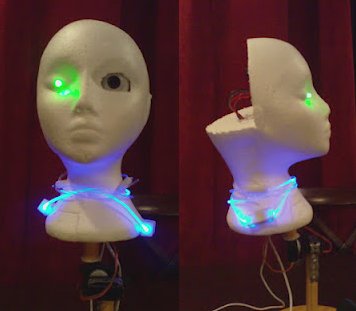
This mannequin head was purchased years ago on sale for less than $3. As with many things one sees while shopping, it didn’t have a purpose at the time, but seemed like it would be useful later. Add in an Arduino, some servos, and electronics parts that were acquire in a similar manner, and you have all the ingredients needed for a cool hack.

The build is well documented in the video after the break, and we especially like at 2:24 when who we suppose is the mom says “Look at this mess!” Apparently the next iteration will be a robot to clean everything up!

This iteration is quite impressive though, as it uses a webcam to track objects using a servomotor and lists the code used. For a view of it tracking stuff along with a view of the PC, fast forward to around 8:45. In addition to tracking the parts using the servo, the non-webcam eye changes color from green to yellow depending on if it’s tracking or not. It also featured a blinking necklace, which is also a plus in our eyes.

[youtube http://www.youtube.com/watch?v=TithLO3KzzU&w=470&h=315%5D

For more random head-like creepiness, be sure to check out [Boxie the Creepster]!

Control An Arduino From Android Over Bluetooth

Whether you’d like to do some real-time logging of data, or just want to control a project with your Android phone, [Thomas]’s Arduino-Android Bluetooth connection instructable is sure to be useful

[Thomas]’ build uses the very inexpensive JY-MCU Bluetooth module that’s available on eBay or dealextreme. This Bluetooth module ties directly into the Tx and Rx lines of the Arduino so a wireless serial connection between an Android device can be established. On the Android side of the build, Python for Android and the Scripting Layer for Android allow for reading wireless sensor data over Bluetooth.

While connecting an Android device to an Arduino is also possible with an IOIO  or an Android Open Accessory dev kit, we haven’t seen much (barring this) about controlling or reading simple electronics with Android over Bluetooth. Sometimes you just don’t need an awesome dev board to bodge up a simple project, so we hope [Thomas]’s very nice instructable will help get a few more builds off the ground.

Becoming The YouTube Loading Animation

Whether you’re used to dropped wifi connections, or your housemates are using up all the bandwidth for streaming, we’ve all see the spinning octet of disks that is the YouTube loading animation. [technocrat] thought it would be a great idea to actually become YouTube and set out on designing a physical manifestation of the loading animation.

[technocrat] used eight ping-pong balls as the main structure of the build. After drilling each ping-pong ball and gluing white LEDs in, the only thing left was to connect everything up to an Arduino. The code loops through each LED and provides the ‘light trail’ animation YouTube has burned into our memory.

To complete the build, [technocrat] attached his physical loading animation to a black t-shirt emblazoned with the YouTube logo to make everything more understandable. While it may not be as colorful as the beachball of death or as conceptual as the Windows ‘spinning hourglass’, we’re really liking this build. Check out the video after the break.

Continue reading “Becoming The YouTube Loading Animation”

PushingBox Alerts You Of Your Cat’s Roaming Habits

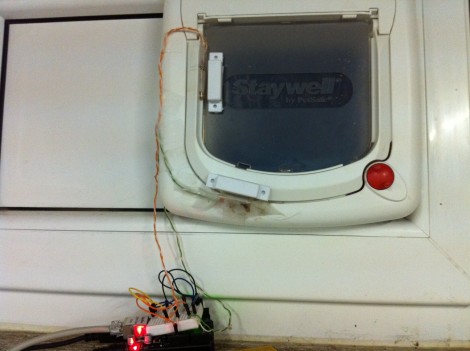
Dogs may be man’s best friend, but cats are certainly a hacker’s best muse. They provide so many ‘reasons’ for projects, like this cat door which [Clement] augmented to monitor the comings and goings of his feline friend (translated). He’s using a web service we hadn’t heard of before called PushingBox to send notifications like Tweets and Emails from the Arduino monitoring that door.

The two white rectangles attached to the cat door in the image above are magnets commonly used for entry door monitoring. Using a pair of them along with reed switches lets the system differentiate between an incoming or outgoing cat. The Arduino is web-connected and running the PushingBox API to manage the notification messages. See a demo of the system in the clip after the break.

This would be a nice addition to the cat door we saw [Dino] build. Of course, if you really want to go all out with the cat hacks the next project should be a GPS tracking collar. Continue reading “PushingBox Alerts You Of Your Cat’s Roaming Habits”