Laptop Touchpad-based LED Lighting Control

touchpad_lighting

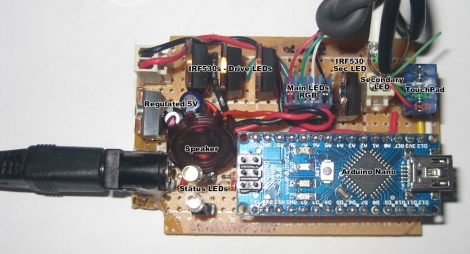
[Dave] needed some extra light above his desk/workbench area and decided to wire up some RGB LED light strips to brighten the place up a bit. He wasn’t content with using a standard switch to toggle them on and off, and after some brainstorming, he decided to build a capacitive touch circuit using a pair of copper tubes mounted in a project box. Just as he was putting the finishing touches on his switch, he saw a project online where a Synaptics touchpad was used in conjunction with an Arduino for lighting control. The copper tube switch was pitched, and he got busy working with his Arduino.

When connected to an Arduino, the touchpads can be used in two modes – relative and absolute. Relative mode is familiar to most people because it is used to guide the mouse cursor around on a laptop’s screen. Absolute mode however, relays coordinate information back to the Arduino, allowing the user to map specific areas of the pad to specific functions. [Dave] enabled his touchpad to use absolute mode, and mapped a handful of different functions on the Arduino. He can now fade his lights on and off or light the room on a timer, as well as use a sliding function to tweak the LEDs’ brightness.

It’s a neat, yet simple hack and a great way to repurpose old laptop touchpads.

Continue reading for a quick demo video he put together, and swing by his site if you want to take a look at the source code he used to get this working.

Continue reading “Laptop Touchpad-based LED Lighting Control”

Geiger Counter A/D Conversion For Radiation Level Crowdsourcing

arduino_geiger_counter

[Akiba] and the crew at Tokyo Hakerspace are still hard at work trying to help out their fellow countrymen after the recent earthquake, tsunami, and ongoing nuclear crisis in Japan. You may remember the group as they are behind the Kimono Lantern project we featured last week. This time around, their efforts are focused on getting usable information out to those who need it.

With all of the talk about nuclear fallout, they wanted to see what sort of measurements they could get in Tokyo, however they could not locate a Geiger counter anywhere nearby. Luckily, they were eventually able to source two old counters from the Reuseum in Idaho. One is being lent out to individuals in order to check if their home’s radiation levels are safe, but it was decided that the other would reside outdoors in order to collect radiation readings from the air.

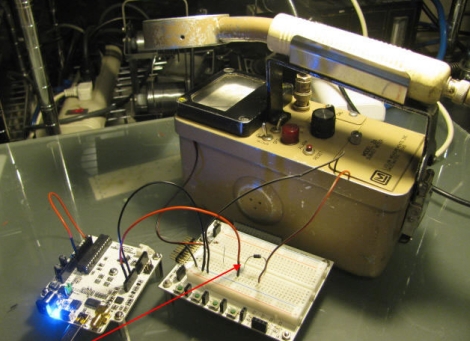
[Akiba] wanted to put the results from the external Geiger counter up on Pachube, however these old units are all analog. He figured that a quick and dirty way to do analog to digital conversion would be to monitor the chirps coming off the counter’s speaker. This was done by wiring up an Arduino to the speaker leads, and keeping track of each time the speaker was activated. This resulted in an accurate digital radiation reading, matching that of the counter’s analog display. The Arduinio wirelessly sends the information to another Arduino stationed inside his apartment, which then uploads the data to Pachube.

A walkthrough of his conversion as well as the source code for both the Arduino counter and the Pachube uploader are available on his site, in case anyone else in the Tokyo area has a Geiger counter handy and wishes to do the same.

GPS-enabled Bag Allows For Carefree City Roaming

mapbag_lilypad

[Josh] was looking for a way to enjoy exploring the city of Chicago safely, and hacked together a messenger bag navigation system to ensure he always knew where he was going.

While riding, he wanted to embrace the idea of Dérive, but he felt that he was being too overly conscious of time as well as his location, which took all the fun out of his unplanned excursions. Having recently been “doored” by a car, he was also looking for a way to help him navigate the city streets without being overly distracted with finding his way around.

His “Map Bag” solves both of these problems for him, without being obtrusive. He fit a messenger bag with a LilyPad Arduino and a GPS receiver for keeping track of his location. The Arduino can constantly monitor speed, heading, and location, directing [Josh] to his destination by vibrating one of 8 shaftless motors that are installed throughout the bag’s chest strap. Now while he rides, he can take in the city’s atmosphere while also knowing that he will get exactly where he needs to – on time.

He does not have any source code or schematics on his site as of yet, but we hope to see some in the near future. If you are interested, check out the videos of the bag’s construction embedded below.

Continue reading “GPS-enabled Bag Allows For Carefree City Roaming”

Gameboy ROM Backups Using An Arduino

gameboy_cart_reader

[Alex] collects retro gaming consoles. One day while playing a SNES title, his save games got wiped when he powered off the system. It turned out that the battery inside the game cartridge got disconnected somehow, and it got him thinking. He decided he wanted to find a way to back up his save games from the cartridges for safe keeping.

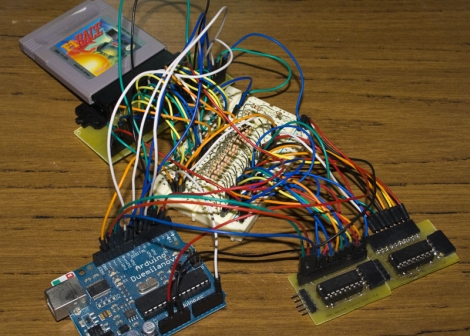
While cart readers exist, he says that they are hard to find nowadays, so he decided to construct his own using an Arduino. SNES cartridges are relatively complex, so he opted to focus on Gameboy cartridges for the time being. Before attempting to back up save games, he first chose to learn how to communicate with the cartridges in general, by reading the ROM.

He breaks the cartridges down in detail, discussing how they are constructed as well as how they can be addressed and read using the Arduino. He was ultimately successful, and offers up code as well as schematics on his site for any of you interested in doing the same. We imagine that save game reading (and perhaps editing) will likely happen in the near future.

Check out the video below to see his cart reader in action.

Continue reading “Gameboy ROM Backups Using An Arduino”

Automatic Dog Dish Filler Never Goes Dry

automatic_water_dish

[Avatar-X] has a Siberian Husky that gets a lot of exercise throughout the day, and as you would imagine, drinks a ton of water as well. We all suffer from memory lapses at one time or another, and while he is normally good about keeping the bowl filled, he occasionally forgets. He has tried a handful of various auto-filling dog dishes, but none of them seemed to work all that well, and they often rapidly built up healthy bacterial colonies.

With the help of some friends, he rigged up an automatic water dish filler, that ensures his pup always has a sufficient supply of water. He tapped into his kitchen water supply with a standard refrigerator hookup kit, and ran some tubing up into his cabinets, where he placed a garden irrigation valve. The valve is controlled using an Arduino which senses the bowl’s water level using a pair of wires.

The system looks like it works pretty well if the video embedded below is any indicator. [Avatar-X] provides code and schematics for the water control circuit on his site, free to anyone looking to build a similar system for their pets.

If you are interested in learning more about automating some of your pet’s care, be sure to check out these hacks we featured in the past.

Continue reading “Automatic Dog Dish Filler Never Goes Dry”

Recycled Sound – An Art Installation Not Lacking Arduinos

[oakkar7] wrote in to show us [Ben Johansen] and [Jonathan Snow]’s  interactive art installation, Recycled Sound(Website has a virus). The exhibit will premiere  in the TWU Arts Triangle Walking Tour March 25th from 5-7pm.

Currently a work in progress, the final plan is for the outdoor installation to feature a podium in the center with a rotating top, and various islands surrounding. As the podium’s top is rotated the surrounding islands come to life with a variety of light and sound displays which vary depending on how the podium is turned. While the electronics are not recycled, the actual sculptures and music making elements themselves consist of scrap yard parts and factory waste.

The whole display runs off of 12.. yes TWELVE Atmel 328s with Arduino boot loaders! The center podium houses a transmitting circuit consisting of two atmega 328s with Arduino boot loaders sharing a crystal, an hmc 6532 magnetometer breakout board and two RF transmitters.  The Islands each contain a receiving module with, obviously,  an Arduino and RF receiver. The receiving Arduinos connect to opto isolated switching modules for motors and lighting. Check out [Ben]’s blog for in progress shots, code, and build information.

If you are looking to control some 12V motors/lights with your 5V Arduino be sure to check out the pictures in the blog. While we here at Hackaday may be quick to jump into soldering [Ben] follows the proper development progression to the letter. Each aspect is bread boarded, then refined, then transferred to a soldered perf board.

update: His site has some kind of malware going on. None of us noticed it in Firefox, but after complaints we fired up ol IE. Yup, nastyness there. You can go there at the following link if you dare.

More after the jump:

Continue reading “Recycled Sound – An Art Installation Not Lacking Arduinos”

Laser Light Show Features Full XY Control Via Homemade Galvanometers

[Rich] over at NothingLabs has put together a really cool laser light show that you really must see in an effort to win a laser cutter from Instructables.

His walkthrough discusses the mechanics of laser light shows – specifically how galvanometers are typically used to precisely aim mirrors in order to draw images and write text. Commercial galvanometers tend to be pretty expensive, so he opted to build his own, using relatively cheap and easy to find parts.

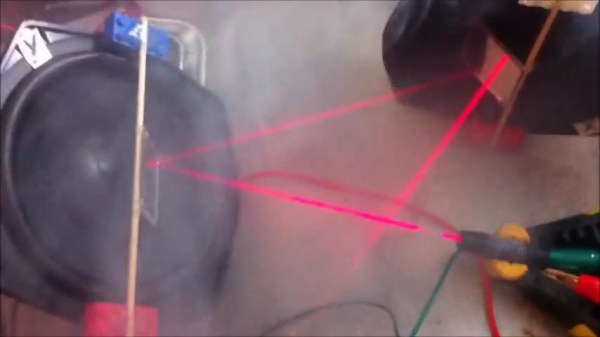
The galvanometers were constructed using a pair of old speaker woofers, a few Lego bricks, and some acrylic mirror squares. The mirrors were mounted on the speakers, which were then wired to an Arduino. He removed the batteries from a cheap red laser pointer and permanently wired it to the Arduino, which it now uses as a pulsed power source. Once he had everything built, he positioned the laser using a fog machine for guidance.

As you can see in the video below, the laser show is quite impressive. His homemade galvos provide a somewhat rough quality to the final projected image, and we like that a lot. It looks almost as if all of the text and images were hand drawn, which is a pretty cool effect.

Just as [Rich] mentions, we hope to see some cool hacks based off his work in the future.

If you are interested in some of our previous laser features, check these out.

Continue reading “Laser Light Show Features Full XY Control Via Homemade Galvanometers”