[Ray’s] breadboard power supply lets you drain the last traces of power from ‘dead’ AA batteries. Electronics that are powered off of disposable alkaline batteries have a cutoff voltage that usually leaves a fair amount of potential within. Since many municipal recycling programs don’t take the disposables (you’re just supposed to throw them in the trash!) we love the idea of squeezing them for prototyping use.
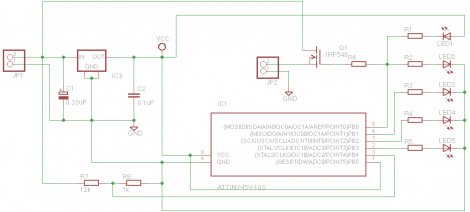
His design uses just one IC, the MCP1640, along with a handful of passive components. The chip is a boost converter with a startup voltage of just 0.65V, which means the batteries themselves – normally starting life above 1.5V – can be used until they drop to about 0.3V each.
Above you can see the kit he is selling. But it’s an open source project and the circuit is so simple we’re sure you can build your own. Add that boost converter chip to your next parts order for around $0.40.
[Ray] made a nice demo video for the device which you can see embedded after the break.
Continue reading “Squeezing The Juice Out Of Some AA Batteries”