A bike computer sits on a wooden background. The back of the bike computer has a 3D printed attachment with two white translucent zip ties running through the back.

Repairing A Bike GPS With 3D Printing

We love hacks that keep gadgets out of the trash heap, and [Brieuc du Maugouër] has us covered with this 3D printable replacement mount he designed for his bike GPS.

One of the most frustrating ways a gadget can fail is when a small, but critical part of the device fails. [du Maugouër] combined a 3D printed back and four M2x6mm screws to make a robust new mount to replace the broken OEM mount on his handlebar-mounted GPS. Slots for zip tie mounting are included in case the replacement mount breaks before yet another replacement can be printed. Apparently [du Maugouër] agrees with Chief O’Brien that “in a crunch, I wouldn’t like to be caught without a second backup.” [Youtube]

It’s exciting that we’re finally in a time when 3D printed replacement parts are living up to their potential. This would be a lot easier if more manufacturers posted 3D printed design files instead of getting them pulled from 3D file platforms, but makers will find a way regardless of OEM approval.

We’ve covered a lot of bike hacks over the years including DIY Bike Computers and GPS Trackers. Do you have a project that keeps something from becoming trash or might save the world another way? There’s still time to enter the Save the World Wildcard round of the Hackaday Prize (closes October 16th).

Climbing Everest One Hill At A Time – And Keeping Track Of It

The internet is full of self-proclaimed challenges, ranging from some absolutely pointless fads to well-intended tasks with an actual purpose. In times of TikTok, the latter is of course becoming rarer, as a quick, effortless jump on the bandwagon is just easier for raising your internet points. Cyclists on the other hand love a good challenge where they compete with one another online, testing their skills and gamifying their favorite activity along the way. One option for that is Everesting, where you pick a hill of your choice, and within a single session you ride it up and down as many times as it takes until you accumulated the height of Mount Everest on it. Intrigued by the idea, but not so much its competitive aspect, [rabbitcreek] became curious how long it would take him to reach that goal with his own casual bicycle usage, so he built a bicycle computer to measure and keep track of it.

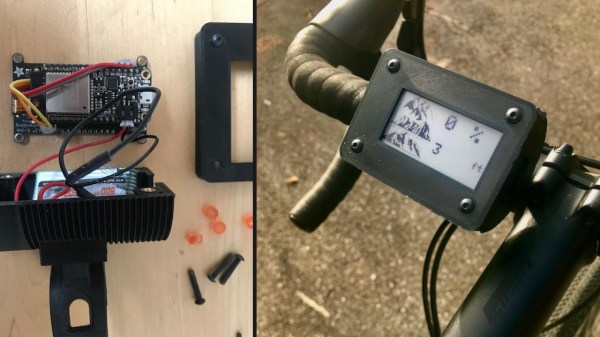
While the total distance and time factors into the actual challenge, [rabbitcreek]’s primary interest was the accumulated height, so the device’s main component is a BMP388 barometric pressure sensor attached to a battery-powered ESP32. An e-paper display shows the total height and completed percentage, along with some random Everest-related pictures. Everything is neatly packed together in a 3D-printed case that can be mounted on the bicycle’s handlebar, and the STL files are available along with the source code in his write-up.

Of course, if you’re actually interested in the challenge itself, you probably have an assortment of sports tracking equipment anyway, but this is a nice addition to keep track as you go, and has a lower risk of ransomware attacks. And in case [rabbitcreek] sounds like a familiar name to you, he’s indeed become a Hackaday regular with his environmental hacks like the tide clock, a handheld particle sniffer, or logging temperatures in the Alaskan wilderness.

Easy To Read Bicycle Computer

[David Schneider] had trouble seeing his bike computer in the sunlight and wanted a navigation solution that would be both readable and not require a smart phone. In good hacker fashion, [David] married a Raspberry Pi and a Kindle Touch (the kind with the E-ink display). The Kindle provides a large and easy-to-read display.

[David] was worried about violating the DCMA by modifying the Kindle. Turns out, he didn’t have to. He simply used the book reader’s Web browser and set the Pi up as a wireless access point. One clever wrinkle: Apparently, the Kindle tries to phone home to Amazon when it connects to a wireless network. If it can’t find Amazon, it assumes there’s no valid network and treats the network as invalid. To solve this issue, [David] causes the Pi to spoof the Kindle into thinking it gets a valid response from Amazon.

The other work around was to change how the Python application on the Pi updates the screen. [David] found that without that optimization, the constant redrawing on the E-ink display was annoying. The Pi-related hardware includes a GPS, some reed switches, and a WiFi dongle.

Continue reading “Easy To Read Bicycle Computer”

Grinding A Bicycle Crank For Power Analysis

For [Mark] and [Brian]’s final project for [Bruce Land]’s ECE class at Cornell, they decided to replicate a commercial product. It’s a dashboard for a bicycle that displays distance, cadence, speed, and the power being generated by the cyclist. Computing distance, cadence and speed is pretty easy, but calculating power is another matter entirely.

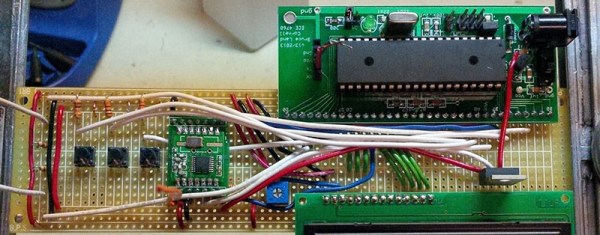
The guys are using an ATMega1284 to drive an LCD, listen in on some Hall Effect sensors, and do a few calculations. That takes care of measuring everything except power. A quick search of relevant intellectual property gave then the idea of measuring torque at the pedal crank. For that, [Mark] and [Brian] are using a strain gauge on a pedal crank, carefully modified to be stiff enough to work, but flexible enough to measure.

A custom board was constructed for the pedal crank that measures a strain gauge and sends the measurements through a wireless connection to the rest of the bicycle dashboard. It works, and the measurements in the classroom show [Brian] is generating about 450 W when pedaling at 33 mph.

Video below.

Continue reading “Grinding A Bicycle Crank For Power Analysis”

Rodent-based Power Generation

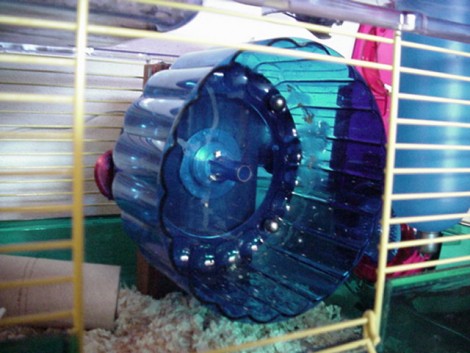
Your hamster lives to good life, with food delivery and a maid service that cleans up after him. [DanF] helped to brighten up this hamster’s life even more by improving its exercise equipment and giving it a small night-light as well. This project adds a low RPM alternator to the hamster wheel.

The first part of the process was to reduce energy lost to friction by fitting the wheel with a bearing. From there a ring of permanent magnets was added which will pass by a stationary coil and induce a current. It works, but unfortunately there’s not enough power generated to charge a battery. That means the light is only on when the hamster is running. But maybe you can figure out a way to use a super-capacitor like we saw in that exercise bike hack.

One nice finishing touch to the setup is a bicycle computer to track how much time was sent on the wheel, and the distance traveled.

[Thanks Dizzy]