Slipcasting Resin Prototypes

[Eric Strebel] doesn’t need an introduction anymore. If there is a picture of an elegantly designed part with a professional finish on our pages, there is a good chance he has a hand in it. This time he is sharing his method of making a part which looks like it is blow-molded but it is not. Blow-molded parts have a distinctive look, especially made with a transparent material and [Eric’s] method certainly passes for it. This could upgrade your prototyping game if you need a few custom parts that look like solidified soap bubbles.

Mold making is not covered in this video, which can also be seen below the break, but we can help you out with a tip or two. For demonstration’s sake, we see the creation of a medical part which has some irregular surfaces. Resin is mixed and degassed then rolled around inside the mold. Then, the big reveal, resin is allowed to drain from the mold. Repeat to achieve the desired thickness.

This is a technique adapted from ceramics called slipcasting. For the curious, an elegant ceramic slipcasting video demonstration can be seen below as well. For an added finishing touch, watch how a laquer logo is applied to the finished part; a touch that will move the look of your build beyond that of a slapdash prototype.

More education from this prolific maker can be seen in his video on painting with a professional-looking finish and his tips for working with foam-core.

Continue reading “Slipcasting Resin Prototypes”

Card Reader Lockout Keeps Unauthorized Tool Users At Bay

It’s a problem common to every hackerspace, university machine shop, or even the home shops of parents with serious control issues: how do you make sure that only trained personnel are running the machines? There are all kinds of ways to tackle the problem, but why not throw a little tech at it with something like this magnetic card-reader machine lockout?

[OnyxEpoch] does not reveal which of the above categories he falls into, if any, but we’ll go out on a limb and guess that it’s a hackerspace because it would work really well in such an environment. Built into a sturdy steel enclosure, the guts are pretty simple — an Arduino Uno with shields for USB, an SD card, and a data logger, along with an LCD display and various buttons and switches. The heart of the thing is a USB magnetic card reader, mounted to the front of the enclosure.

To unlock the machine, a user swipes his or her card, and if an administrator has previously added them to the list, a relay powers the tool up. There’s a key switch for local override, of course, and an administrative mode for programming at the point of use. Tool use is logged by date, time, and user, which should make it easy to identify mess-makers and other scofflaws.

We find it impressively complete, but imagine having a session timeout in the middle of a machine operation would be annoying at the least, and potentially dangerous at worst. Maybe the solution is a very visible alert as the timeout approaches — a cherry top would do the trick!

There’s more reading if you’re one seeking good ideas for hackerspace. We’ve covered the basics of hackerspace safety before, as well as insurance for hackerspaces.

Continue reading “Card Reader Lockout Keeps Unauthorized Tool Users At Bay”

Hackaday Links Column Banner

Hackaday Links: May 20, 2018

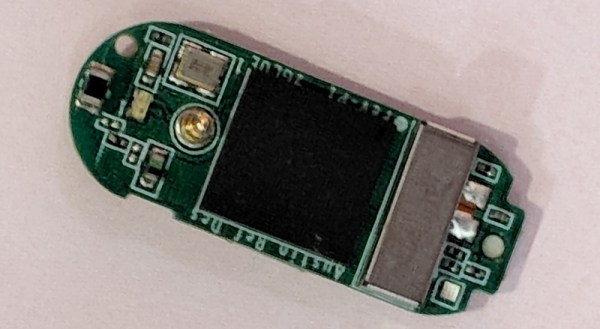
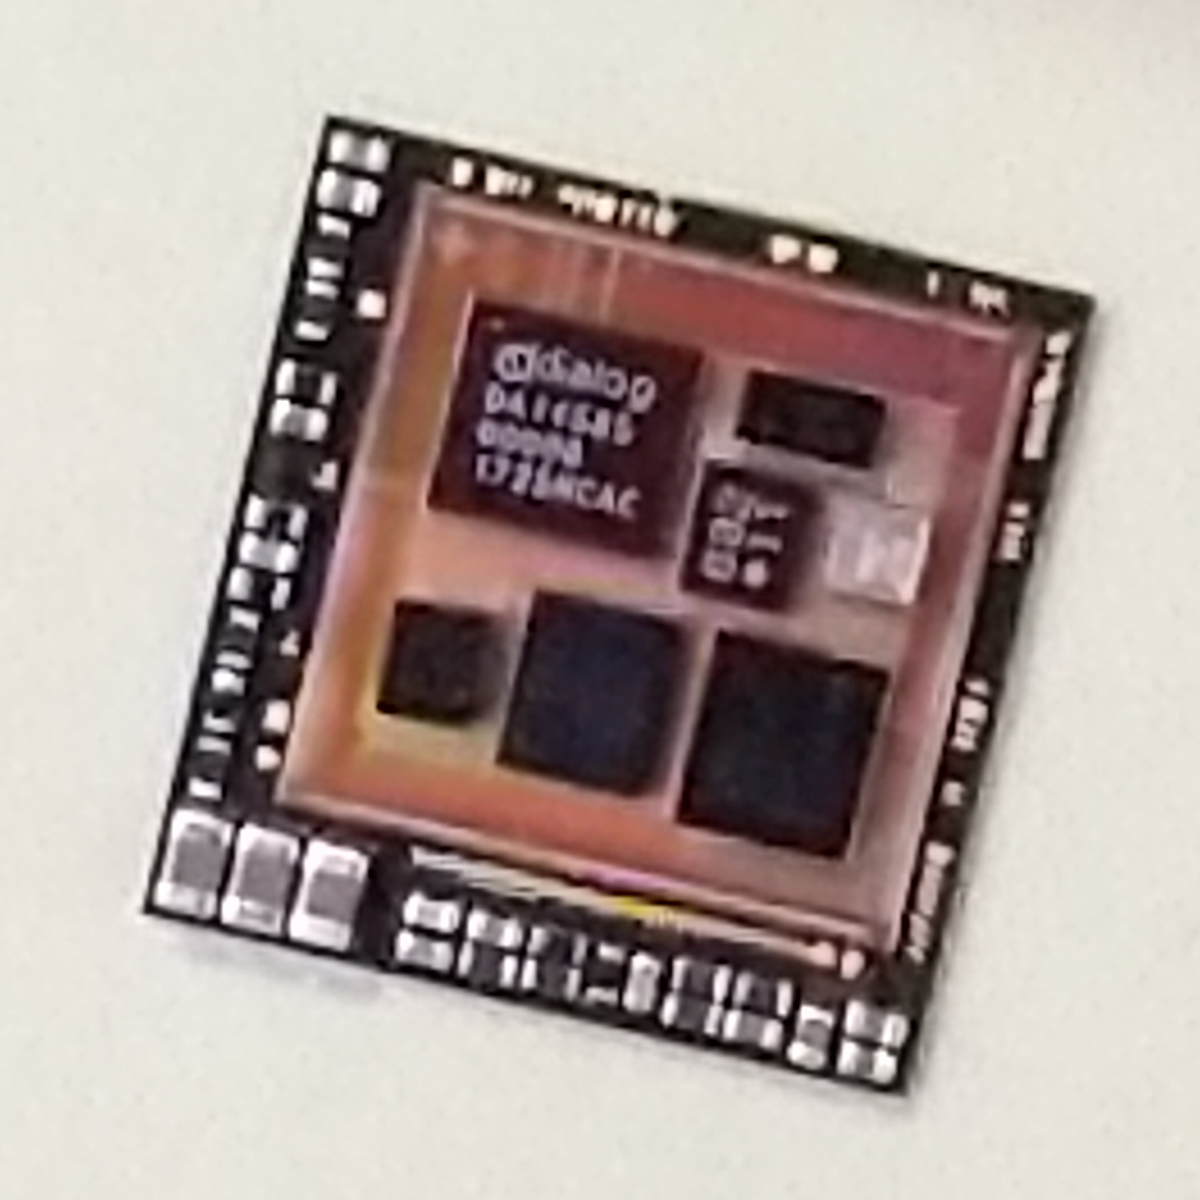
One of the more interesting pieces of tech from Hollywood that never seems to become a reality is a location tracker. Remember the ‘movement tracker’ in Alien that found the cat in the locker? Yeah, like that. Something that reports the direction and distance to a target, kind of like a PKE Meter from Ghostbusters. I think there was something like this in Predator. On Indiegogo, there’s a device that tracks other devices. It’s called the Lynq, and it’s a small, handheld device that tells you the distance and bearing of other paired devices. Hand them out to your friends, and you’ll be able to find each other at Coachella. While the device and use case is interesting, we’re wondering how exactly this thing works. Our best guess is that each device has a GPS module inside, and communicates with other paired devices over the 900MHz band. It’s a bit pricey at $80 per unit (although you need at least two to be useful), but this is a really interesting project.

The SDRPlay SDR1 and SDR2 are — as you would guess — software defined radio receivers, that retail for $2-300. Problem: a few of these units were stolen from a warehouse, and are winding up on eBay. Solution: SDRPlay has decided to disable the specific receivers ‘via the serial number’. In a move just slightly reminiscent of FTDIgate, a manufacturer has decided to brick products that are stolen or infringe on IP. It’s a solution, but I wouldn’t want to be on the customer service team at SDRPlay.

A few years ago, [Oscar] created the PiDP-8/I, a computer kit that miniaturized the venerable PDP-8/I into a desktop form factor, complete with blinkenlights and clicky switches. It’s a full simulation of a PDP-8 running on a Raspberry Pi, and if you took the PiDP-8/I back to 1975, you could, indeed, connect it to other computers. But the PDP-8/I isn’t the most beautiful minicomputer ever created. That honor goes to the PDP-11/70, a beast of a machine wrapped in injection molded plastic and purple toggle switches. Now, after years of work, [Oscar] has miniaturized this beast of a machine. The PiDP-11/70 is a miniature remake of the PDP-11/70, runs a Raspberry Pi, and is everything you could ever want in a minimainframe. The price will be around $250 — expensive, but have you ever tried to find a PDP-11 front panel on eBay?

The Nvidia TX2 is a credit card-sized computer with a powerful ARM processor and a GPU. The TX2 is a module designed for ‘AI at the edge’, or something along those lines, meaning you can take a trained data set, load it onto an SD card, and the TX2 will do all the fancy image processing and OpenCV without a connection to the Internet. The obvious application for the TX2 is something like an ‘AI camera’, and now this is finally a product. The DNNCam is a 4k, 60FPS camera attached to a TX2 and stuffed into an IP67-rated enclosure. If you’re thinking of building anything like a security camera attached to a GPU, this is the all-in-one solution. It’s pricey, yes, but the TX2 module isn’t exactly cheap.

Inverted Pendulum For The Control Enthusiast

Once you step into the world of controls, you quickly realize that controlling even simple systems isn’t as easy as applying voltage to a servo. Before you start working on your own bipedal robot or scratch-built drone, though, you might want to get some practice with this intricate field of engineering. A classic problem in this area is the inverted pendulum, and [Philip] has created a great model of this which helps illustrate the basics of controls, with some AI mixed in.

Called the ZIPY, the project is a “Cart Pole” design that uses a movable cart on a trolley to balance a pendulum above. The pendulum is attached at one point to the cart. By moving the cart back and forth, the pendulum can be kept in a vertical position. The control uses the OpenAI Gym toolkit which is a way to easily use reinforcement learning algorithms in your own projects. With some Python, some 3D printed parts, and the toolkit, [Philip] was able to get his project to successfully balance the pendulum on the cart.

Of course, the OpenAI Gym toolkit is useful for many more projects where you might want some sort of machine learning to help out. If you want to play around with machine learning without having to build anything, though, you can also explore it in your browser.

Continue reading “Inverted Pendulum For The Control Enthusiast”

Stretching The Definitions Of A Custom IC

Maker Faire is the nexus for all things new and exciting. At the Bay Area Maker Faire this weekend, zGlue introduced a new platform that stretches the definition of custom ICs. Is this custom silicon? No, not at all. zGlue is a platform allowing anyone to take off-the-shelf ICs and package them into a single module, allowing you to build a smaller PCB with a shorter BOM.

The zGlue module found in the zOrigin

The idea behind zGlue is to take all of the fun chips available today from accelerometers to tiny microcontrollers with integrated wireless and put them on a tiny, tiny board that is then encapsulated. At Maker Faire, the zGlue team was busy demonstrating their cloud-based platform that allows anyone to add off-the-shelf chips to the zGlue stack and assemble it into a custom module.

Of course, every new tech startup needs a demo, so zGlue has come up with zOrigin, a small fitness tracker that features a suite of chips crammed into one encapsulated package. The chips included in the zOrigin ZiP package are a Dialog DA14585 microcontroller with BLE, an Analog Devices heart rate monitor, a crystal, a bit of Flash, a power monitoring IC and an accelerometer. There are also thirty passives stuck in this single chip, and with a battery, some LEDs, and a vibration motor, this chip becomes a complete solution for wearable fitness trackers.

Shoving a bunch of chips into a single module is nothing new; most of wireless modules available on the market are just that. NextThingCo experimented with a Linux computer on a chip with the GR8 module, again, just a bunch of chips slathered in epoxy. The most visible benefit of custom modules is probably the Octavo System on a Chip that became the PocketBone.

While the ability to create custom modules from off-the-shelf chips is nothing new for manufacturers, the ability for anyone to create their own custom ICs has remained out of reach for the Average Joe hardware hacker. zGlue is the solution to this problem, and the prices seem fairly reasonable, starting at around $100 for the initial R&D.

Internet Of Laundry — Let The ESP8266 Watch Your Dirty Drawers Get Clean

When you think of world-changing devices, you usually don’t think of the washing machine. However, making laundry manageable changed not only how we dress but how much time people spent getting their clothes clean. So complaining about how laborious our laundry is today would make someone from the 1800s laugh. Still, we all hate the laundry and [Andrew Dupont], in particular, hates having to check on the machine to see if it is done. So he made Laundry Spy.

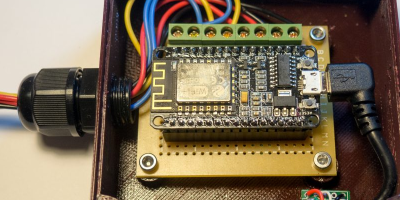
How do you sense when the machine — either a washer or a dryer — is done? [Andrew] thought about sensing current but didn’t want to mess with house current. His machines don’t have LED indicators, so using a light sensor wasn’t going to work either. However, an accelerometer can detect vibrations in the machine and most washers and dryers vibrate plenty while they are running.

The four-part build log shows how he took an ESP8266 and made it sense when the washer and dryer were done so it could text his cell phone. He’d already done a similar project with an Adafruit HUZZAH. But he wanted to build in some new ideas and currently likes working with NodeMCU. While he was at it he upgraded the motion sensor to an LIS3DH which was cheaper than the original sensor.

[Andrew] already runs Node – RED on a Raspberry Pi, so incorporating this project with his system was a snap. Of course, you could adapt the approach to lots of other things, as well. The device produces MQTT messages and Node – RED subscribes to them. The Pushover handles the text messaging. Node – RED has a graphical workflow that makes integrating all the pieces very intuitive. Here’s the high-level workflow:

You might wonder why he didn’t just have the ESP8266 talk directly to Pushover. That is possible, of course, but in part 2, [Andrew] enumerates some good reasons for his design. He wants to decouple components in the system for easier future upgrades. And MQTT is simple to publish on the sensor side of things compared to API calls which are handled by the Raspberry Pi for now.

Laundry monitoring isn’t a unique idea and everyone has a slightly different take on it, even some Hackaday authors. If phone notification is too subtle for you, you can always go bigger.

Tiny Sideways Tetris On A Business Card

Everyone recognizes Tetris, even when it’s tiny Tetris played sideways on a business card. [Michael Teeuw] designed these PCBs and they sport small OLED screens to display contact info. The Tetris game is actually a hidden easter egg; a long press on one of the buttons starts it up.

It turns out that getting a playable Tetris onto the ATtiny85 microcontroller was a challenge. Drawing lines and shapes is easy with resources like TinyOLED or Adafruit’s SSD1306 library, but to draw those realtime graphics onto the 128×32 OLED using that method requires a buffer size that wouldn’t fit the ATtiny85’s available RAM.

To solve this problem, [Michael] avoids the need for a screen buffer by calculating the data to be written to the OLED on the fly. In addition, the fact that the smallest possible element is a 4×4 pixel square reduces the overall memory needed to track the screen contents. As a result, the usual required chunk of memory to use as a screen buffer is avoided. [Michael] also detailed the PCB design and board assembly phases for those of you interested in the process of putting together the cards using a combination of hot air reflow and hand soldering.

PCB business cards showcase all kinds of cleverness. The Magic 8-Ball Business Card is refreshingly concise, and the project that became the Arduboy had milled cutouts to better fit components, keeping everything super slim.