Sound Blimp Makes Camera Quieter And Waterproof

soundBlimp

The D-SLR “crunch” sound can be pretty satisfying. Your camera has moving parts and those cell-phone amateurs can eat your shutter actuation. If you’re a professional photographer behind the scenes on a sound stage or at any film shoot, however, your mirror slapping around is loud enough to get you kicked off the set. [Dan Tábar] needed his D800 to keep it down, so he made his own sound blimp to suppress the noise. As an added bonus, it turns out the case is waterproof, too!

[Dan] got the idea from a fellow photographer who was using a prefab Jacobson blimp to snap pictures in sound-sensitive environments. Not wanting to spend $1000, he looked for a DIY alternative. This build uses a Pelican case to house the body of the camera and interchangeable extension tubes to cover lenses of various sizes. [Dan] took measurements and test-fit a paper cutout of his D800 before carving holes into the Pelican case with a Dremel tool. One side got a circular hole for the extension tubes, while the other received a rectangular cut for the camera’s LCD screen and a smaller circle for the viewfinder.

Lexan serves as a window for all of the open ends: LCD, viewfinder, and the lens. [Dan] snaps pictures with a wireless trigger, saving him the trouble of drilling another hole. You can hear the D800 before and after noise reduction in a video after the break, along with a second video of [Dan] trying out some underwater shots. If you’d rather take a trip back in time, there’s always the 3D printed pinhole camera from last week.

Continue reading “Sound Blimp Makes Camera Quieter And Waterproof”

Swapping The Sensor In A DSLR

OLYMPUS DIGITAL CAMERA

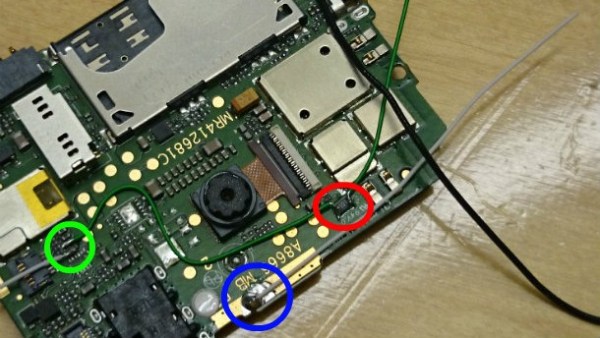
To take a color image, modern digicams have something called a Bayer pattern – small red green and blue filters, one color for each pixel – that drastically reduce the resolution if all you’re doing is taking black and white pictures. [Lasse] is an astrophotographer, and doesn’t exactly need color pictures, so he decided to swap the color sensor in his camera with a monochrome CCD.

Most DSLRs have CCD sensors on strange surface mount packages or put everything on flex PCBs. [Lasse]’s Olympus E-500, though, features an 8 Megapixel CCD on a ceramic DIP that is actually fairly easy to remove given the right tools and just a little bit of mechanical encouragement.

After putting in a new monochrome CCD, [Lasse] had a much more sensitive sensor in his camera, and processing the RAW files off the camera gives him a great improvement for his astrophotography.

This isn’t [Lasse]’s first adventure in tearing apart DSLRs for astrophotography. Earlier, he uncovered the secrets of the Four Thirds lens format with a logic analyzer, making his Olympus camera a wonderful tool for looking into the heavens.

What The Inside Of A Pneumatic Transport System Looks Like

While most of us are familiar with pneumatic transport systems by their use at drive-up bank windows, these systems are also commonly found in hospitals ferrying samples around. When [Aidan] was in the hospital, he asked how this series of tubes routed samples from many different floors to the lab and back again. Well, give him an old tube to play around with and he’ll eventually come up with a way to record the inside of one of these pneumatic tubes, giving some insight into how this system actually works.

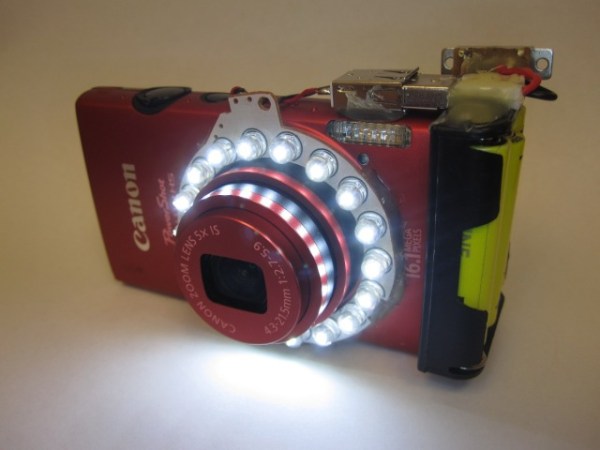
When asked, a tech that uses this system on a daily basis described it as a very basic physical Ethernet that sucks and blows through rotary junctions and physical hubs to route packets to different areas of the building. [Aidan] wanted to record a tube’s travels, so he wired up a small HD camera, a bunch of LEDs, and a few batteries. Sending this recording sample container revealed some of how this pneumatic system works; the containers will travel forward and stop before reversing through one of the rotary switches. You can check out the flight of the container in the video below.

Of course there are other glimpses of how stuff travels through the unseen world of getting from point A to point B. Here’s a time lapse camera going on a trip via DHL just for kicks.

Continue reading “What The Inside Of A Pneumatic Transport System Looks Like”

Bench Equipment Tip: Screenshot Of Old Oscilloscopes

oscillocam-oscilloscope-camera-accessory

Here’s a quick tip on capturing the output of oscilloscopes that don’t have that native feature. [Paulo Renato] used a cookie tin as a camera cowl for capturing CRT oscilloscope screenshots.

We figure if you’ve got any kind of functioning oscilloscope you’re lucky. And although it’s nice to pull down the measurements to your PC on the newer models, the results [Paul] gets with this rig are still satisfactory. The plastic cookie box he used blocks out ambient light while holding the camera at a consistent focal length. He used some flat black spray paint to make sure the obnoxious yellow plastic didn’t interfere with the image, then drilled a hole which fits tightly around his camera lens.

You’ll need to monkey with the exposure settings to get the best image. But once you’ve got it dialed in it should be the same every time you want to take a picture of the screen.

Raspberry Pi Camera Built As Part Of Advertising Campaign

the-rpi-camera

Here’s yet another example of well targeted advertising. This camera built around a Raspberry Pi is a giveaway from Sprite. The “lucky” winner of the camera will have the pleasure of seeing the Sprite logo as a watermark on all of the images they snap with it. But in the right hands it’s a simple hack to remove that “feature” (they published the Python script that adds the watermark) or to just scrap the parts for another project. Either way, Sprite got us to say their name three times in this paragraph so the campaign worked.

The most obvious part of this build is the custom cast resin case that they came up with which is a gaudy cartoon-like monstrosity. It protects the case-less Raspberry Pi board, and mounts the Pi Camera board so that the lens is positioned correctly. The lipstick-sized module mounted in the lower back half of the case is a 2400 mAh portable power supply with a USB charging port sticking out the side. This makes us wonder, do you have to wait for the RPi to power up before snapping a picture? If the size and color didn’t get you noticed by everyone the shutter sound will. it shouts the name of the soda company whenever you press the shutter release button.

If you’re more of a high-end photography enthusiast this DSLR wedded with an RPi will be of more interest.

Ghostly Images Captured Only On Camera

is that a logo

A while back our good buddy [Ch00f] built a QR code clock, unreadable to both humans and computers. A human couldn’t read the clock because of the digital nature of a QR code, and because the clock used persistence of vision in driving the LEDs, a digital camera can’t capture all the pixels in the QR code at the same time. It’s a highly useless but impressive art piece. Now, [Ch00f] is turning that build on its head. He created a rudimentary display that is invisible to the human eye, but easily detected with a digital camera.

This build exploits a basic property of CMOS digital cameras – the rolling shutter. Because it takes time to get pixels off a modern digital image sensor, each picture is actual a composite of many different strips, each taken slightly out of sequence. You can see this for yourself by taking a picture of something rotating very fast with your camera phone; a picture of an airplane propeller will make the blades appear curved, or look like [Dr. Seuss] has an aeronautical engineering degree.

To create his display, [Ch00f] found a few inexpensive fiber optic lights. By aligning a few of these into columns and lighting them up in a precise sequence, he can exploit the rolling shutter and make an image appear. To the human eye, it looks like a solid wall of illuminated fiber optics.

As for how practical this build is, [Ch00f] says not much. For cell phone cameras, you’d need to have a very, very short exposure time for this to work. The only way to do that is to make this display unbelievably bright, or just put it out in the sun. We can’t see that being practical for any potential use case, but we’d be more than happy to see a large-scale attempt at displaying images with this technique.

Showing Off A High-performance Brushless Motor Camera Gimbal

gopro-brushless-motor-gimbal

Here’s [Tom Parker] showing off a brushless motor gimbal stabilizer for his GoPro camera. We saw a similar project a couple of weeks back that featured a 3d printed quadcopter mount. This offering is meant to be held in your hands. It keeps the subject in frame even if the cameraman’s hands pitch and roll (we figured aeronautical terms were best here). This image shows him demonstrating a level camera as he quickly rolls the frame from one side to the other. It doesn’t compensate for yaw, which is something he may change in the next iteration. We already like the results he’s getting with it.

About 3:15 into the video demo below we get a very quick description of the build itself. He started it as a project at University. Fabrication included work on a 3D printer, laser cutter, and vacuum forming machine. The grips are bicycle handlebar components. To overcome the stabilization system the operator has access to a joystick. Without this you’d never be able to aim the camera up or down because of auto-leveling.

Continue reading “Showing Off A High-performance Brushless Motor Camera Gimbal”