On-the-go Desktop

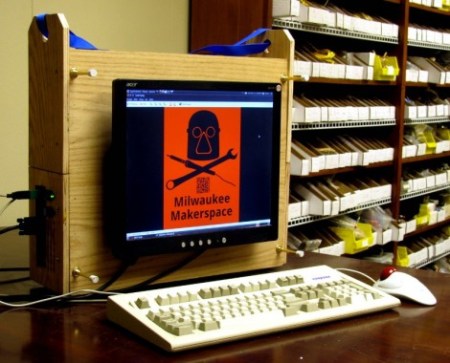
Here’s a desktop you can take with you. [Rbean] built it at a hackerspace in Milwaukee, Wisconsin (go Badgers!) using very basic materials and techniques. The utilitarian construction of the wooden body reminds us of Cub Scout tool box projects. It features an open space in the top which house the keyboard and mouse during travel. The blue strap lets you sling all forty pounds over one shoulder, but we’d also love to see a thick dowel to go along with the toolbox concept we’ve got stuck in our mind.

The lower half of the case is removable, serving as the mounting area for what looks like a mini ITX motherboard, hard drive, and full-sized power supply. As you can see the LCD screen mounts to the side of the box which allows you to rest the unit on its side and protects the display if the whole thing were to be knocked over. [Rbean] mentions that he’d like to try another revision using aluminum instead of wood, but we like this version. The only thing we’d want to see added is a set of speakers mounted inside the case on either side of the monitor.

Copper-clad Enclosures

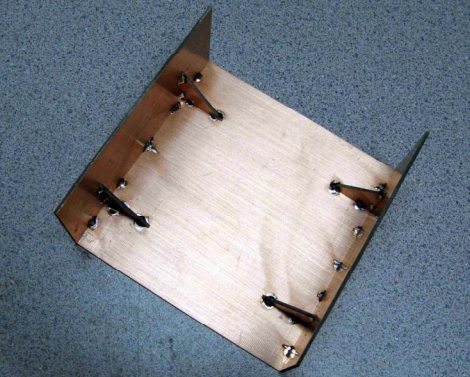
Building a great looking box for your projects can be a challenge. [Ken] boils down his process of building enclosures out of copper clad (PDF) circuit board material into an illustrated guide in case you want to try this for yourself. Why would you want to use PC board? The fiberglass substrate makes for a strong and lightweight material. Also, [Ken] is a ham radio operator and the copper coating acts as an electrical shield for delicate components inside.

As you can see above he uses solder to tack the pieces together. There’s some important considerations that go along with this method. First, he cuts the pieces just a bit oversized and then sands them flat and square before assembly. Next, he uses some 20 gauge wire as a shim between a ninety-degree joint and a right angle jig. This shim compensates for the shrinking that occurs as the solder cools, making sure the joint gets pulled to a right angle. He even solders nuts in place so that screws can be used to attach the case cover to the chassis.

Yesterday we saw toner transfer used to make labels on an ABS case. If you make your enclosure out of copper clad, using toner transfer for panel labels will be a snap!

Tuesday Two-Fer: Battery Cases And ABS Lettering

These are both interesting, unrelated, and can’t quite stand on their own so we threw them into one post.

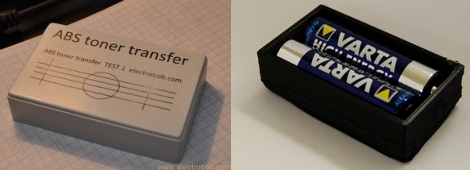
On the left you see the product of using toner transfer on ABS plastic. [Bogdan] tried this out as a way to make front panels for his enclosures. It really shouldn’t work very well because ABS has a lower melting point than toner does. But it seems that it takes a while for the ABS to heat up. If you’re quick, ironing for about 10 seconds, you can get the toner to stick to the plastic and then soak the paper off, leaving your printed design looking nice and clean.

To the right you see a printed battery case. [Nikolaus Gradwohl] ran across the same problem we’ve face many times: how to attach batteries to your projects? We’ve duct-taped them together, used the blister packs they’re sold in, Dremeled them out of thrift-store toys and just about every other thing you can imagine. He decided to make them easy to manufacture with a 3D-printer. This is accomplished with an OpenSCAD file he wrote. Plug in the size and number of batteries and a printable package will be automatically generated.

Project Enclosures The Right Way

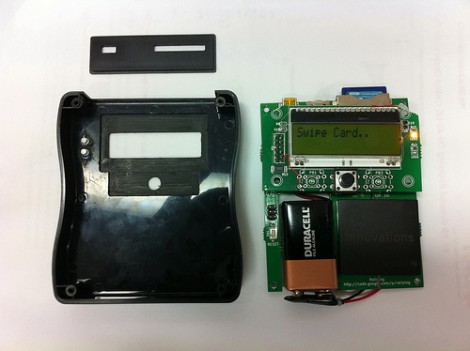
[Stephen Eaton] created an enclosure and shared his process in a pair of blog post. We thought is was amusing that he remarks on how rarely his projects get the to point that you’d want to make an enclosure for them. We’ve certainly got a lot of bare-PCB creations lying around. But when it does come time, we think his fabrication method is a good way to go.

First of all, he didn’t start from scratch. He already had a SparkFun project case sitting around. The problem is figuring how to make it work for your situation. We’ve used a drill, a Dremel, and a file in the past and that yields passable results but nothing that would be mistaken for anything other than a carefully mangled project box. [Stephen] decided to mill the openings he needed from the box, which yielded professional looking results. He started by emailing SparkFun and asking if they could give him a 3D model of the project box and the obliged. He then modeled the LCD screen, LED light pipes, button, USB port, and SD socket. From there it was off to the mill with a custom jig and a few tricks we think you’ll appreciate. The end result is just another reason to build the CNC mill you’ve had on your mind for so long.

Add-on Panel Brings Automated Vents Flaps To A PC

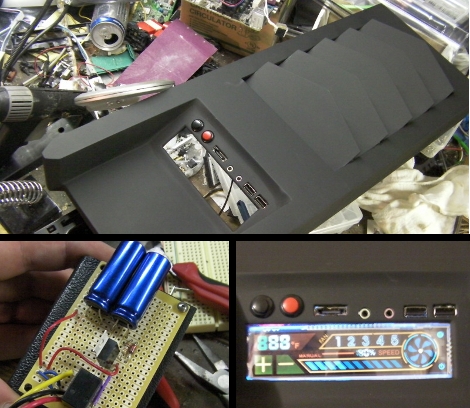
[SXRguyinMA] built a replacement top bezel for his computer case. He wanted to add vents that would automatically open or close based on the cooling needs of the computer. With some careful measurements he modeled the parts in Sketchup and sent out for them to be cut from styrene with a water jet cutter. The parts came back looking great and the assembly of the shutters went swimmingly. The bezel also includes a lighted screen for temperature information, as well as the front USB ports, headphone and mic jacks, etc. Hidden underneath is an Arduino board and servo motor. The Arduino polls the temperature and drives the servo to adjust the fins accordingly. There’s even a supercap in the circuit that will close the vents when the PC powers down or when power is unexpectedly lost. See it in action after the break.

Continue reading “Add-on Panel Brings Automated Vents Flaps To A PC”

Photo Booth In Briefcase Form

Taking portability one step further [Marty Enerson] built a photo booth in a roll-away case. The Pelican mobile case houses an Elo Touchscreen, a Canon PIXMA iP3000 photo printer, and a Canon Powershot SD100 digital camera. Most of this, including a Lenovo laptop to run it, was purchased second-hand from eBay, with a copy of Photoboof (different from the wedding photo booth from last week) to tie up the software side of the project. He plans to add a folding stand later on to make it into a kiosk.  For some reason that sparks the image of a voting booth in our minds.

Hackaday Links: October 3, 2010

Sugar rocket

We’re told that this rocket is sugar powered. It’s quite a bit bigger than the homemade sugar motors we saw last week and it makes for quite a show. [Thanks Estqwerty]

Wooden PC construction

The finished look of this wooden PC case seems very familiar to us but we’re not sure we’ve seen pictures of the build process(updated link, sorry [Jeff]) before. There’s something extremely satisfying about how well its creator works with a file. [Thanks Anders]

Working on top

We never realized that this job existed, but if you repair communication towers it’s a heck of a climb to work. The video of a two-man crew climbing a 1600 foot tower is one of the most interesting we’ve seen this year. [via Blogging Protagonist]

Lego typing machine

[Dougal’s] typing machine types his name… over and over again. An interesting little piece of mechanical engineering, we’d have to think for a while to decide the best use for this little guy. [Thanks Chris]

Typing on a different type of keyboard

Here’s another typing machine but this time it’s not a keyboard and not purely mechanical. Pictured is one of the performers in an old equipment ensemble performing with whining stepper motors, speech synthesis, an other antiquated noise-makers. [Thanks Mike]