Owen with his laser cutter

A Home Made Laser Cutter For $700

While some decent lasers are out there for under $400 USD, they tend to be a little small. What if you wanted something a little nicer but didn’t want to jump to the $2,000 category? The answer for [Owen Schafer] was to build it with parts he had lying around and a few strategic purchases.

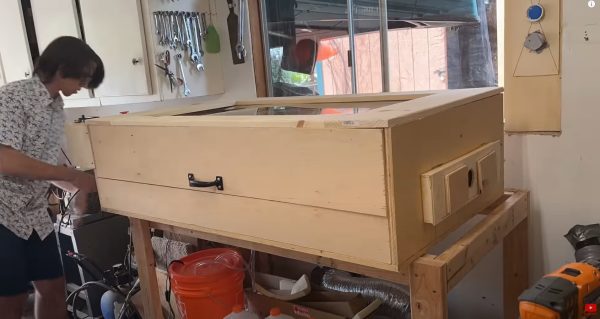
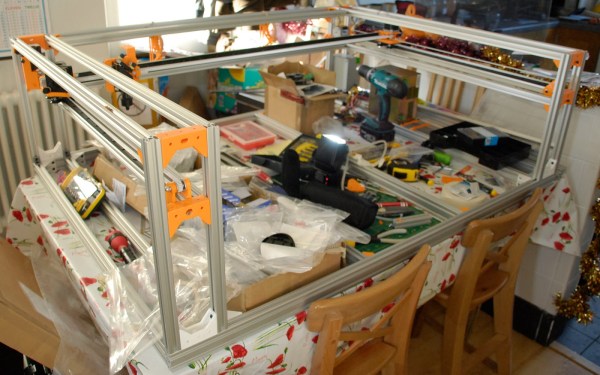
While he was initially planning on using a diode laser, doing anything more than engraving is tricky. He purchased a cheap 40 W CO2 laser tube, but it meant that he needed water cooling, mirrors, and more complex stuff that a diode doesn’t need. The frame is aluminum extrusion held together with 3D printed plates. Given there was a powerful laser bouncing around with mirrors, a plywood box formed the enclosure.

The stepper controller is an Arduino Mega running the Marlaser firmware, though [Owen] admits perhaps a laser cutter-specific driver board would have been better as he spent many hours trying to get the Arduino to do what he wanted. Air ventilation is a tube with a fan that vents out a nearby window. Water cooling is just a bucket of water with a pump in it. A simple nylon hose connected to a compressor with a maximum airflow valve provides an air assist while cutting. Finally, we’re happy to report that [Owen] bought safety glasses specific to his laser to protect his eyes and researched how to ground the high voltages generated.

We particularly loved seeing all of [Owen’s] test cuts. He proudly displayed his boxes, sharks, and lamp shades like anyone with their new laser cutter is wont to do. If you’re looking to upgrade your laser, there’s an add-on for detecting materials optically or a relatively cheap laser bed you can throw in your laser.

Continue reading “A Home Made Laser Cutter For $700”

Getting Kitted To Teach Your First Hardware Workshop

I was always a sucker for art classes in my early days. There was something special about getting personal instruction while having those raw materials in your hands at the same time. Maybe it was the patient voice of the teacher or the taste of the crayons that finally got to my head. Either way, I started thinking: “I want to do this; I want to teach this stuff.”

Last year at Hackaday Superconference I got my chance. Hardware workshops with real hardware were so rare; I just had to bring one to the table! What follows is my tale of joys and woes bringing together a crew to take their first few steps into the world of cable-driven animatronics. If you’re thinking about getting your feet wet with teaching your own hardware workshop, read on. I’ve packed this story with as much of my own learnings as I could to set you on a path to success.

The good news is that Supercon returns every year. I you want to take part in some epic workshops like this one, grab a ticket for this year’s conference now. If you want to host a hardware workshop, the Call for Proposals is still open! Okay, let’s dive in.

Continue reading “Getting Kitted To Teach Your First Hardware Workshop”

Tales Of Garage Design: Achieving Precision From Imprecise Parts

Designing parts to fit perfectly together is hard. Whether it’s the coarseness of our fabrication tools or the procedures of the vendor who makes our parts, parts are rarely the exact dimension that we wish they were. Sadly, this is the penalty that we pay by living in a real world: none of our procedures (or even our measurement tools!) are perfect. In a world of imperfect parts, imperfect procedures, and imperfect measurement techniques, how on earth are we supposed to build anything that works? Fortunately, we’re in luck! From the brooding minds of past engineers, comes a suite of design techniques that can combat the imperfections of living in an erroneous world.

Continue reading “Tales Of Garage Design: Achieving Precision From Imprecise Parts”

robot arm laser cutter

Robot Arm Wields Laser, Cares Not For Your Safety

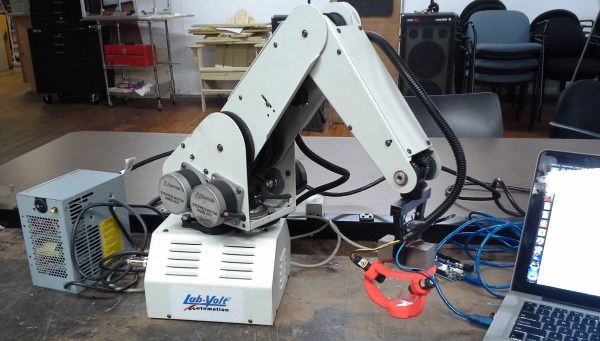
Here at Hackaday we’ve covered a bunch of DIY laser diode projects. And for good reason, they are just cool. We’ve seen people add lasers to their 3D printers, stick one in a milling machine, use a highly modified scanner and even build a simple XY gantry specifically for the task. To say the least there is definitely a wide range of methods for moving around a laser but we’ve never seen anything like what [Sp4rky] sent in to us. He and his friends outfitted an old educational robot arm with a laser.

The robot arm is a 5 axis Armdroid 5100 picked up from eBay for a couple hundred dollars. It didn’t come with a controller but all of the stepper drivers were housed in the base of the arm. After a little tinkering around with the inputs the team was able to get the arm to move by sending serial commands from a PC, through an Arduino Mega which then sends the appropriate signals to the uni-polar stepper drivers. That was the easy part of the build.

The hard part was getting the arm to hold the laser at a consistent angle and height above the table. Inverse Kinematics to the rescue! Since the desired position of the laser, as well as the length of the arm segments is known, mathematical formulas can be derived to determine the necessary arm segment and joint positions while moving the laser around. The process flow starts out with an image in Inkscape, g-code is then generated with this plugin, then sent to the Arduino running a modified version of GRBL that has the inverse kinematic formulas. The Arduino directly controls the stepper drivers and the robotic arm moves. The Arduino also controls 3 constant-current laser drivers made from LM317 regulators. Three laser drivers, why?

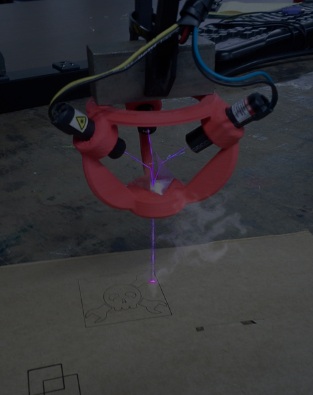
Triple Laser Robot[Sp4rky] got his laser diode modules out of surplus medical equipment and, unfortunately, the rated optical wattage was quite low. Since he had 3 diodes, he decided to try to combine the 3 low power beams into one high power beam. This can be done using a prism. A prism splits sunlight into a rainbow of colors because each wavelength(color) of light that passes through the prism is bent a different amount. Since the laser diodes only put out one wavelength of light, the beam bends but does not split or diffuse. A 3D printed bracket points each laser diode at a 3-sided pyramidal prism which sends the combined beam of light straight out the bottom towards the object to be cut or engraved.
This project is cool enough that we would have covered it even if [Sp4rky] wasn’t burning a Hackaday logo. Although it doesn’t hurt for anyone wanting their project to get covered!

Abandoned DIY Laser Cutter installed in Ikea Desk

Ikea Desk Laser Cutter Combo

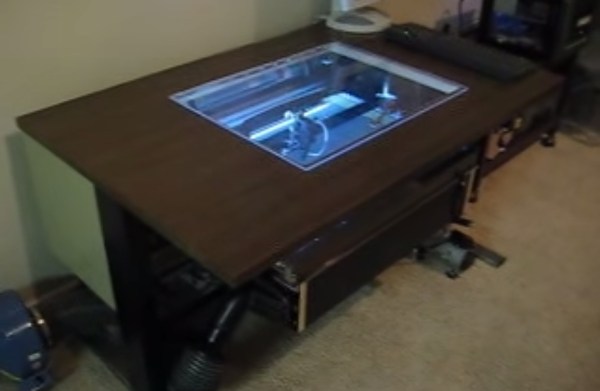
Craigslist can be a good source for finding someone else’s abandoned projects. Besides being extremely jealous, you’ll agree that [Mike’s] find is atypical of the normal Craigslist listings. He scored a 75% complete group of laser cutter parts for $500. That included the XY frame, stepper motors, Gecko motor drivers, optics, and 40 watt CO2 laser tube. He paired the laser parts with another Craigslist find, a $15 desk. A few more parts and 3 weeks of tinkering later, [Mike] had a working DIY mutant Ikea Desk Laser Cutter.

The laser cutter has a 23 x 14 inch work envelope and is controlled via Mach3. The X Axis of the frame had a little bit of wobble in it so [Mike] added a THK linear rail and bearing to stiffen it up. To add a little bit of mistake proofing to the laser, [Mike] put a water flow sensor in the laser tube cooling system. The laser will not turn on unless water is pumping to cool the laser tube. Wrecking your laser tube by accident would be a total bummer!

Continue reading “Ikea Desk Laser Cutter Combo”

AxCut: An Open Source Laser Cutter

If you’ve always wanted a laser cutter and you have £1500 lying around (approx. $2500 as of today) — and you have access to a 3D printer — then you’ll want to take a look at [Damian’s] open source laser cutter: axCut. The project has evolved over the last few months from some mockups in OpenSCAD to a working prototype.

You’ll want to dig through his blog posts as well as his YouTube channel for all the juicy details, but from what we can gather, [Damian] is on the home stretch. The current implementation includes a 40W CO2 laser with functioning laser control and an impressively quiet watercooling system. Although the build’s wiring remains a bit of a tangle, the prototype cuts (almost) as expected. His next hurdle is ironing out the air assist, which should prevent some fire hazard issues and keep the lens free of debris.

Check out a couple of videos after the break, and if you’re interested in getting into laser cutting but want to start smaller, have a look at the MicroSlice from a few months ago.

Continue reading “AxCut: An Open Source Laser Cutter”

Delta Laser Engraver Uses Inkscape For G-Code

lazer

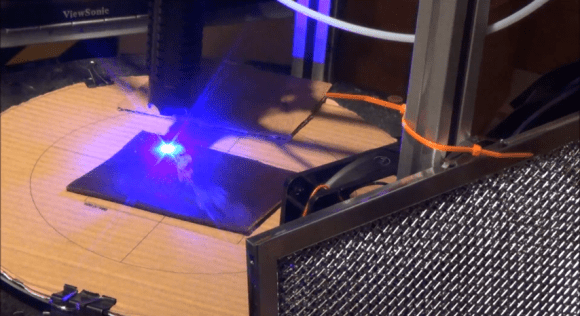
[Z LeHericy] has a SeeMe CNC Rostock Max 3D printer, and a 2W WickedLasers Spyder Artic blue laser. Naturally, he had to try strapping them together.

Most of our homemade laser engravers featured here use recycled DVD burner diodes, and while they certainly work, they leave a bit to be desired… Well, if you want more power, let us introduce the Class 4 Artic Spyder 2W blue laser from WickedLasers — a company that sells super high-powered lasers to anyone who can afford them — because that’s a great idea!

Safety concerns aside — wear your darn laser goggles! This pair can etch wood and leather quite well. He’s been using it to etch celtic knots onto pieces of leather. To do this he’s used Inkscape to convert a .BMP of the knot into a vector image, and then using the G-Code tools included with Inkscape he can create a tool path for the printer.

The finished leather looks awesome — Stick around after the break to see the laser in action!

Continue reading “Delta Laser Engraver Uses Inkscape For G-Code”