Porting Contiki To The TI MSP430 Launchpad

For many years Contiki has been one of the main choices when it came to choosing an IPv6 over Low power Wireless Personal Area Networks stack (aka 6LoWPAN). It is developed by a world-wide team of developers with contributions from Atmel, Cisco, ETH, etc… and is open source. As most platforms to which Contiki has been ported are quite expensive, [Marcus] decided to bring the operating system to the TI Launchpad. For our readers that don’t know, the latter is based on a msp430g2452/2553 microcontroller, which only have 256/512 bytes of RAM and 16kB of ROM. As a side note, Contiki typically requires 10k RAM and 30k ROM.

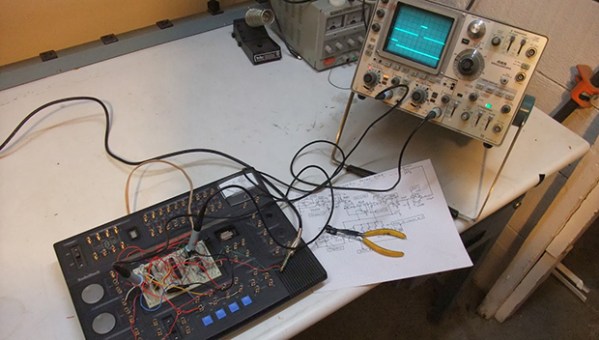
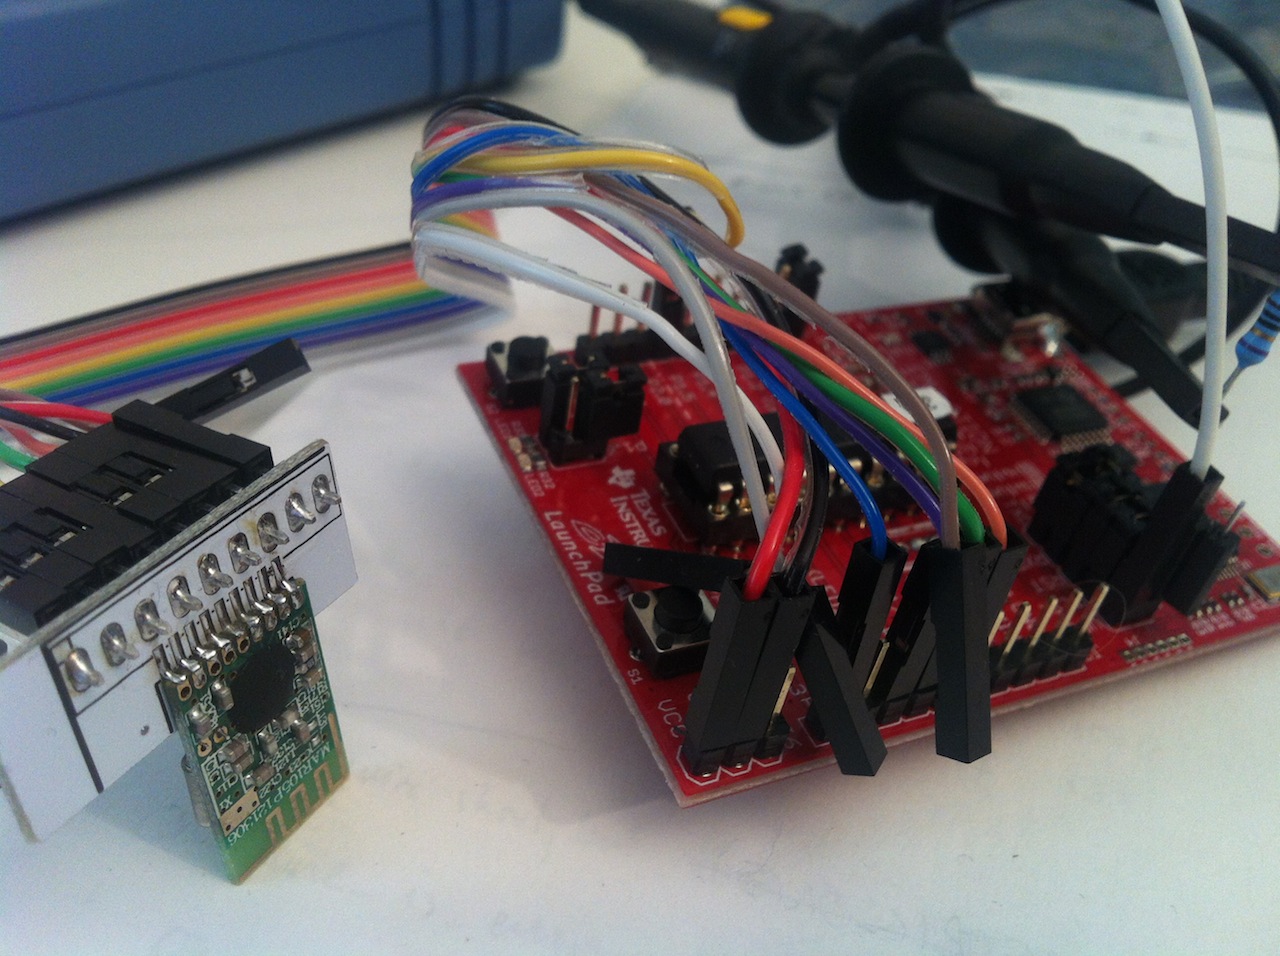
[Marcus] therefore had to remove several features from Contiki: queue-buffering, energy estimation and regrettably uIP. His test setup (shown above) uses the TI CC2500 radio that can be found for less than $2 on Aliexpress, for which he wrote radio drivers from scratch. He also coded his own radio duty-cicling layer, as the one included in Contiki was too big.

Paintball Pistol Turned Sniper Rifle

OBXP6G7

There’s a huge price discrepancy between paintball pistols and paintball sniper rifles. So the [Fresh-Prints-of-3D] decided to print himself an sniper upgrade kit.

He started with the classic Tippman 98 Custom pistol , which is a tried and true industry standard when it comes to reliable paintball guns. Using Sketchup he designed a side loading hopper adapter, a fixed stock, a magazine adapter, various brackets, and even a bipod fore-grip. He then printed the parts out at his local hackerspace; Innovatrix Labs, which is in Northeastern Pennsylvania. A Portabee 3D printer was used for some of the first prototypes but the final parts were all printed on a large MendleMax2 which has a build area large enough for the entire fixed stock!

The best part? He’s only been using SketchUp for a few months. Once the design and build is completely finalized he might release it under a CC license. 

It just goes to show that 3D printers are really breaking down various markets of overpriced plastic components — 3D printers only print trinkets? Pfft.

[Via Reddit]

Homemade Polariscope Is Super Easy To Make

polariscope

[Abhimanyu Kumar] was watching YouTube videos one day when he came across something called a Polariscope — After learning how it worked, he discovered you can make your own using household items!

First off, what is a Polariscope? Well, put simply, it is a device that can show you the photoelasticity of a clear specimen, which can reveal the stress distribution in the material! And it is actually really easy to make one.

All you need to build your own is:

  • A polarized light source (any modern LCD monitor)
  • A transparent specimen (plastic cutlery, glass statues, plastic you can bend, etc)
  • A circular polarizing filter (the cheap 3D glasses you didn’t return at the theater)

Then just place the objects in the order shown in the diagram and start snapping some photos. This would be really cool for checking stress concentrations in a project — provided you are using some Lexan or acrylic!

Controlling Cheap, Awesome Christmas Lights

LEDs

[James] was wandering around Walgreens after Christmas and found something very interesting – RGB LED Christmas lights that were individually addressable. At $6.50 for a strand of 15 lights, he just had to buy a few and figure out the control protocol. After all, who can turn down a big, cheap, controllable RGB LED strip?

The packaging for these lights – apparently manufactured by BriteStar – includes a ‘try me’ button that cycles through different light patterns. This button is what initially tipped [James] off to the fact the lights on this strand could be individually controllable. Opening up one of the lights, he found exactly what he wanted: an epoxy blob, two wires for power, and three wires for the signaling.

After checking out this light with a scope and logic analyzer, [James] realized there was a very, very simple protocol going on. Essentially, the entire string functioned as a gigantic shift register, taking the values for one light and pushing it down the string. In looking at the protocol, [James] also discovered] these lights support 16 levels of brightness. Yep, RGB LED Christmas Lights with PWM for under $7. Can’t beat that.

[James] wrote an Arduino library to control these strings and put it up on Github. While your local Walgreens has probably already hidden these lights away in the back of the store, it might be worth asking around to see if they have any left.

Retrotechtacular: Tube Amplifiers

retrotechtacular-how-tube-amps-work

It’s hard to beat this vintage reel for learning about how vacuum tube amplifiers work. It was put together by the US Army in 1963 (if we’re reading the MCMLXIII in the title slide correctly). If you have a basic understanding of electronics you’ll appreciate at least the first half of the video, but even the most learned of radio enthusiasts will find something of interest as they make their way through the 30-minute presentation.

The instruction begins with a description of how a carbon microphone works, how that is fed to a transformer, and then into the amplifier. The first stage of the tube amp is a voltage amplifier and you’ll get a very thorough demo of the input voltage swing and how that affects the output. We really like it that the reel discusses getting data from the tube manual, but also shows how to measure cut-off and saturation voltage for yourself. From there it’s off to the races with the different tube applications used to make class A, B, and C amplifiers. This quickly moves onto a discussion of the pros and cons of each amplifier type. See for yourself after the jump.

Continue reading “Retrotechtacular: Tube Amplifiers”

Delta Laser Engraver Uses Inkscape For G-Code

lazer

[Z LeHericy] has a SeeMe CNC Rostock Max 3D printer, and a 2W WickedLasers Spyder Artic blue laser. Naturally, he had to try strapping them together.

Most of our homemade laser engravers featured here use recycled DVD burner diodes, and while they certainly work, they leave a bit to be desired… Well, if you want more power, let us introduce the Class 4 Artic Spyder 2W blue laser from WickedLasers — a company that sells super high-powered lasers to anyone who can afford them — because that’s a great idea!

Safety concerns aside — wear your darn laser goggles! This pair can etch wood and leather quite well. He’s been using it to etch celtic knots onto pieces of leather. To do this he’s used Inkscape to convert a .BMP of the knot into a vector image, and then using the G-Code tools included with Inkscape he can create a tool path for the printer.

The finished leather looks awesome — Stick around after the break to see the laser in action!

Continue reading “Delta Laser Engraver Uses Inkscape For G-Code”

Acoustic Delay Line Memory

Back in the olden days  when computers were both analog and digital, making RAM was actually very hard. Without transistors, the only purely electronic means of building a memory system was vacuum tubes; It could have been done, but for any appreciable amount of RAM means an insane amount of tubes, power, and high failure rates.

One of the solutions for early RAM was something called a delay line. This device used ultrasonic transducers to send a pulse through a medium (usually mercury filled tubes heated to 40°C) and reads it out at the other end. The time between the pulse being sent and received is just enough to serve as a very large, small capacity RAM.

Heated tubes filled with hundreds of pounds of mercury isn’t something you’d want sitting around for a simple electronics project. You can, however, build one out of a Radio Shack Electronics Learning Lab, a speaker, and a microphone.

[Joe] designed his delay line using an op-amp to amplify the train of acoustic pulses traveling through the air. A compactor picks up these pulses and sends them into a flip-flop. A decade counter and oscillator provide the timing of the pulses and a way to put each bit in the delay line. When a button on the electronics lab is pressed, a ‘tick’ is sent into the speaker where it travels across [Joe]’s basement, into the microphone, and back into the circuit.

The entire setup is able to store ten bits of information in the air, with the data conveniently visualized on an oscilloscope. It’s not a practical way to store data in any way, shape, or form, but it is an interesting peek into the world before digital everything.

Video below.

Continue reading “Acoustic Delay Line Memory”