8-bit Computer Project Lands In A Philco Radio Case

We’ve enjoyed seeing the development progress of Veronica, [Quinn Dunki’s] 8-bit computer project. It started out on a breadboard, then moved to edge-connected PCBs, and now [Quinn] has given Veronica a body of her own.

The donor is a Philco Model 42-327T and was produced in 1942. It was chosen because it is non-functional and missing several pieces. We wonder about the collector’s value of the piece but since [Quinn] snagged it from eBay there can’t be in huge demand right now. The teardown images are priceless. There seems to be no reasoning behind component placement for the beast. It looks more like a junk drawer packed full of relic components than something that actually worked once upon a time.

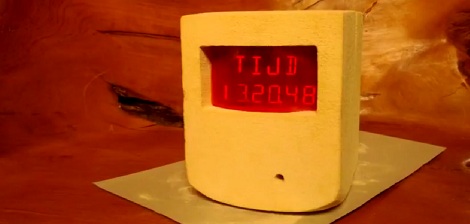
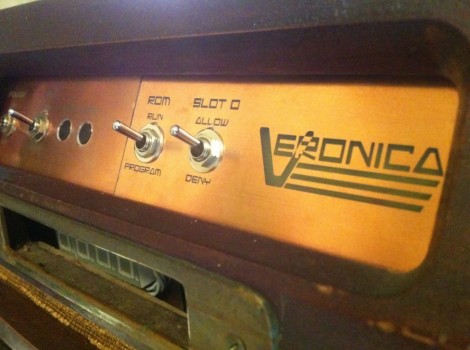
But we digress. After gutting the retro wooden case [Quinn] set out to fabricate her own face plate. Since she’s comfortable working with copper clad, she whipped up a negative design and etched the dashboard seen above. It mounts in the original dial opening, and hosts all of the controls she needs to work with the 8-bit computer. Just below is where the present buttons used to be located. You can just see the hexout display for reading data from the registers mounted in that void.

Laser Cutting Technique Makes Plywood Bendable

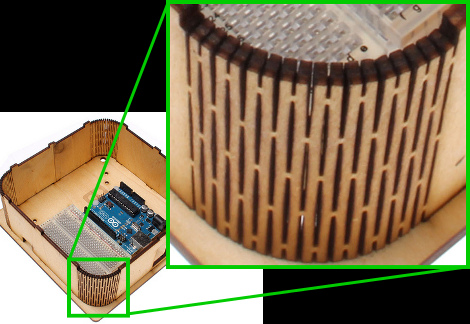
Here’s a laser cutting technique that makes thin plywood bendable. By cutting away elongated diamond shapes from the material, a lattice of strips connected minimally by alternating tabs is left over. The wood is then bendable, and it must be somewhat durable since the idea came from a product that uses the technique as a hinged notebook enclosure.

We don’t have much interest in it as an often used pivot point as surely it must be a problem with long-term use. But we love the look of it as a rounded corner on an enclosure like the Arduino project box seen above. The side walls are one continuous piece, with identical top and bottom sections which receive the alignment tabs. The whole thing is held together with just four bolt/washer/nut combinations.

But if you don’t have access to a laser cutter, we guess you’ll have to stick to altering pre-made enclosures for now.

Aluminum Bending Tutorial And A DIY Brake

What makes a project really exceptional? Part of it is a, ‘gee, that’s clever’ angle with a little bit of, ‘that’s actually possible.’ One thing the Hack a Day crew really appreciates is awesome enclosures. Altoids tins will get you far, but to step up to the big leagues you’ve got to bend some aluminum. Luckily, [Rupert] sent in a great tutorial on bending aluminum sheets for enclosures.

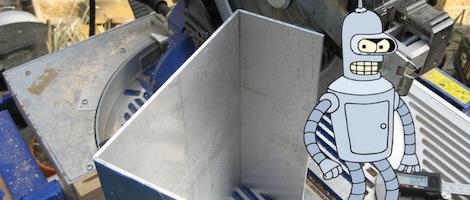
To make his press brake, [Rupert] scavenged a few pieces of 38mm bamboo worktop scraps. After assembling a few of these pieces with some hinges, he was ready to bend some aluminum.

One trick [Rupert] picked up is scoring the sheet metal on the inside of a future bend. For [Rupert]’s project, he sent his 3mm aluminum sheet through a table saw set to cut 1mm deep. Of course this should only be done with a blade designed for non-ferrous metals with as many carbide teeth as possible. Judging from [Rupert]’s homebuilt Hi-Fi that used this construction technique, the results are phenomenal.

Exterior-grade Electrical Box As Project Enclosure

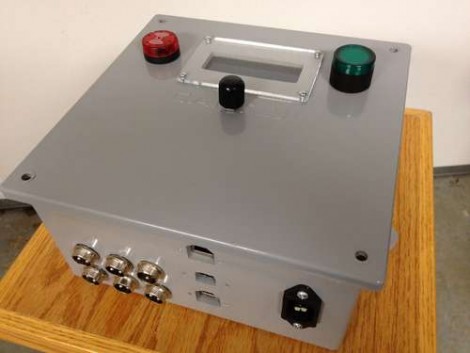
The quest for a project box is always a balance between cost, complexity, and style. We think [Pcmofo] really finds the mark with his exterior electrical box enclosures. He took the time to document his fabrication process for those that want to replicate his look.

These grey plastic boxes are meant to keep the elements away from home and commercial electrical systems. They’re easy to find and come in many different sizes (this one is 8″ square and 4″ deep). The plastic is very rigid, but still easy enough to work with simple tools.

[Pcmofo] starts by eyeballing the placement of his components. Once he has a good idea of where each should be located he grabs a caliper and uses Adobe Illustrator or Inkscape to design a template. This is attached with painter’s tape, and rough openings are made using a drill press. The holes are brought to the final size by hand using files for a nice finished edge. When it comes time to mount hardware, the plastic is strong enough to hold threads if you are careful when using the tap to cut them.

The example enclosure houses a temperature controller for fermenting beer. You can see some video of the enclosure embedded after the break.

Continue reading “Exterior-grade Electrical Box As Project Enclosure”

EagleUp Pulls Your PCBs Into SketchUp

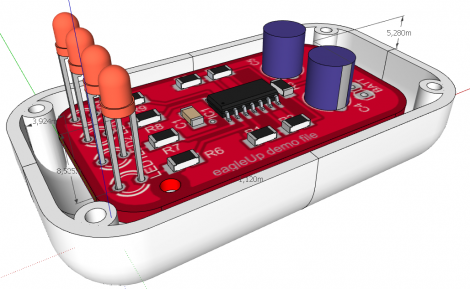
[Karl] wrote in to tell us about a software package called EagleUp that will import your Eagle CAD PCB designs into Google SketchUp. It bridges the gap between the two using the open source image processing software ImageMagick.

As you can see above, you’ll end up with a beautifully rendered 3D model of your hardware. This is a wonderful way to make sure that your enclosure designs are going to work without needing to wait for the PCBs to arrive from the fab house. It is available for Windows, OSX and Linux (although the last time we tried to run Sketchup under Wine nothing good came of it — perhaps it’s time to try again).

In [Karl’s] case, he’s working on an Arduino compatible board based around the Xmega. He mentions that EagleUp is a great way to get an idea of how component placement will end up, and to see if the silk screen layer is going to turn out well or not. Here’s a link to one of his test designs.

Hone Your Skills By Building Control Modules

If you ask us, there’s no substitute for learning by doing. But often the hardest part of acquiring new skills is coming up with the idea for a project that utilizes them. [Mike Rankin] wanted to develop a project using laser cut acrylic, and settled on building a control box for an RGB LED strip. He got some practice modeling objects in SolidWorks and seeing the process through to the final build. But it also let him explore an area of microcontroller programming in which he had little experience.

The LED strip he’s using depends on the HL1606. This is an SPI addressable chip that we see popping up in a lot of projects these days. It’s pretty simple to send red, green, and blue values through the data bus, and it allowed [Mike] to try his hand at programming menus and sub-menus. The controller takes input from a clickable rotary encoder. The settings are displayed on an OLED screen, with all the hardware nestled comfortably in his custom-cut enclosure.

Don’t miss the demo video embedded after the break.

Continue reading “Hone Your Skills By Building Control Modules”

Making The Case For Cool Project Enclosures

luna_mod_case

Quite often, we see project boxes that seem to be constructed more as an afterthought than anything else. That’s not to say there is anything wrong with stuffing your latest creation into a nondescript black box, or even cardboard if it happens to fit your needs. Sometimes however, an enclosure embodies the spirit of a project, making it all that much cooler.

[Adam] recently picked up a copy of Make magazine and decided to build their “Luna Mod”, a sound effects generator and looper based on a PICAXE-08M. Aside from the micro controller the Luna Mod includes a couple of pots, a switch, and a few LEDs – nothing incredibly striking. Once he had everything assembled on a strip of protoboard, he started working on his enclosure.

The enclosure is made from an old record, which after some trial and error, [Adam] got just right. The record was heated and cut, then bent into shape. While it’s not necessarily a hack, we think it looks pretty slick. It really fits the theme of the Luna Mod and is far more attractive than a plain plastic box.

Stick around to see his sound generator in action.

Continue reading “Making The Case For Cool Project Enclosures”