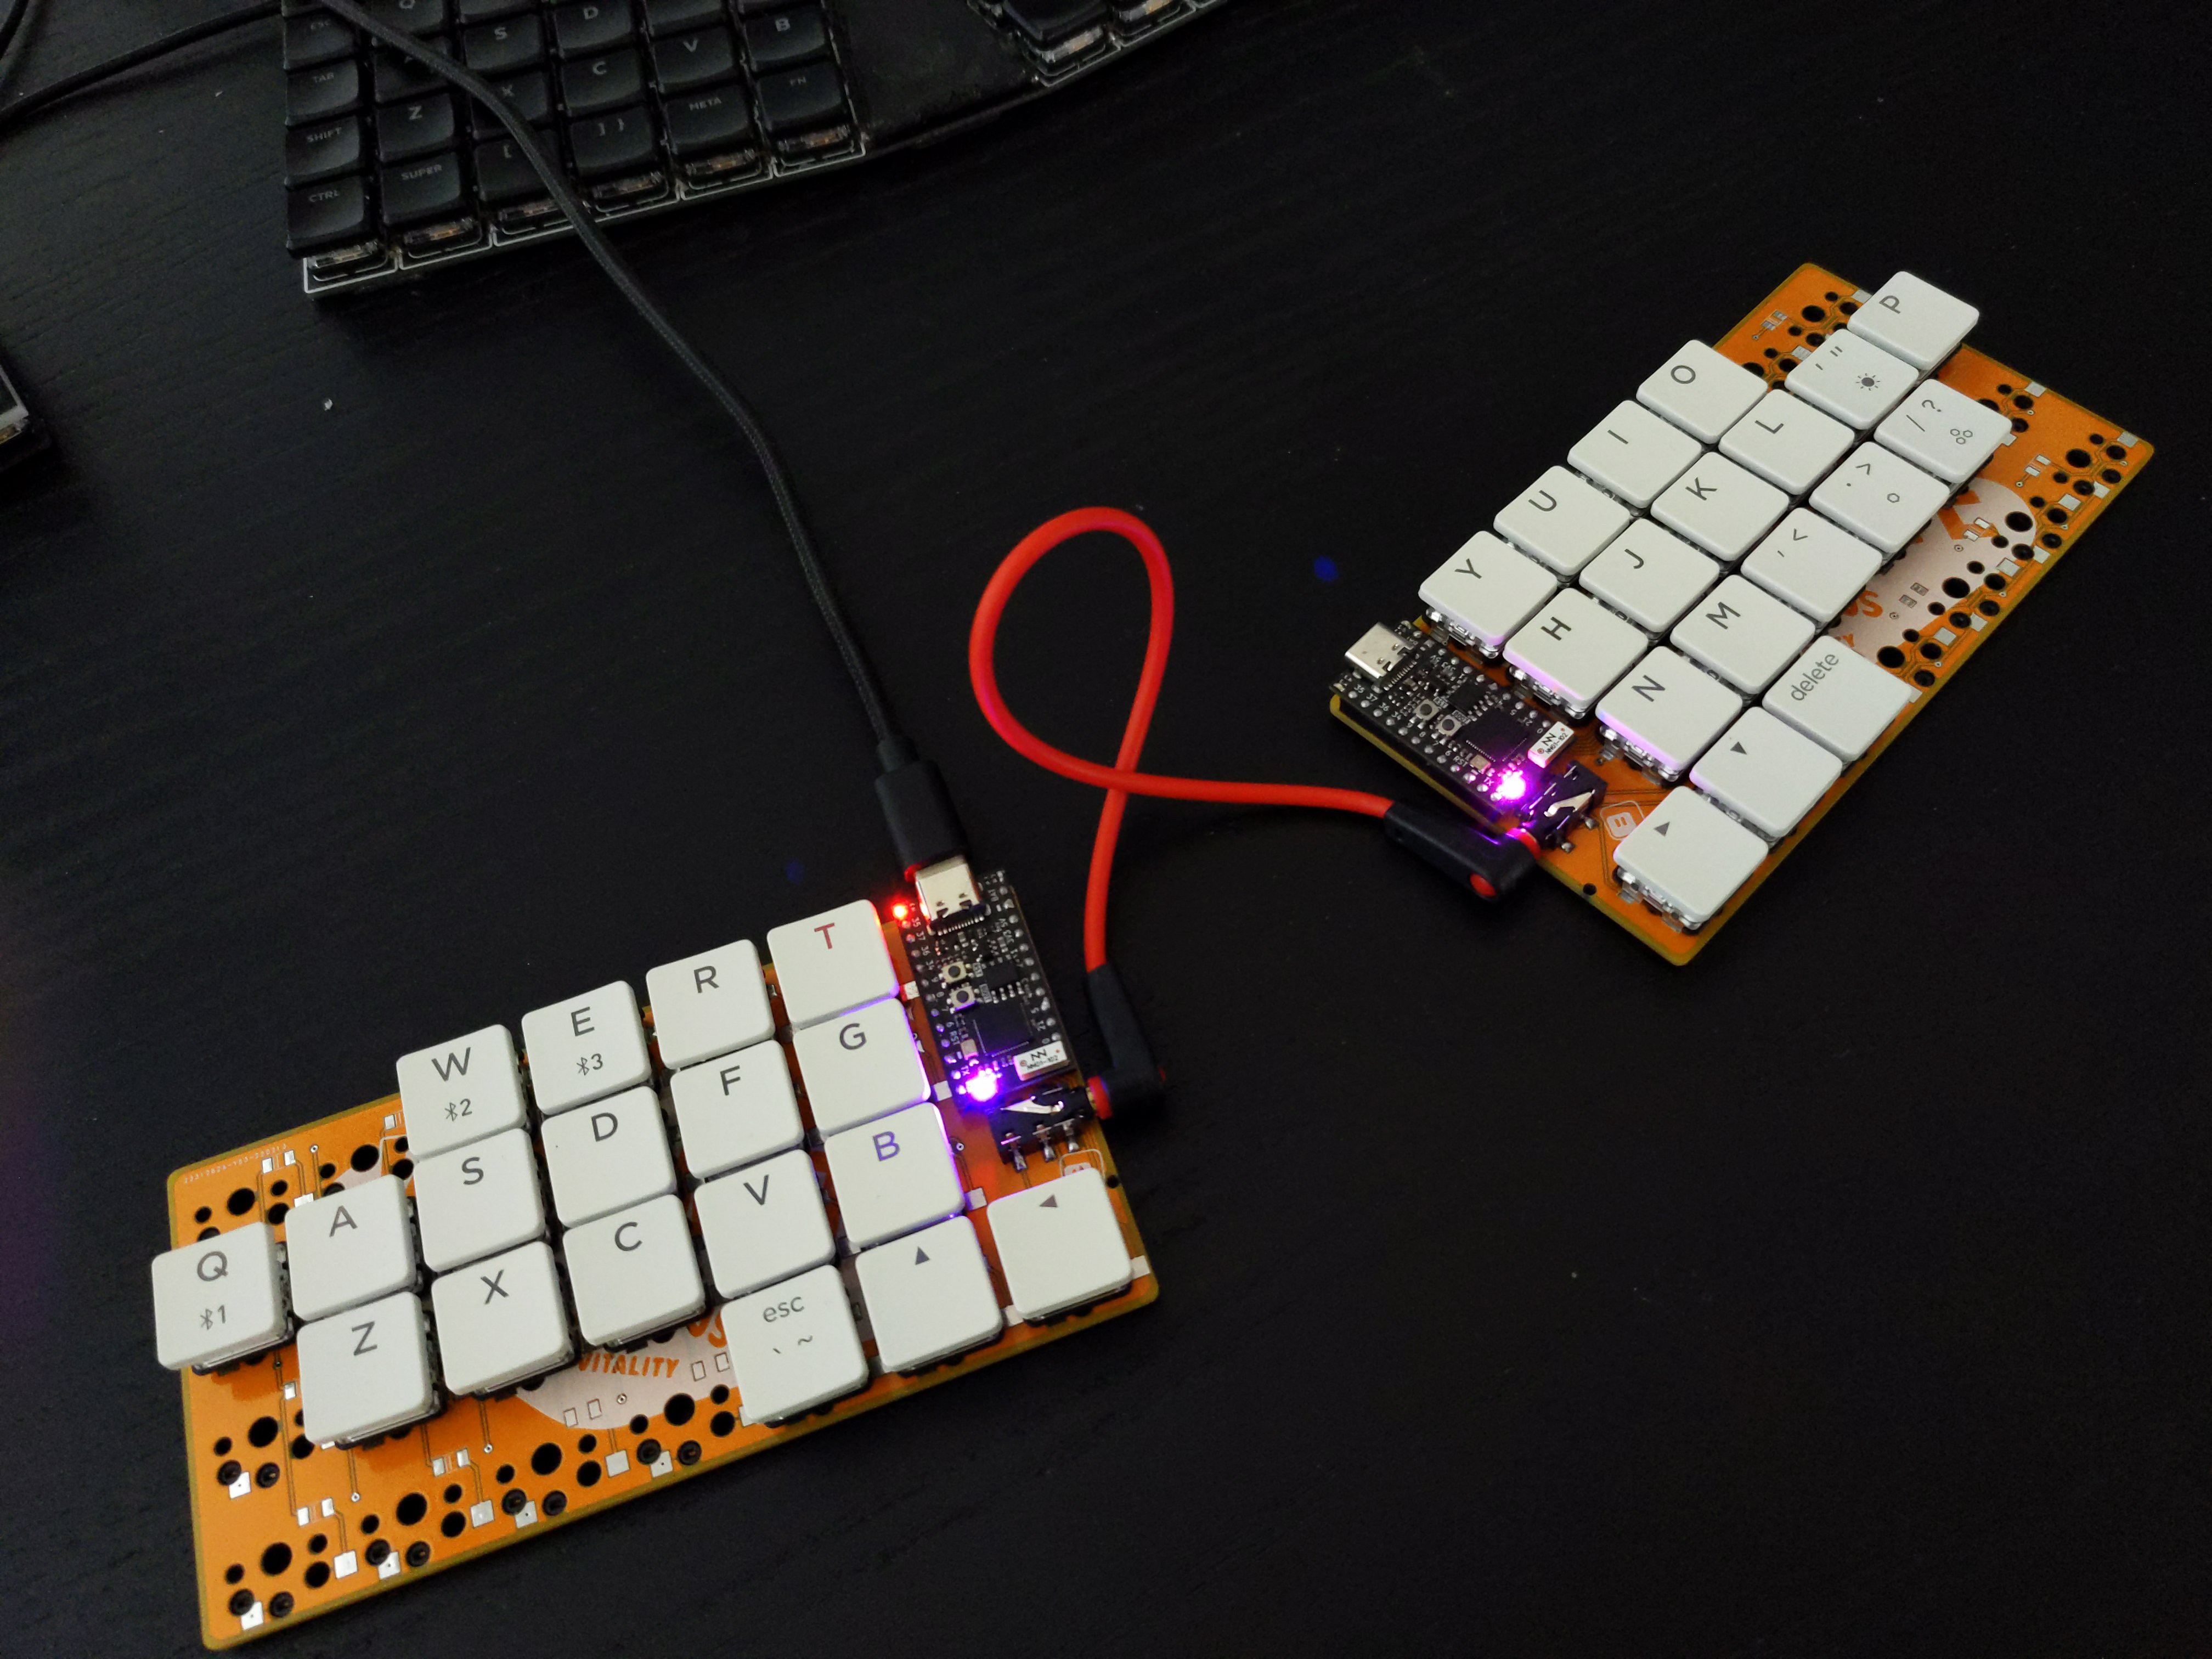
About a month ago, [Unexpected Maker] finished their TinyS3, an ESP32-S3 development board. Since the chip supports both true USB and Bluetooth, [deʃhipu] wondered how well it would work in a keyboard.
Thus, the Vegemite Sandwich was made, perhaps while [deʃhipu] was dreaming of traveling in a fried-out Kombi. But really, it was named so because [Unexpected Maker] hails from Australia.
This is [deʃhipu]’s first time using switch sockets, which is (as far as we know) the only choice when it comes to hot-swappable Kailh chocs. We’ll be watching this one with hungry eyes.
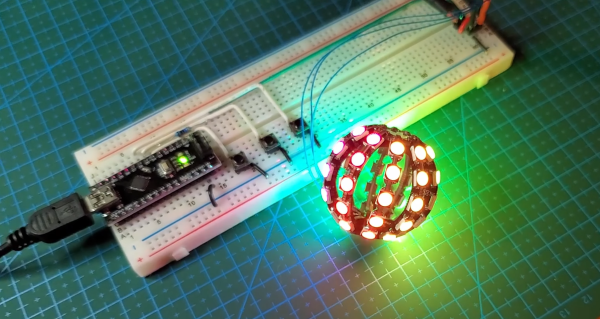
Yes, circuit sculptures are amazing. But the patience and skill required puts most of the designs we’ve seen fairly far out of reach of the average beginner. We totally understand — not everyone finds fun in fiddly, structural soldering.
This SMD LED ball is almost ready for prime time. [Hari] wants this to be accessible for everyone and completely parametric, so he’s still working out the kinks. Check out the current form after the break as [Hari] rolls the ball through the various display modes using an Arduino and talks about the failures along the way, like having to file out the LED slots because they were designed too tightly the first time. [Hari] is also working on the friction fit of the pieces so the ball is easier to assemble, especially at the beginning.
Rotary encoders are critical to many applications, even at the hobbyist level. While considering his own rotary encoding needs for upcoming projects, it occurred to [Jan Mrázek] to try making his own DIY capacitive rotary encoder. If successful, such an encoder could be cheap and very fast; it could also in part be made directly on a PCB.
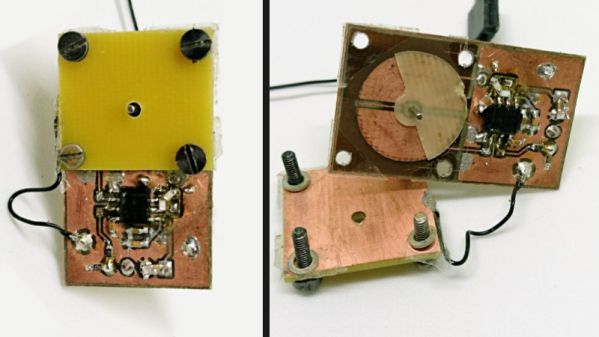
First prototype, two etched plates with transparent tape as dielectric material. Disc is 15 mm in diameter.
The encoder design [Jan] settled on was to make a simple adjustable plate capacitor using PCB elements with transparent tape as the dielectric material. This was used as the timing element for a 555 timer in astable mode. A 555 in this configuration therefore generates a square wave that changes in proportion to how much the plates in the simple capacitor overlap. Turn the plate, and the square wave’s period changes in response. Response time would be fast, and a 555 and some PCB space is certainly cheap materials-wise.
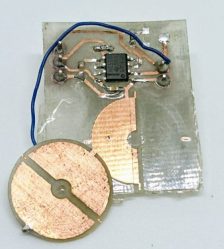
The first prototype gave positive results but had a lot of problems, including noise and possibly a sensitivity to temperature and humidity. The second attempt refined the design and had much better results, with an ESP32 reliably reading 140 discrete positions at a rate of 100 kHz. It seems that there is a tradeoff between resolution and speed; lowering the rate allows more positions to be reliably detected. There are still issues, but ultimately [Jan] feels that high-speed capacitive encoders requiring little more than some PCB real estate and some 555s are probably feasible.
Over on Hackaday.io, [bobricius] took this technology and designed something great. It’s a GSM cell phone with a case made out of FR4. It’s beautiful, and if you’re ever in need of a beautifully crafted burner phone, this is the one to build.
The components, libraries, and toolchains to build a cellphone from scratch have been around for a very long time. Several years ago, the MIT Media Lab prototyped a very simple cellphone on a single piece of FR4. It made calls, but not much else. It was ugly, but it worked. [Bobricius] took the idea and ran with it.

 About a month ago, [Unexpected Maker] finished their TinyS3, an ESP32-S3 development board. Since the chip supports both true USB and Bluetooth, [deʃhipu] wondered how well it would work in a keyboard.