Wooden Machine Belongs In Willy Wonka’s Factory

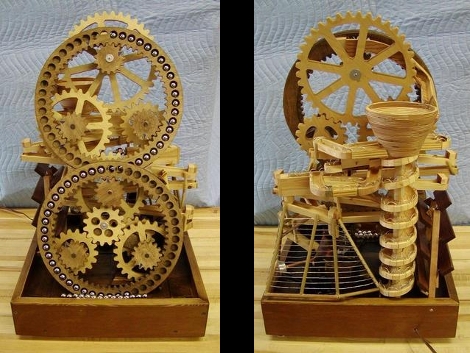
Behold the wooden machine (translated) that is used for… well it does… it was built because… Okay, this is a case where asking what it does or why it was built is the wrong question. [Erich Schatt] began building the piece that he calls “Wheels” back in 1995. It took just seven years to complete, and is made entirely of wood. The video after the break shows a multitude of moving parts.

The chains were modeled after bicycle chains, which are used to transfer motion from the “rider” throughout the machine. The gearing for each segment was meticulously calculated, then perfected through trial and error. The complexity even calls for a differential and universal joints. It’s mesmerizing to watch and for that reason it’s made appearances at conventions and been featured in art exhibitions.

It’s also worth mentioning that this comes from a very humble-looking shop. [Erich] posted some pictures of his studio and aside from the abundance of bar clamps, it’s just your average garage or basement setup.

Continue reading “Wooden Machine Belongs In Willy Wonka’s Factory”

Mechanical Engineering Primer

So you’re master of electrons; able to program multiple chip architectures without batting an eye. Good for you. The only problem is that blinking LEDs gets boring after a while and you’re going to want to do something else. Here’s a chance to expand on your physical construction skills. Make: Skill Set is sharing the first chapter from the book Making Things Move by [Dustyn Roberts].

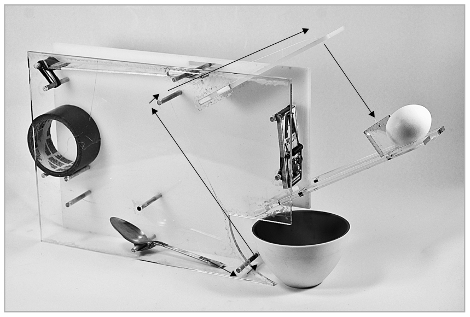
This chapter, which comes in PDF form, covers simple machines. It’ll guide you through the three different types of levers, including examples of how you use these in your everyday life. Next it’s on to pulley systems, wheels and axles, inclined planes and wedges, screws, and gears. [Dustyn] rounds out the chapter by talking about how these concepts are combined into machines like the Rube-Goldberg device seen above. Take some time to look this chapter over and then put it on the holds list from your public library if you’re interested in reading more.

5/8″ Ball Bearing Playground

This kinetic sculpture is a ball bearing’s paradise. Not only do they get a cushy ride around two lift wheels but there’s a variety of enjoyable obstacles they can go down. The first is a vortex made from a wooden flower pot which sends the balls randomly down one of two possible exits. From there it’s on to enjoy a ride on a flip-flop, a divide-by-three (takes weight of three marbles before it dumps them all), a zig-zag track, or a divide by twelve mechanism. We’re sure this is a riveting read, but don’t miss the video after the break where [Ronald Walter] shows it in action and takes it apart to illustrate the various features.

If you’re wondering about the digital logic terms used, we’ve seen wooden devices that use these concepts in the past.

Continue reading “5/8″ Ball Bearing Playground”

Breathing Motion Powered USB Charger

When your batteries run low you can use your body to recharge them. This contraption generates power from chest expansion while breathing. [Jmengel] used some gears from old optical drives to boost the RPM generated by a belt around your torso that he calls a thorax expansion coupler. When you breath in, that belt pulls on a plate that spins the gears, ultimately rotating a small motor. The AC current generated by that motor is run through a rectifier and a boost converter, then fed to a charging circuit.

Does it work? Not really, as this only outputs around 50 mW. But we like the twinge of Dune nostalgia we get looking at it. Wouldn’t this be a perfect addition to a stillsuit?

Gear Indicator For Suzuki Motorcycle

This little board serves as a current gear indicator for a motorcycle. It was designed with the Suzuki V-Storm motorcycles in mind as they have a sensor built into the gearbox. Other gear indicators rely on sensors on the shifters themselves, but reading the voltage level from a gearbox sensor gives much more reliable information.

The voltage measurement is handled by an ATmega88 microcontroller which in turn drives the 8×8 LED display. Also built into the system is a temperature sensor and photoresistor. The firmware takes advantage of both of these inputs, displaying temperature when in sixth gear or at the push of a button, and dimming the display based on ambient light. There are also settings for screen rotation, and user preferences.

We didn’t find schematics or software but this should be pretty easy to replicate. If you need a primer for AVR programming we’ve got you covered.

[Thanks Michal]

How To Design Your Gears

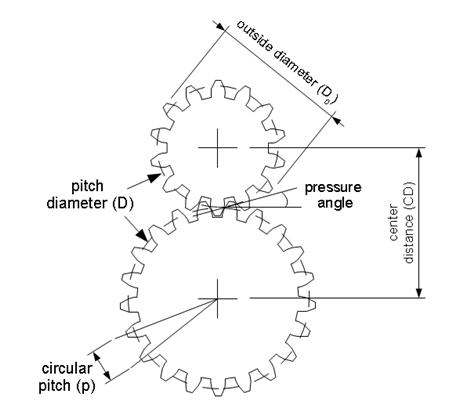
[Dustyn Roberts] takes us through the process of designing gears for a specific application. Using Inkscape and Ponoko.com [Dustyn] takes us from equation to physical gear. While there is a plugin for Inkscape that allows you to basically drag and drop gears, this writeup will take you through the math to get exactly what you need. Those laser cut wooden gears are pretty cool looking too.

Motorcycle Current Gear Indicator

[Vassilis Papanikolaou] just finished building a gear indicator for a motorcycle. This quite a simple implementation compared to some of the other vehicle information displays we’ve taken a look at. You should be able to build and install your own without breaking the bank. An ATtiny25 microcontroller reads data from a couple of hall effect sensors and the neutral switch, then displays the current gear on a 7-segment display.

There’s a magnet on the shifter and two hall effect sensors at the position for ‘gear up’ and ‘gear down’ shifting. The AVR chip keeps track of these and even stores the last position in EEPROM when you shut the bike off. If the device somehow gets off track, it will automatically recalibrate itself next time you shift into neutral, thanks to the bike’s neutral sensor switch.