Hacklet 26 – Arduino Projects

Arduino is one of those boards that has become synonymous with hacking and making. Since its introduction in 2005, over 700,000 official Arduino boards have been sold, along with untold millions of compatible and clone boards. Hackers and makers around the world have found the Arduino platform a cheap and simple way to get their projects off the ground. This weeks Hacket focuses on some of the best Arduino based projects we’ve found on Hackday.io!
drawingbot[Niazangels] gets the ball – or ballpoint pen – rolling with Roboartist, a robot which creates line drawings. Roboartist is more than just a plotter though. [Niazangels] created a custom PC program which creates line drawings from images captured by a webcam. The line drawings are converted to coordinates, and sent to an Arduino, which controls all the motors that move the pen. [Niazangels] went with Dynamixel closed loop servo motors rather than the stepper motors we often see in 3D printers.
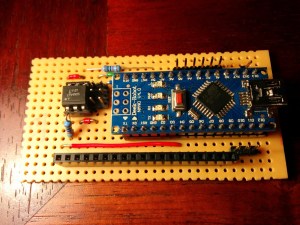
tape[Peter Edwards] is preserving the past with Tapuino, the $20 C64 Tape Emulator. Plenty of programs for the Commodore 64, 128, and compatibles were only distributed on tape. Those tapes are slowly degrading, though the classic Commodore herdware is still going strong. Tapuino preserves those tapes by using an Arduino nano to play the files from an SD card into the original Datasette interface. [Peter] also plans to add recording functionality to the Tapuino, which will make it the total package for preserving  your data. All that’s missing is that satisfying clunk when pressing the mechanical Play button!

infinity

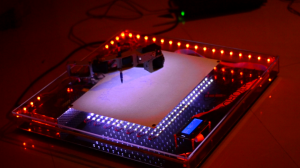
[Dushyant Ahuja] knows what time it is, thanks to his Infinity Mirror Clock. This clock tells time with the help of some WS2812B RGB LED. [Dushyant] debugged the clock with a regular Arduino, but when it came time to finish the project, he used an ATmega328 to create an Arduino compatible board from scratch. Programming is easy with an on-board Bluetooth module. [Dushyant] plans to add a TFT lcd which will show weather and other information when those power-hungry LEDs are switched off.
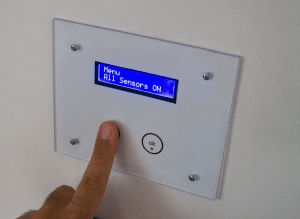
alarm2[IngGaro] built an entire home alarm system with his project Arduino anti-theft alarm shield. [IngGaro] needed an alarm system for his home. That’s a lot to ask of a standard ATmega328p powered Arduino Uno. However, the extra I/O lines available on an Arduino Mega2560 were just what the doctor ordered. [IngGaro] performed some amazing point-to-point perfboard wiring to produce a custom shield that looks and works great! The alarm can interface with just about any sensor, and can be controlled via the internet. You can even disarm the system through an RFID keycard.

Want MORE Arduino in your life? Check out our curated Arduino List!

That’s about all the millis()  we have for this weeks Hacklet. As always, see you next week. Same hack time, same hack channel, bringing you the best of Hackaday.io!

Hacklet 22 – Retro Console Projects

Everyone loves arcade games, and it didn’t take long for designers to figure out that people would love to take the fun home. The home gaming console market has been around for decades. Through the early days of battery-powered pong style consoles through Atari and the video game crash of the early 80’s, to the late 8 and 16 bit era spearheaded by The Nintendo Entertainment System and The Sega Master System and beyond, consoles have become a staple of the hacker home. This week’s Hacklet features some of the best retro console projects from Hackaday.io!

52001We start with [ThunderSqueak] saving the world with her Atari 5200 Custom Controller Build. For those who don’t know, the Atari 5200 “Super System” was an 8 bit system ahead of its time. The 5200 was also saddled with on of the worst controller designs ever. The buttons would stop responding after a few hours of game play. With 17 buttons, (including a full number pad), that was a pretty major design flaw! [ThunderSqueak] hacked a cheap commercial fighting game stick to make it work with the 5200. 12 individual buttons were wired in a matrix to replace the telephone style keys on the original 5200 controller. Atari’s non-centering analog stick was converted over to a standard 4 switch arcade style stick. [ThunderSqueak] did leave the original pots accessible in the bottom of the enclosure for centering adjustments. Many 5200 games work great with the new setup.


snes[DackR] is bringing back the glory days of Nintendo with Super Famicade, a homebrew 4 SNES arcade system inspired by Nintendo’s Super System. Nintendo’s original Super System played several customized versions of games which were available on the Super Nintendo Entertainment System (SNES). [DackR] is building his own with parts from four SNES consoles. He’s also adding a few features, like a touch screen, video overlay, and enhanced RGB.

He’s going to add custom memory monitoring hardware, which will allow him to check how many lives a player has left and handle coin operation, all without the original Super System Hardware. If you’re curious what the original Super Systems looked like, check out Hackaday’s Tokyo Speedrun video.You might just catch a glimpse of one!

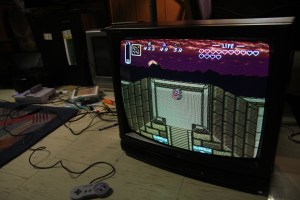
rgb[Bentendo64] is improving on the past with RGB For ‘Murica. European systems have enjoyed the higher quality afforded by separate red, green and blue video lines for decades. North American gamers, however were stuck in the composite or S-Video realm until shortly before the HDTV age. [Bentendo64] had an old hotel CRT based monitor, and decided to hack an RGB input. After opening up the back of the set, he removed the yolk board and added direct inputs to the video amplifiers. We’re not sure if this mod will work with every CRT, but it can’t hurt to try! Just be sure to discharge those high voltage capacitors before wrenching on these old video systems. Even if a set has been unplugged for days, the caps can give a seriously painful (and dangerous) shock!

snes2[Ingo S] is also working to improve the SNES with SNES AmbiPak, a mod which brings ambient lighting and “rumble pack” controller feedback to the vintage Super Nintendo. [Ingo S] used the popular SNES9X emulator to figure out where game data is stored while the SNES is running. His proof of concept was the original F-ZERO SNES game. [Ingo S] found that Every time the player’s car hits the wall, the system would perform a write on address 3E:0C23. All he would need to do is monitor that address on the real hardware, and rumble the controller on a write. The real hardware proved to be a bit harder to work with though. Even these “slow” vintage systems clock their ram at around 3MHz, way too fast for an Arduino to catch a bus access.  [Ingo S] is solving that problem with a Xilinx XC9572 Complex Programmable Logic Device (CPLD). CPLDs can be thought of as little brothers to Field Programmable Gate Arras (FPGAs). Even though they generally have less “room” for logic inside, CPLDs run plenty fast for decoding memory addresses.  With this change, [Ingo S] is back on track to building his SNES rumble pack!

It feels like we just got started – but we’re already out of space for this week’s Hacklet! As always, see you next week. Same hack time, same hack channel, bringing you the best of Hackaday.io!

The Inaugural Hackaday.io Meetup

hackaday-meetup-banner

Last Monday we held our very first Hackaday Projects Meetup at the Congregation Ale House in Pasadena, CA. We knew there were a lot of Hackaday.io members in the area and figured a meetup is a great excuse for them to meet each other.

The turn out was surprisingly good, with a wide variety of makers and hackers. People I met included aerospace engineers, embedded device developers, 3d printer inventors, and web developers. About thirty Hackaday readers turned up along with some newbies and a merry few hours of drinking beer, exchanging tales, poking at blinky things and admiring 3d printers ensued.

Continue reading “The Inaugural Hackaday.io Meetup”

20,000 Hackers

20k-hackers

What a pleasant thing to wake up and realize that we now have more than 20,000 Hackers on Hackaday.io. It wasn’t even two months ago that we celebrated passing the 10k mark. While we’re talking numbers, how about 2,075 projects, and 148 hackerspaces?

But what’s in a number? It’s what this stands for that really gets us excited! You took the leap and decided to show off what you’re working on while you’re still working on it. This is the key to pollinating ideas. One concept can result in many awesome spin-off projects. So if you haven’t yet written about that killer idea bouncing around in your head, do it now and be the inspiration for the next iteration of amazing hacks.

Much more to come

Our crew has been refining an overhaul of how the feed works to make it easier to know when and how your favorite hackers are updating their builds. You should see that functionality live in August. We’re also working on improving interactivity so that you can better find others with similar interests whether it’s just for casual conversation or to undertake an epic build as a team.

We’re certainly not above pointing out our own weaknesses. The Stack never took off. The idea seemed like a good one, but we need your help figuring out how to make it shine. Leave a comment below telling us what you think The Stack should be and how you think it should work.

Thumbnail that say The Hacklet

The Hacklet #7 – MIDI

7

This week’s Hacklet is all about Hackaday.io projects which use MIDI, or Musical Instrument Digital Interface for the uninitiated. MIDI was designed from the ground up as an open communications standard for musical instruments. Nearly every major instrument company participated in the design of the standard. MIDI was first demonstrated in January of 1983, with the communications standard document following in August. Hackers, makers, and musicians immediately ran with it, using MIDI to do things the designers never dreamed of.

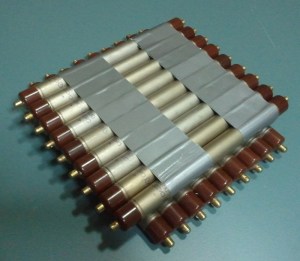
SAMSUNG[Robert’s] 9×9 Pixel Muon Detector/Hodoscope  is a great example of this. [Robert] is using 18 Geiger Muller Tubes to detect cosmic particles, specifically muons. The tubes are stacked in two rows which allows him to use coincidence detection. Rather than just plot some graphs or calculate impact probabilities, [Robert] hacked a Korg Nanokey 2 MIDI controller to output MIDI over USB messages corresponding to the detected muons. Check out his video to see a sample of the music of the universe!


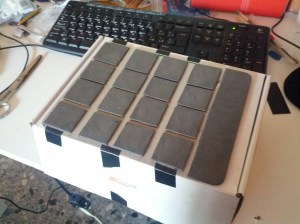
diyMPCNext up is [Michele’s] DIY MPC style MIDI controller. [Michele] needed a simple low-cost drum controller that wouldn’t wake his neighbors. He loved Akai MPC controllers, so he rolled his own. [Michele] investigated force sensitive resistors but found they were very expensive. At a cost of $8 USD each, his resistors alone would be nearly the cost of a low-end MPC!  [Michele] created his own sensitive pads using a sandwich of copper tape and 3M Velostat conductive sheets. An HCF4067 routes all the analog lines to a single pin of Teensy 3.0, which then converts the analog resistor outputs to MIDI messages.

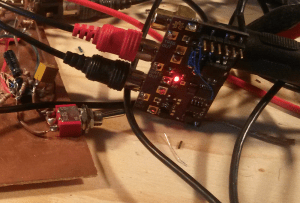
pic-midi-1vo[Johan] loves his analog synths, and wanted them to be able to talk MIDI too. He built MIDI2VC, a circuit which converts MIDI to 1V/Octave (similar to  CV/Gate). 1V/Octave is an analog control system used in some early synthesizers, as well as many modern analog creations. Pitches are assigned voltages, and as the name implies, each octave is 1 volt. A4 on the keyboard is represented by 4 volts, while A5 is 5 volts. [Johan] used a Microchip PIC16LF1823 to receive and convert the MIDI signals. The PIC outputs I2C data to an MCP4725 DAC which drives the analog side of the house.

eldanceLong before DMX512 came on the scene, hackers were controlling lights via MIDI. [Artis] continues this with El Dance, a wireless system for controlling electroluminescent wire worn by dancers. Similar in function to  [Akiba’s] EL wire system, [Artis] took a lower cost route and used the venerable NRF24L01 radio module. He added an antenna which gives the modules a range of about 30 meters. The computer running the dance routine’s music sees the transmitter side of the link as a MIDI instrument. Standard note on and off commands activate the EL wire strings.

midi-vibeOur final hack comes from [Jen] who built a MIDI Vibrator Inductor Synth. [Jen] performs in an experimental music band called My Wife, with instruments as varied as violins and sewing machines. [Jen] must be a fan of Van Halen’s Poundcake as she’s using a similar technique, with a MIDI twist. An Arduino converts MIDI notes to analog values, which are sent to a motor controller board. The motor controller uses PWM to drive a vibrator motor at the frequency of the note being played. Like all DC motors, the vibrator puts out a ton of electromagnetic noise, which is easily picked up by [Jen’s] electric bass.

That’s it for this week’s Hacklet! Tune in next week for more projects from Hackday.io!


Hacklet #5 – Hackerspaces And DIY Laptops

sector67

Did you know that Hackaday.io has a hackerspace index? That’s right, you can enter your local hackerspace’s info, pictures, videos, and social media links. Members and crew can link their hackaday.io profiles and drop comments about their latest projects.

The map up at the top of the hackerspace index’s page is interactive too – zoom in on your country and local area to see any spaces nearby. It’s like one-stop shopping for awesome. Well, except that this awesome is free.

It really is great to see all the pictures of spaces large and small. Some of the most stunning shots are from c-base, in Berlin, Germany. Founded in 1995, the c-base crew have created an incredible space. Take a look at the workstation in the photo. Is it Steampunk? Matrix-punk? Heck no, that’s 100% c-base.

c-base


Do It Yourself Laptops

You don’t have to be Bunnie Huang to build your own laptop. All it takes is some time, ingenuity,and a good hot glue gun.

opentech-laptop

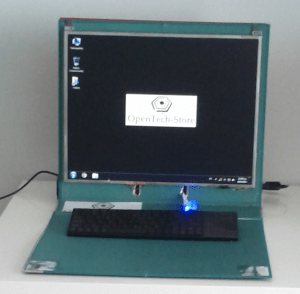
Our first laptop is actually inspired by Bunnie’s Novena. The OpenTech-Laptop uses two binders as it’s shell, but inside hides some decent computing power. [OpenTech] used a miniITX motherboard with an ATOM N2800 CPU. The screen came from an old laptop (long live matte 4:3 screens!) [OpenTech] even hand wired a Low Voltage Differential Signaling (LVDS) cable so the motherboard can push those pixels. A wireless keyboard, hard drive, and speakers round out the build. [OpenTech] is still looking for a portable power solution.Why not follow Bunnie’s lead and grab some R/C Plane LiPo batteries, [OpenTech]?

minibsd

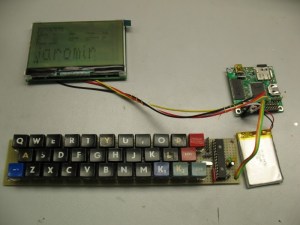
Next up is a MiniBSD laptop computer created by [Jaromir]. MiniBSD is based on RetroBSD, a PIC32 based BSD single board computer. Rather than use a premade platform like the Fubarino, [Jaromir] laid out his own board with everything he wanted – a microSD socket, SDRAM, real-time clock, and all the trimmings. He then added a graphical LCD, a LiPo battery, and a sweet retro keyboard from an old Czech computer company called Tesla. [Jaromir’s] next task is a 3D printed case. The only problem is the case is 2cm wider than his current printer’s bed!

http://hackaday.io/project/1559-Laptop-pi

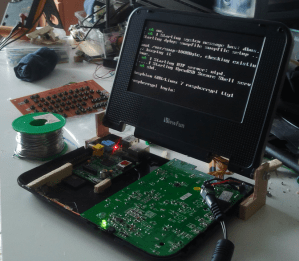
You didn’t think we’d leave the Raspberry Pi out, now did you? Laptop-pi is [Bram’s] project to convert an old DVD player (remember those?) into a Pi Laptop. Not only did [Bram] build a QWERTY keyboard from scratch on perfboard, he also hacked together an on-screen keyboard so he can type with just a D-pad. He’s currently fighting with a dodgy audio amp, but we’re sure that’s just a temporary setback. We think Laptop-pi will be a killer portable for retro gaming!


That’s it for this week’s Hacklet, stay tuned for next week when we bring you more of what’s happening at Hackaday.io!
Thumbnail that say The Hacklet

Hacklet #4 — PCB Tools And Wristwatches

4

The Hackaday Prize is heating up! When we set up the prize, we expected to see some incredible entries, and you guys haven’t let us down. Projects like SatNOGS, which aims to create a global network of satellite ground stations, or OpenMV, a low-cost Python powered vision module, are seriously blowing us away.

We’re starting to give away some prizes through community voting and there’s still plenty of time for you to enter. Check out The Hackaday Prize page for the full details.

Low Cost Printed Circuit Board Tools

Pick and Place

We’ve seen mills, lathes, CNC machines and 3D printers, but if there is any device that gets a hardware hacker’s attention, it’s a pick and place machine. In the PCB industry these machines pick up thousands of parts every hour, perfectly placing them on printed circuit boards. The downside is they’re incredibly expensive. The cheapest Chinese machines without vision start in the $4000 USD price range.

[Neil] aims to break down those price barriers with a $300 Pick and Place Machine that doubles as a 3D printer. He’s using delta 3D printer hardware to do it, and he’s throwing in everything! OpenCV based vision, multiple tool heads, reel and tray pick up, [Neil] has covered all the major points. He can’t do it alone though, so he’s looking for help. Check it out, and give him a hand (or a skull)!
pcbMill

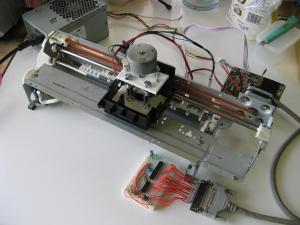
A low-cost pick and place machine will need printed circuit boards to work on. Not to worry, [shlonkin] has you covered with his PCB mill for under $10. Built from recycled printers, an Arduino, and host software written in processing, [shlonkin] has already posted impressive photos of boards his machine has milled. The main problem [shlonkin] has run into is longevity with plastic parts. In his most recent update, he’s looking for ideas. Can you help him?

Digital Watches

Anyone will tell you that digital watches are a pretty neat idea. With the era of smartwatches upon us, more than one hacker has delved into building their own timepiece. We’re happy to report that most of them even tell time.

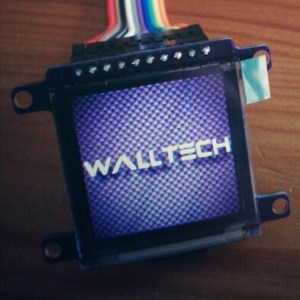
walltech[Walltech] has gone all out to create the ultimate watch. His OLED Smart Watch 6.0 is the culmination of years of work. The watch features a 1.5” OLED display, an SD card slot, and a vibrator motor. It has Bluetooth 4.0 to connect to the world, and an Atmel ATmega32u4 as its brain. A 500mAh battery will power the watch for 18-24 hours per charge.

[Walltech] plans to make it do everything from SMS and email notifications to music streaming. Don’t see a feature you want? Add it! Smart Watch 6.0 Is completely open source, so you can hop into the code and hack away!

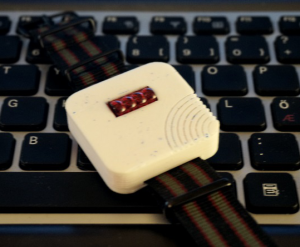
tilttouchtime2On the other side of the spectrum is [askoog89’s] Tilt Touch Time, which utilizes  those awesome bubble LED displays some of us remember from the 70’s. The retro look is only 3D printed skin deep though, as [askoog89] is using an ATtiny2313 processor. Atmel’s Qtouch is providing the capacitive touch sensing, while a tilt sensor helps Tilt Touch Time live up to its name. [Askoog89] has submitted his watch to The Hackaday Prize, so he’s trying to figure out a way to use the touch sensor to sync time with a PC. If that doesn’t work out, we bet those bubble LEDs would make great light sensors for some monitor-blink-sync action.

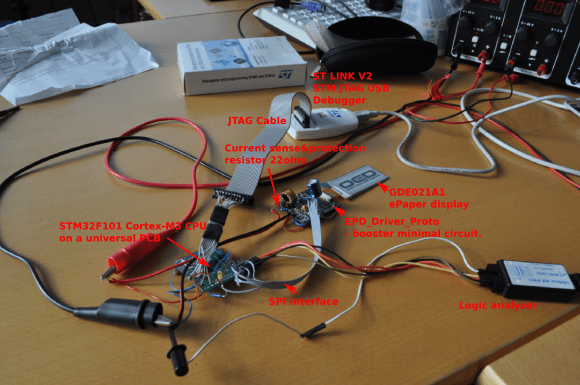
Fallout fans have seen plenty of PIP boys here on Hackaday, but have you seen [jara’s] PIP Watch? This Personal Information Panel is going big on size but low on power with a 3 inch e-ink display. [Jara] is using an STM32F101 ARM Cortex-M3 CPU, so he’s got plenty of processing power at his disposal. He’s connecting to the world through a Bluetooth serial link. All he needs is a Geiger counter, and he’s good to go!

pipWatch

That’s it for this week’s Hacklet, stay tuned for next week when we bring you more of what’s happening at Hackaday.io!