[AA7EE] is no stranger to building radios. His latest is a from-scratch build of a 20 meter QRP transceiver based on the popular SST design. Although the SST has been available as a kit, [AA7EE] incorporated some design changes from others and some of his own, too. He even added an onboard keyer to simplify operation. You can see videos of the radio below.
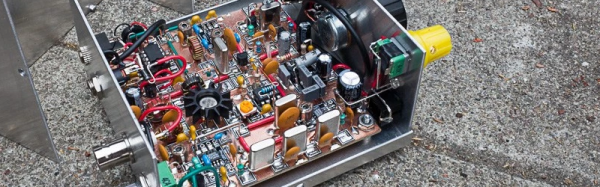
The build uses Manhattan-style PCB pads. Although the construction is very attractive, the real value of the post is the detailed explanation of not only how, but why everything is the way it is. This isn’t a simple project, and being able to see it completed step-by-step is very educational. About the only decision not adequately explained was the change of red and yellow knobs to black! You can see both versions in the videos below.
The Manhattan construction is tidy, but the radio also has an attractive case. The size is just big enough to stack a pair of paddles on top.
There may be some more enhancements for the little radio coming. We’ve covered [AA7EE’s] RF exploits before, including a physically attractive radios and details about the same construction method used in this radio.