I2C From Your VGA Port

Breakout board for VGA to I2C

VGA, DVI, and HDMI ports use Display Data Channel (DDC) to communicate with connected displays. This allows displays to be plug and play. However, DDC is based on I2C, which is used in all kinds of electronics. To take advantage of this I2C port on nearly every computer, [Josef] built a VGA to I2C breakout.

This breakout is based on an older article about building a $0.25 I2C adapter. This adapter hijacks specific lines from the video port, and convinces the kernel it’s a standard I2C device. Once this is done, applications such as i2c-tools can be used to interact with the port.

[Josef] decided to go for overkill with this project. By putting an ATmega328 on the board, control for GPIOs and LEDs could be added. Level shifters for I2C were added so it can be used with lower voltage devices. The end product is an I2C adapter, GPIOs, and LEDs that can be controlled directly from the Linux kernel through an unused video port.

The I2C Programmable NFC Tag

NFCNFC tags are cool, but programming them to do your bidding – whether unlocking your computer, making an Arduino vending machine, or a smart home application – requires using an NFC device to program the tag over the air. An NFC tag programmable with any ‘ol microcontroller would certainly have some interesting applications, and Elecfreaks’ DNFC tag is just the thing to test out these ideas.

While NFC tags are reprogrammable, reprogramming them requires an NFC controller, be that through a dedicated hardware, a phone, or an Arduino shield. The DNFC tag is reprogrammable with a microcontroller with an I2C interface thanks to TI’s RF430CL330H dynamic NFC transponder IC. It still does everything you would expect from a NFC tag – MIFARE compatible. NDEF reading and writing, and everything else – but you can program it through an Arduino, Pi, or any other board with an I2C interface.

TI has an app note on using the chip inside the DNFC for automatic Bluetooth pairing, and Elecfreaks themselves have a few use cases in mind that include putting WiFi credentials on an Arduino board without putting the SSID in code and other Internet of Things™ applications. We’re thinking this is one of those devices that is eminently useful, but for something we just can’t think of off the top of your head. If you’ve got an idea for how to use an I2C programmable NFC tag, drop a note in the comments.

Elecfreaks is doing an Indiegogo campaign for the DNFC, $13 for one. I picked one up, but it’s flexible funding, so buy it or don’t. I don’t care.

The Lightgame Project: A Multiplayer Arduino Game

lightgame_3Summer is upon us. The Lightgame Project is a multiplayer reaction time based game built around the Arduino. It’s a perfect rainy day project for those restless kids (and adults!). Designed by two undergraduate students [Efstathios] and [Thodoris] for a semester long project, all the hard work has already been done for you.

There are tons of reasons we love games that you can build yourself. For one, it’s an amazing way to get children interested in hobby electronics, making, and hacking. Especially when they can play the game with (and show off to) their friends. Another reason is that it is a perfect way to share your project with friends and family, showcasing what you have been learning. The game is based on your reaction time and whether or not you press your button when another players color is shown. The project is built around two Arduinos connected via I2C. The master handles the mechanics of the game, while the slave handles the TFT LCD and playing music through a buzzer.

I2C is a great communication protocol to be familiar with and this is a great project to give it a try. [Efstathios] and [Thodoris] did a great job writing up their post, plus they included all the code and schematics needed to build your own. It would be great to see more university professors foster open source hardware and software with their students. A special thanks goes out to [Dr. Dasygenis] for submitting his student’s work to us!

Continue reading “The Lightgame Project: A Multiplayer Arduino Game”

A Better USI I2C Library For The MSP430

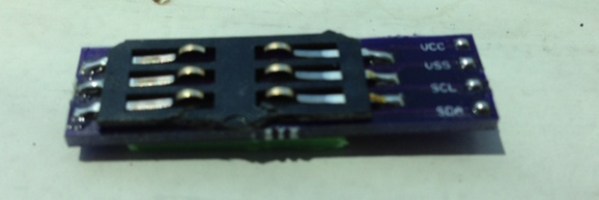
USI

TI’s MSP430 chips are rather interesting – they’re low power, very capable, and available for under a dollar in most cases. Some of these chips, though, don’t have native SPI or I2C interfaces; instead, everything is done through a USI, or Universal Serial Interface module. [Jan] found the stock I2C USI module was a little rough around the edges, so he created his own.

[Jan] found the TI example code for using the USI as an I2C device overly complicated and something that an intern whipped up in a week and was never touched again. In response to this, he created a much, much simpler USI/I2C module that’s actually readable. It’s available over on the GitHub if you want to grab it for yourself.

Compared to the TI code, [Jan]’s library is dead simple. There are only two functions, one for initialization, and another for sending and receiving. Easy, small, and it works. Can’t do much better than that.

Wii Nunchuck-Controlled Tetris On A Raspberry Pi

tetris

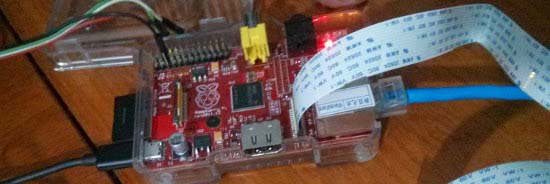
[Vince] teaches an Embedded Systems class at the University of Maine, and some of his students were working on video games for their finals. He decided to “test the hardware” that the students were using by putting two 8×8 displays, one 4×7 segment display, and a Wii Nunchuck on the I2C bus. He then wrote a version of Tetris that accepts trigger presses and accelerometer input for control. Judging by the video (embedded after the break), the Raspberry Pi runs the game without issue. The bus is, of course, more than capable of handling everything.

Unfortunately, [Vincent] had some trouble getting the controls just right. Sometimes dropping a piece can cause the next to drop too quickly, and the accelerometer control seems a bit too sensitive. We imagine using the joystick for rotation and adding some strategic pauses in the game could help. He graciously released the source code for the project, so maybe we’ll see some embracing and extending in the near future.

Continue reading “Wii Nunchuck-Controlled Tetris On A Raspberry Pi”

Making The Worst Linux PC Useful

AVR

After seeing [Dimitry] build the most minimal Linux computer ever, [Kyle] decided he needed one for himself. In true hacker fashion, he decided to take this build for the worst Linux PC one step further: he would add I2C to his version, making it somewhat useful, considering the number of I2C peripherals out there.

This build is based on [Dmitry]’s ARM Linux computer emulated on an 8-bit AVR. It’s a full-blown Linux computer with 16 MB of RAM courtesy of a 30-pin SIMM, a lot of storage provided by an SD card, all running on an emulated ARM processor inside a lowly ATMega1284p. [Kyle] built this clone over the course of a few months, but from the outset decided he wanted to implement an I2C protocol on this terribly under specced computer.

After booting his computer, [Kyle] eventually got an I2C module loaded by the kernel. With an I2C module and a few spare GPIO pins, he set out to create something to attach to this terribly slow computer – an ancient LED dot matrix display. With a real-time clock, this display became a clock  with the help of a homebrew program written in C. Considering the speed of the emulated processor, the program takes nearly three seconds to read the RTC and display the current time to the display. We’re thinking it was a wise choice to only implement hours and minutes in this clock.

If having a useful computer running at about 10 kilohertz isn’t enough, [Kyle] also compiled the classic text-based adventure Zork. It actually runs, proving you don’t need Megahertz of power to do something useful and fun.

Making A Solid-state Relay With I2C Interface

As [Mic] often got requests to make high-power switching boards, he recently finally gave in and designed the one shown above based around a solid-state relay. Some of our readers that already play with mains power know that switching should normally occur when the voltage crosses zero volts. The ‘TRIAC BLOC’ is able to do so, which also allows mains frequency measurement. [Mic] then tuned to the internal oscillator of his ATtiny microcontroller with this 50Hz by adjusting its OSCCAL register value, so the switching command can be sent at the ideal moment. Zero crossing detection is implemented by feeding the mains into an AC optocoupler. [Mic] discovered that the optocoupler diodes are not identical, so he had to adjust his firmware to account for the time differences.

All the resources are available on github, we would be interested to hear your detailed analysis of the circuit implemented with the passives R3/C1/L1/R8/C3.