Very Impressive Steampunk Keyboard

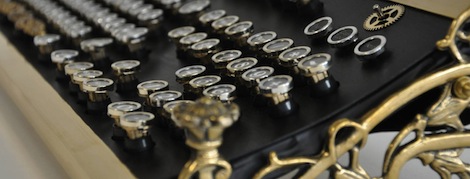
After spending more than 250 hours on his project, [Admiral Aaron Ravensdale]’s steampunk keyboard is finally done.

The keyboard mod was designed around a Model M. After removing the keycaps, [The Admrial] upcycled the keys from old Continental typewriters. Because his typewriters only had 47 keys and the Model M needs 104, three typewriters needed to be sourced off of eBay. Polishing the metal rings of the typewriter keys ate up more than 100 hours.

After building a brass frame from 8mm tubing and candle holders, the stained wood inlay was drilled for the keys. Status lights were installed and the PCB was connected. A pair of ‘gaslight’ keyboard lights were fabricated using 3mm tubing and very fitting “Golden White” LEDs.

[Admrial Ravensdale] put up an Instructable walking through the build process of his keyboard. There’s also a German-language PDF build log that shows every picture of every step.

This isn’t [Admrial Ravensdale]’s first Hack A Day feature, but with a build that might one-up the original steampunk keyboard we can’t wait to see what comes out of [The Admiral]’s workshop next.

SNES Gamepad Coversion To USB

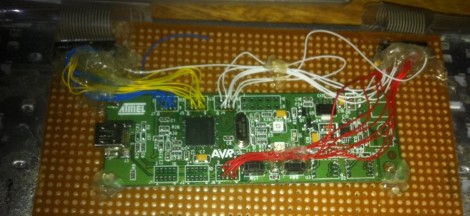
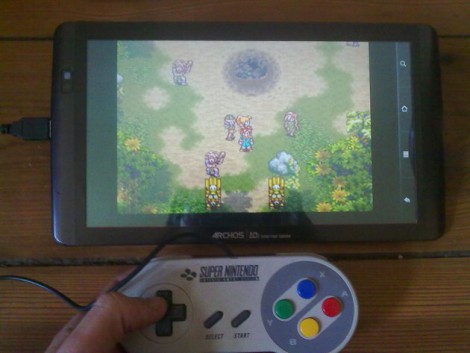
[Kekszumquadrat] wanted to use a classic controller to play emulator games on his Android tablet so he set out to convert an SNES gamepad to connect via USB. He found an old USB keyboard at a yard sale for about 3 Euros. He knew that the emulator he prefers has the option of remapping all the inputs to keyboard keys which means a USB keyboard has all of the electronics he would need to pull this off.

Once he had separated the keyboard circuitry from the case [Kekszumquadrat] plugged it into his Linux box and used Xev to establish how the keyboard matrix is set up. Xev is a common package that opens up an active window on the X desktop. When run from command line, any events that happen to the window will be echoed along with verbose data about that event. When it comes to keypresses, you’ll get the keycode you need. He simply shorted columns and rows until he found the desired mapping, then it was on to soldering.

The SNES controllers are very simple devices. As we’ve seen with previous projects, they use a serial-to-parallel shift register to gather button data and send it to the console. [Kekszumquadrat] simply soldered between button traces and keyboard matrix contacts. Once he finished, the keyboard parts were tucked inside of the controller case and he’s left with a USB controller that appears to be unaltered.

Interfacing With A PS/2 Keyboard

Anyone reading this post has undoubtedly used a keyboard. How they work, however, is a bit more complicated than “one button, one input.”  [PyroElectro] has a great tutorial about building a PS/2 keyboard interface with a 7-segment LED display (video after the break). The tutorial also includes quite a bit of theory behind it.

The system displayed below uses a PIC controller to display the letter or number pressed. A schematic of the whole project is given here as well as a detailed bill of materials.

As for how the PS/2 keyboard works, each keystroke is encoded into a binary number or “scan code”. Most of these codes are 8-bit, but some special symbols use a longer code. Although the article doesn’t fully address it, a very similar method can be used to send data back to the keyboard for such purposes as tuning on a “capslock” or “numlock” key. Although turning on a light is fun, we could see this being used as an expedient method to control a relay for automation purposes.

Continue reading “Interfacing With A PS/2 Keyboard”

Overhaul An Old Mechanical Keyboard

Deskthority forum user [lowpoly] recently posted a writeup on his complete overhaul of an Apple M0110  mechanical keyboard.  Any one familiar with the satisfying clack of a good mechanical key under their fingers can appreciate the effort put into this project.

[lowpoly] removed the keyboard’s PCB, rewired the key matrix adding diodes, built in a teensy USB board, broke apart the mechanical switches and fit replacement springs and finally applied a generous portion of retr0bright to all of the aging plastic. Since the teensy has no mounting holes [lowpoly] had to create a mounting assembly out of some spare plastic. A usb mini cable is even fitted into the original RJ-11 connector.  To compensate for the lack of PCB the key assembly was fitting with some rubber washers. To top off the whole thing some nice new rubber feet were taped to the underside of the M0110.

[lowpoly] reports that with the foam, new springs, and lack of PCB the keyboard is much quieter and easy to use.  The end result is a slick retro looking modern keyboard. If you’ll excuse us we have to go rooting through some old storage bins to find our own ancient keyboards.

We have seen our share of vintage keyboard hacks which can be useful, impressive and sometimes just odd. This build keeps it down to a nice simple, functional, useful retrofit. Nice work!

FrankenKindle: Building An Alternate Kindle Keyboard

If you’ve ever thought the Kindle keyboard was a bit cramped you’re not alone. [Glenn’s] been working on developing an external keyboard for the Kindle for quite some time. It may not make easier for everyone to use, but he’s motivated to improve usability for his sister who has Cerebral Palsy.

We see a lot of keyboard hacks that solder straight to the pads under the buttons, but for a compact device like the Kindle this would really mess things up. Instead of going that route, [Glenn] sourced a 20-pin Flexible Flat Cable and breakout board that match the internal Kindle connector. The prototype seen above uses a TS3A5017 serial multiplexer chip to simulate the keyboard button presses. That multiplexer is driven by a Teensy++ microcontroller board which is monitoring a larger set of buttons on the V.Reader seen above. Check out the video after the break for a brief demonstration, then look around at the rest of [Glenn’s] blog posts to view different steps of the development cycle.

Continue reading “FrankenKindle: Building An Alternate Kindle Keyboard”

Impressive Steampunk Keyboard

This amazing steam punk keyboard was sent in to the tip line, and while it’s not necessarily a ‘hack’ in the purest sense, the level of quality in the build is incredible.

Each key was crafted from brass tubing that was later filled with a wooden dowel and covered with the key cap label. While there’s no mention of how the key caps were made, we do especially like the abstract Windows Key label. After the PCB for the keyboard matrix was enclosed in a bit of plywood, the hand tooled leather was applied to the front. The name plaque that was hand engraved with a modified screwdriver is especially nice.

The build is based around the amazing Das Keyboard with Cherry Blue switches, one of the only keyboards currently being manufactured that comes close to the feel of the One True Keyboard. While it’s not a keyboard built from scratch, it’s still one of the best steampunk builds we’ve seen, most likely because not a single gear was glued to the project.

UPDATE: Playing Piano With Optical Sensors

[Sebastian Steppeler] has been hard at work on his optical sensors for an electric piano. When we looked in on the project back in October he was testing reflective sensors to increase responsiveness and MIDI data resolution for his electric keyboard. Since then he’s finalized the sensor circuits and produced enough boards to monitor all 88 keys on this full keyboard. You can see the string of PCBs just above the ivories, waiting to be installed. Not only are then in, but he also added sensors for the pedals.

Because the boards were installed by hand, there are some variances in the physical placement. This can have a rather dramatic effect on the readings from the reflective sensors so he has been working out a method of balancing the calibration. Part of this is already being taken care of by the C# interface that he wrote for a PC. Take a few minutes to check out all of his blog posts, then jump down after the break and hear how great it sounds.

Continue reading “UPDATE: Playing Piano With Optical Sensors”