Think of all those promised products that looked so good and were eagerly awaited, but never materialized. Have you ever backed a Kickstarter project in the vain hope that one day your novelty 3D printer might appear? Good luck with the wait! But sometimes, just sometimes, a product everyone thought was dead and gone pops up unexpectedly.
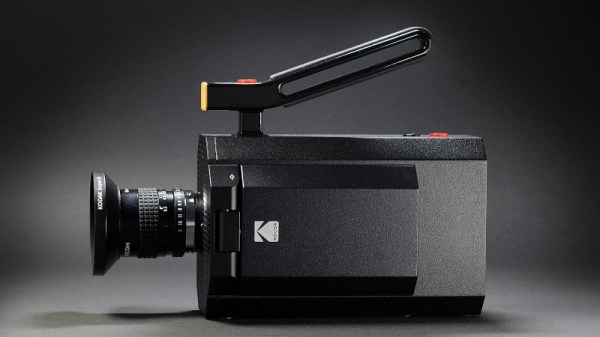
So it is with Kodak’s infamous new Super 8 camera, which they announced in 2018 and had the world of film geeks salivating over, then went quiet on. It’s abandoned, we all thought, and then suddenly five years later it isn’t. If you really must have the latest in analog film-making gear, you can put your name down to order one now.
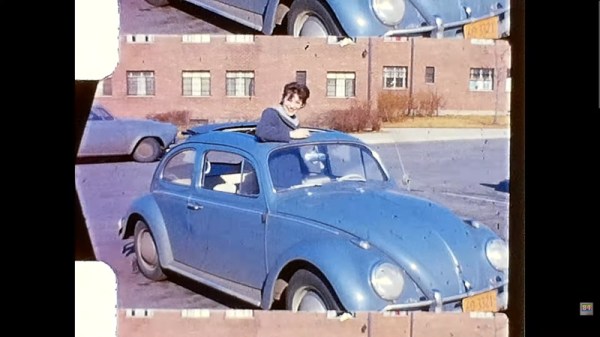
Despite the near-complete collapse of its ecosystem in the face of portable videocassette camcorders in the 1980s, somehow the 8 mm format, smallest of the movie films, has survived the decades. There’s a special aura around an 8 mm image which electronic recordings don’t replicate, plus for film makers there’s an attraction to working with real film. Unsurprisingly almost all of the devices used with 8 mm film have ceased to be manufactured, but a few items escaped the cut. It’s still possible to buy an 8 mm digitizer for example, and it’s one of these with a Kodak brand that [Mac84] has. Unsatisfied with its image quality, he’s set about tinkering with its firmware to give it some video adjustment possibilities and remove its artifact-prone artificial sharpening.
Helped by the device having a handy EEPROM from which to extract the code, he was able to recover the firmware intact. From here on he was in luck, because the digitizer’s Novatek CPU is shared with some dash cams and this had spawned a hacker scene. From there he was able to find the relevant area and adjust those settings, and after a few false starts, re-flash it to the device.
The results can be seen in the video below the break, and perhaps reveal much about what we expect from an image in the digital age. The sharpened images look good, until we see untampered versions which are closer to the original.
At least as far as the inner workings are concerned, there’s not a whole lot of difference between an single-lens reflex (SLR) camera that uses film and a digital SLR (DSLR) camera that uses an electronic sensor except the method for capturing the image. So adding the digital image sensor to a formerly analog camera like this seemed like an interesting project for [Wenting Zhang]. But this camera ballooned a little further than that as he found himself instead building a complete, full-frame digital camera nearly from scratch.
The camera uses a full-frame design and even though the project originally began around the SLR mechanism, in the end [Wenting] decided not to keep this complex system in place. Instead, to keep the design simple and more accessible a mirrorless design is used with an electronic viewfinder system. It’s also passive M lens mount, meaning that plenty of manual lenses will be available for this camera without having to completely re-invent the wheel.
As far as the sensor goes, [Wenting] wanted something relatively user-friendly with datasheets available so he turned to industrial cameras to find something suitable, settling on a Kodak charge-coupled device (CCD) for the sensor paired with an i.MX processor. All of the electronics have publicly-available datasheets which is important for this open-source design. There’s a lot more work that went into this build than just picking parts and 3D printing a case, though, and we’d definitely recommend anyone interested to check out the video below for how this was all done. And, for those who want to go back to the beginnings of this project and take a different path, it’s definitely possible to convert an analog SLR to a digital one.
If you’re at all into nostalgic cameras, you’ve certainly seen the old Brownie from Kodak. They were everywhere, and feature an iconic look. [JGJMatt] couldn’t help but notice that you could easily find old ones at a good price, but finding and developing No. 117 film these days can be challenging. But thanks to a little 3D printing, you can install an ESP32 camera inside and wind up with a modern but retro-stylish camera. The new old camera will work with a memory card or send data over WiFi.
The Brownie dates back to 1900 and cost, initially, one dollar. Of course, a dollar back then is worth about $35 now, but still not astronomical. After cleaning up and tuning up an old specimen, it was time to fire up the 3D printer.
There are also mods to the camera to let it accept an M12 lens. There are many lenses of that size you can choose from. There are a few other gotchas, like extending the camera cable, but it looks like you could readily reproduce this project if you wanted one of your very own.
The disc format was Kodak’s great hope in the 1980s, the ultimate in photographic convenience in which the film was a 16-shot circular disc in a thin cartridge. Though the cameras were at the consumer end of the market they were more sophisticated than met the eye, with the latest electronics for the time and some innovative plastic multi-element aspherical lenses. It failed in the face of better compact 35 mm cameras because the convenience of the disc wasn’t enough to make up for the relatively small negative and that few labs had the specialized printing equipment to get the best results from the format. The cameras faded from view, and the film ceased manufacture at the end of the 1990s.
The biggest hurdle to creating a Disc cartridge comes in the cartridge shells themselves. It’s solved by sourcing them second-hand from Film Rescue International, a specialist in developing expired photographic film. The stages follow the cutting of a film disc, perforating its edges, and fitting it into the cartridge. It’s an exact enough process in the pictures, and it’s worth remembering that in the real cartridges it must be done in the dark.
This is an interesting piece of work for anyone with an interest in photography, and while the Disc cameras were always a consumer snapshot camera we can see that it would appeal to those influenced by Lomography. We wish we could get our hands on a Disc cartridge, an maybe CAD up a 3D printable version to make it more accessible.
Anybody born before the mid 1990s will likely remember film cameras being used to document their early years. Although the convenience of digital cameras took over and were then themselves largely usurped by mobile phones, there is still a surprising variety of photographic film being produced. Despite the long pedigree, how many of us really know what goes into making what is a surprisingly complex and exacting product? [Destin] from SmarterEveryDay has been to Rochester, NY to find out for himself and you can see the second in a series of three hour-long videos shedding light on what is normally the strictly lights-out operation of film-coating.
Kodak have been around in one form or another since 1888, and have been producing photographic film since 1889. Around the turn of the Millennium, it looked as though digital photography (which Kodak invented but failed to significantly capitalize on) would kill off film for good, and in 2012 Kodak even went into Chapter 11 bankruptcy, which gave it time to reorganize the business.
They dramatically downsized their film production to meet what they considered to be the future demand, but in a twist of fortunes, sales have surged in the last five years after a long decline. So much so, in fact, that Kodak have gradually grown from running a single shift five days per week a few years ago, to a 24/7 operation now. They recently hired 300 Film Technicians and are still recruiting for more, to meet the double-digit annual growth in demand.
[Destin] goes to great lengths to explain the process, including making a 3D model of the film factory, to better visualize the facility, and lots of helpful animations. The sheer number of steps is mind-boggling, especially when you consider the precision required at every step and the fact that the factory runs continuously… in the dark, and is around a mile-long from start to finish. It’s astonishing to think that this process (albeit at much lower volumes, and with many fewer layers) was originally developed before the Wright Brothers’ first powered flight.
This year marks the 30th anniversary of the Hubble Space Telescope. When you see all the great pictures today, it is hard to remember that when it first launched, it was nearly a failure, taking fuzzy pictures. The story of how that problem was fixed while the telescope was whizzing through space is a good one. But there’s another story: how did a $1.5 billion satellite get launched with defective optics? After all, we know space hardware gets tested and retested and, typically, little expense is spared to make sure once a satellite is in orbit, it will work well for a long time.
The problem was with a mirror. You might think mirrors are pretty simple, but it turns out there’s a lot to know about mirrors. For astronomy, you need a first surface mirror which is different from your bathroom mirror which almost certainly reflects off the back of the glass. In addition, the mirrors need a very precise curve to focus light.