Building An Accurate Equal Arm Balance

microscale

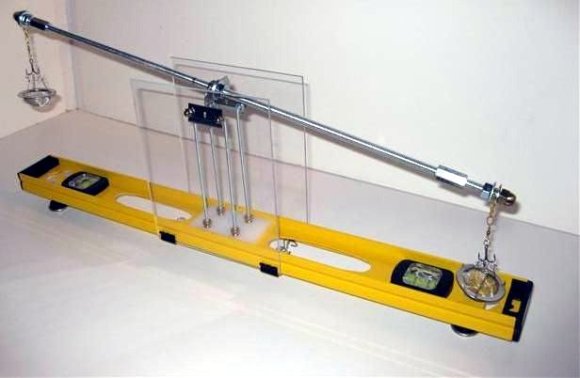
This interesting take on weights and measures uses a two foot long level as the base for a diy equal arm balance. The balance is the oldest method used for measuring mass. That’s because you don’t even need a reference weight for it to work as long as you are measuring ingredients that are proportional to each other in whole numbers.

The key to accuracy with these scales is to reduce friction at the fulcrum. In this case the fulcrum is made of two upturned razor blades on the base, with a single razor blade resting perpendicular to those on the arm. But because gravity is doing the equalization, the base must be as level as possible. Adjustable feet were added to the base so that it can be leveled on two axes. When the tower at the center was built (using threaded rod) a disc level was used to fine-tune the mounting angle of the two razor blades. The finishing touches include a coupling nut on each end for fine-tuning the balance, and the halves of a tea ball strainer as the weighing vessels.


Water Tank Level Meter Prevents Overflow

roof-water-tank-level-meter

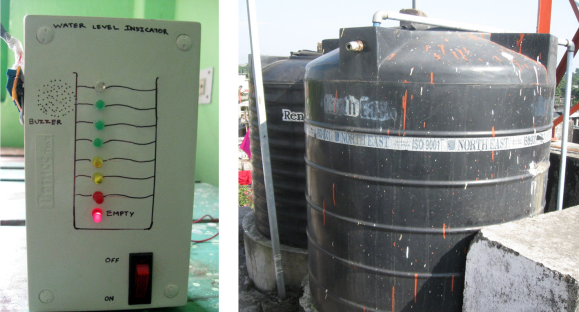
Most of the homes in the area where [Raikut] lives have tanks on the roof to hold water. Each is filled from a well using a pump, with gravity serving as a way to pressurize the home’s water supply. The system isn’t automatic and requires the home owner to manually switch the pump on and off. [Raikut] made this process a lot easier by designing an LED bar indicator to monitor the water level.

The sensor is very simple. Each LED is basically its own circuit controlled by a transistor and a few resistors. A 5V signal is fed from 7805 linear regulator into the tank. The base of each transitor is connected to an insulated wire, each extending different depths in the tank. As the water rises it completes the circuit, illuminating the LED.

[Raikut] is conservation minded and built a buzzer circuit which is activated by the LED indicating the highest water level. If someone walks away from the pump switch while it’s filling the alarm will sound as it gets to the top and they can turn it off before it wastes water.

[via Reddit]

Laser Level Tripod Made From Recycled Parts

laser_level_tripod

[msuzuki777] is a self-proclaimed “Lazy Old Geek” with way too much free time on his hands. He recently picked up a laser cross and figured that he would use some of that time to make a laser tripod for various projects around the house.

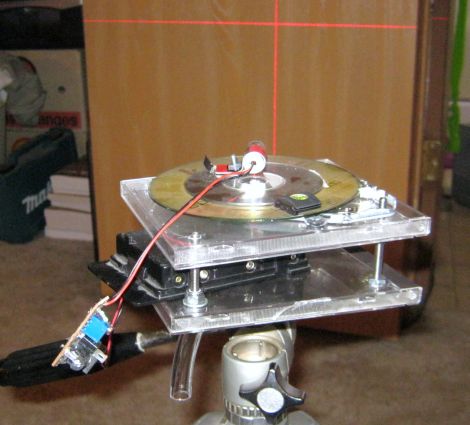
He pulled out an old camera tripod, and modified an unused CD jewel case so that it could be screwed onto the traditional camera mount. He added three bolts to the platform, on which he mounted another CD case, letting him adjust both the laser platform as well as the tripod.

He put together a simple power supply for the laser, and then mounted it on a pair of CDs sandwiched on top of one another. The CD platform was then popped onto the guts of an old CD player, allowing him to spin his laser pointer in any direction without having to re-level it.

The laser cross tripod certainly looks a bit complicated, but [msuzuki777] says it works a treat, allowing him to easily hang pictures and the like. He also mentions that he wants to throw an Arduino at it to automate the leveling process, which is something we’d love to see.

Overly Complicated Gas Guage

While this is most likely overkill for a gas gauge, we do thank [VadimS] for sharing the information. He shows us how to build a capacitive liquid sensor using an Arduino, some foil and some wire. He’s basically detecting the difference in capacitance between the foil sheets. As he gets more water in the bottle, the capacitance goes up. At least we think thats what is going on. He has included the source code for the Arduino, both for handling the sensor and running the LCD display shown in the picture above. When completed, this will be used in his dune buggy for a gas gauge.

SparkFun’s Logic Level Converter


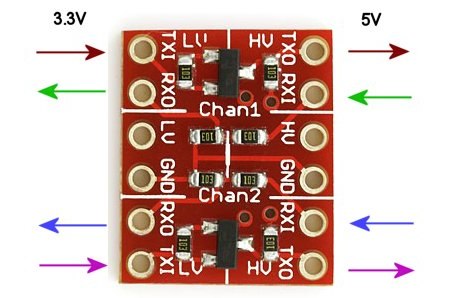
SparkFun has always been good about designing and stocking useful breakout boards. This recently added Logic Level Converter is no exception. It’s uses two BSS138 MOSFETs to shift 5V logic levels to 3.3V. The board handles two separate serial pairs. Just hook up the RX and TX on either side. Provide power at both voltages and the board will happily do the conversion. It’s $2, smaller than the size of a quarter, and perfect for plugging into a breadboard.