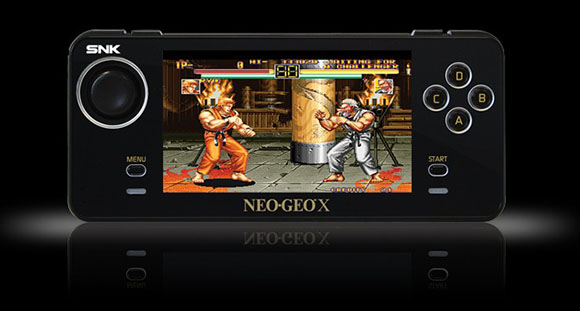
The First Step To Running IPhone Apps In Linux

[Christina] has been working on a project she calls Magenta to put Darwin/BSD on top of Linux. What does that mean? Well, hopefully it’s the first step towards running iPhone/iPad apps on a Linux machine.

Before you get too excited, there are a few caveats; Magenta only works on ARMv7 platforms, none of the fancy iOS frameworks are included, and it’s currently impossible to run iOS apps with this build. Think of this project as a very, very early version of Wine. If you’d like to take Magenta for a spin, [Christina] put the source up here.

Although [Christina]’s project is entirely useless for anyone wanting Siri on their Android phone, it’s possible to add all those fancy iOS frameworks to Magenta and create an open source OS able to run iPhone apps.

We really have to admire [Christina]’s work on this. It’s an amazingly impressive project, and her final goal of recreating the iOS stack would be a boon to the jailbreaking scene. Cue the sound of millions of iPhone clones marching out of China…

via [OleRazzleDazzle] on the reddits

New STM32 Discovery Board Can Now Be Programmed On Linux

Last Wednesday I posted a video review of the new STM32F0-Discovery board which is built around an ARM Cortex-M0 chip. I speculated that it should work with the open source project aimed at programming these discovery boards. I tested it out and a connection could be made, but no code could be flashed. So I spent a few hours over the weekend and added support.

My updates are already in the stlink repository. After cloning the code, you can use three commands to compile the software (./autogen.sh, ./configure, make). That’s assuming you have all of the necessary dependencies (I had to install libusb-1.0-0-dev) and that you add the udev rule suggested in the documentation (also found in the repository). The program st-util connects to the board and provides a listening port for an ARM debugger (I’m using arm-none-eabi-gdb from CodeSourcery G++ Lite).

When I first started testing, the chip id was reporting as 0. It turns out the register address polled for this information was wrong. After finding that in the almost-900 page reference manual I went through the painstaking process of finding the hex values necessary to properly memory map the device. From there I also updated the blink example to generate an ELF file compatible with the Cortex-M0 chip. So out of the gate you should be able to use an ARM cross compiling toolchain to compile the example, connect to the board with this utility, then use the debugger from the toolchain to connect and flash that example to RAM.

There’s lots more to be done. To fully utilize the chip it is necessary to use a startup file and linker script when compiling. I’ve done nothing in this area, but I hope to work on some tutorials as I get further along. Of course if you have your own successes developing for this board using a Linux machine we want to hear about it!

Teaching BeagleBone To Play With LIDD Displays

[Chris] hasn’t managed to get his hands on a Raspberry Pi yet, so he ordered a BeagleBone and got down to business. He was surprised to find that there isn’t much info out there about using LIDD type displays with the hardware. This protocol is used in many of the 320×240 smart LCD modules on the market, so he hammered out his own drivers and is sharing the details.

The system is designed to run a Linux kernel and [Chris] has chosen to go with Angstrom. His journey started by working out how to compile and patch the kernel himself. From there it was just a matter of getting the pin mapping right, and compiling a driver (it sounds way too simple when put like that).

Apparently he’s pretty close to getting the X desktop environment up and running. No idea what he plans for the hardware, but we’re all for people sharing their work to make it easier for others. Thanks!

Accessing An SD Card Through A Parallel Port, Just Because

[Vinod] sent in a very cool build he says is somewhat of a ‘mad project’: he mounted an MMC and SD card under Linux using the parallel port on his computer. Even though parallel ports are getting rarer these days, we absolutely love [Vinod]’s dedication and willingness to dig around the Linux kernel.

The hardware portion of the build is very simple – just an SD/MMC header and a few resistors wired up to a parallel port. The software side of the hack gets pretty interesting with [Vinod] building a kernel module, something we rarely see on Hackaday.

We’d have to agree with [Vinod]’s ‘mad project’ sentiment, if only because of the terrible throughput of [Vinod]’s adapter; it takes him more than a minute to transfer a 1.5 MB file onto the SD card – terribly slow, to put it mildly. Nevertheless, we’ve got to respect [Vinod] for pushing the limits of uselessness and still building something cool in the process.

IR Helicopter Controller Hacked Into A Linux Game Pad

syma-linux-joystick

[Mike Kohn’s] Syma S107 helicopter wasn’t flying as well as it used to due to a broken gear, he figured he might as well find some use for the toy’s controller, since it was currently sitting around collecting dust. Having done a bunch of work with Syma IR protocols earlier this year, he decided it would be pretty easy to get the remote working as a game pad for his Linux desktop.

He patched an IR receiver into an MSP430 board, which decodes the incoming IR signals, sending them to his computer over a serial connection. [Mike] dug around in the Linux source for some good joystick driver code to borrow and found something that was close enough to work. After a bit of tweaking he loaded up his driver module and fired up Mame to give [Ms. Pacman] a try.

He says that the controller worked without much trouble, though as he discovered in previous projects, there are some quirks in the controller that make it somewhat less than convenient to use full time. Check out his site if you’re interested in taking a look at the code that he used to get things running.

Whistle Controls For You Home Electronics

You know how to whistle don’t you? You just put your lips together and blow. But do you know how to make the electronics around you react to your whistled commands? Well [Befi] figured out a system that allows him to assign a whistled command to various home electronics.

He’s using a set of RF remote control outlets to switch power to various devices like a desk lap, or a turn table. The board you see in the image above is the remote control that came with the system, but that chip is an ATmega8 which he added to give round-about USB connectivity using a serial-to-USB converter. The technique is simple enough that we’d bet you can get this to work with an ATtiny2313 and the V-USB project but that’s another story.

The additional piece is the use of embedded Linux to detect and process whistled commands. In the video after the break [Befi] explains that he’s using a Dockstar along with a microphone to capture audio input. It uses a Fast Fourier transform algorithm to process the clip and pushes commands to the remote control after processing is complete. Continue reading “Whistle Controls For You Home Electronics”

Building The Worst Linux PC Ever

Linux is generally considered the go-to OS for under powered computers. Wanting to challenge the preconceived notion that Linux requires ‘a computer made in the last 20 years,’ [Dmitry] built the worst Linux PC ever around a simple 8-bit microcontroller.

The ATMega1284p [Dmitry] used doesn’t have a lot to offer as far as RAM and storage goes; just 16 kilobytes of SRAM and a paltry 128 kilobytes of Flash storage. While this may be voluminous in the embedded world, it’s peanuts compared to the gigabytes of RAM and hard drive space on even a low-end netbook. To solve this problem, [Dmitry] threw an antique 30-pin RAM SIMM at the problem. It’s wired up directly to the microcontroller, as is the 1 Gigabyte SD card that serves as the PC’s hard drive.

Linux requires a 32-bit CPU and a memory management unit, something the puny microcontroller doesn’t have. For [Dmitry], the best course of action was emulating an ARM processor on an AVR. We’re not sure if we’re dealing with genius or madness here, but it did prove to be a valuable learning exercise in writing a modular ARM emulator.

How fast is it? [Dmitry] tells us it takes two hours to boot up to a bash prompt, and four more to load up Ubuntu and login. If you want a Megahertz rating, good luck; the effective clock speed is about 6.5 kilohertz. While the worst Linux PC ever won’t win any races, its simple construction puts it within the reach of even the klutziest of hardware builders; the entire device is just a microcontroller, RAM, SD card, a few resistors, and some wire.

If you’d like to build your own worst Linux PC, [Dmitry] has the firmware and disk image available to download. If you want to watch the time-lapse of this thing booting, check out the video after the break.

Continue reading “Building The Worst Linux PC Ever”