Hackaday Links: September 7, 2012

MakerSlide, European edition

We’re all familiar with the MakerSlide, right? The linear bearing system that has been turned into everything from motorized camera mounts to 3D printers is apparently very hard to source in Europe. A few folks from the ShapeOko forum have teamed up to produce the MakerSlide in the UK. They’re running a crowdsourced project on Ulule, and the prices for the rewards seem very reasonable; €65/£73 for enough extrusion, v-wheels, and spacers to make an awesome CNC router.

Kerf bending and math

A few days ago, I made an offhand remark asking for an engineering analysis of kerf bending. [Patrick Fenner] of the Liverpool hackerspace DoES already had a blog post covering this, and goes over the theory, equations, and practical examples of bending acrylic with a laser cutter. Thanks for finding this [Adrian].

276 hours well spent

[Dave Langkamp] got his hands on a Makerbot Replicator, one thing led to another, and now he has a 1/6 scale model electric car made nearly entirely out of 3D printed parts. No, the batteries don’t hold a charge, and the motor doesn’t have any metal in it, but we’ve got to admire the dedication that went in to this project.

It was thiiiiiiis big

If you’ve ever tried to demonstrate the size of an object with a photograph, you’ve probably placed a coin of other standard object in the frame. Here’s something a little more useful created by [Phil]. His International Object Sizing Tool is the size of a credit card, has inch and cm markings, as well as pictures of a US quarter, a British pound coin, and a one Euro coin. If you want to print one-off for yourself, here’s the PDF.

Want some documentation on your TV tuner SDR?

The full documentation for the E4000/RTL2832U chipset found in those USB TV tuner dongles is up on reddit. Even though these chips are now out of production (if you haven’t bought a proper tuner dongle yet, you might want to…), maybe a someone looking to replicate this really cool device will find it useful.

TangiBot And The Perils Of Open Source Hardware

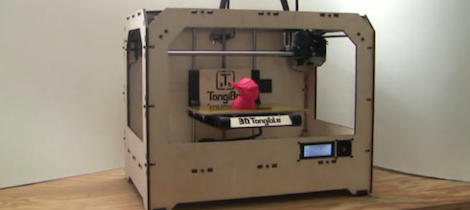
I’ve commented before on the terrible inefficiency and artificially high expense of the current crop of 3D printers. It simply doesn’t make sense to produce the plastic parts of 3D printer kits on a printer farm when there are literally thousands of Chinese injection molding companies that will make those parts cheaper. It looks like [Matt Strong] heeded my call and now has a Makerbot Replicator clone up on Kickstarter that costs $700 less than the official version. We assume the Makerbot lawyers are having a busy morning.

From the info on the Kickstarter page, [Matt] is used parts from his Makerbot Replicator to design a one-to-one copy. Every part and component on [Matt]’s TangiBot is 100% compatible – and seemingly 100% identical – with the Makerbot Replicator. Like the Replicator, [Matt] is offering a dual extruder version that allows you to print in two colors.

At the bottom of the Kickstarter page, under a section titled, “How is 3DTangible able to make a Replicator Clone?,” you’ll see [Matt]’s reasoning for cloning the MakerBot replicator. He says everything is open source, and, “MakerBot used other open source designs when designing and producing their 3D Printers.” We’ll agree that MakerBot used existing extruder designs (and improved upon them), but MakerBot was not this blatant in borrowing from the RepRap project.

For want of editorializing, I’ve complained about the stupid inefficiency of manufacturing 3D printers with 3D printers before. It was only a matter of time before someone realized current manufacturing techniques can be used to make 3D printers cheaper. [Matt] – dude – you were supposed to clone a RepRap. Makerbot has done some really incredible things for the community such as building Thingiverse and generally being an awesome cheerleader for the 3D printing community. Taking the flagship Makerbot printer and making it cheaper will not make [Matt] any friends on the Internet, but at least the laws of economics are coming to the world of 3D printers.

Thanks [Brad] for sending this in.

Mixing Colors On The Reprap

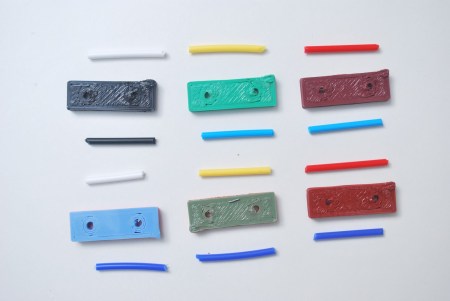
3d printing has come huge strides in ability to construct detailed objects. Unfortunately, color is still a considerable limitation. Here, some people at the Reprap blog are having fun coming up with an extruder head that actually mixes two colors as it deposits them. Don’t confuse this with the dual head that Makerbot is touting that allows you to switch colors on the fly, this is a single head that actually has a cavity where the material is melted, then stirred to create a combination of the two. It is an interesting method of overcoming a limited supply of colors.

Having this extra stirring chamber means that there would be a small amount of material wasted any time that you wanted to make a change to the color, as it would have to be purged. There are some interesting thoughts in their comments on how to use this extra material most efficiently.

Solidoodle, A $500 3d Printer

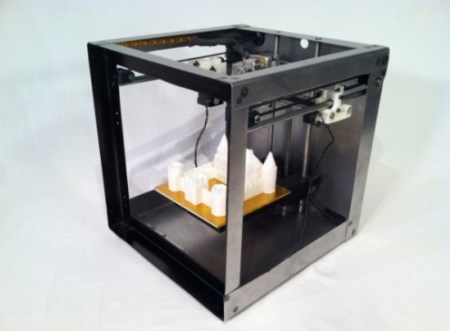
3D printers are very popular right now. We’ve seen them go from an interesting project to multiple commercial entities. Makerbot seems to be the poster child for the commercial side of things, at least they were. Their former COO [Samuel Cervantes] is now in charge of a new company called Solidoodle. Their main product is a complete 3d printing kit for $499. You supply power and a computer.

The Solidoodle is capable of building things 6″x6″x6″. The quality seems to be comparable to most of the others we’ve seen. They tout a .1mm layer thickness in HD mode (makerbot shows .2-.3mm). Not bad considering it is less than 1/3 the price of the makerbot replicator with a single extruder. The video after the shows it in action, as well as both with the optional case and door and without.

Printing Point-to-point Circuits On A 3D Printer

[CarryTheWhat] put up an Instructable on his endeavours in printing circuit boards for solder free electronics. He managed to print a flashlight where the only non-printed parts are a pair of batteries and a couple of LEDs.

The circuit is a weird mix of point to point and Manhattan style circuit construction; after modeling a printed plastic plate, [CarryTheWhat] added a few custom component holders to hold LEDs, batteries, and other tiny electronic bits.

To deliver power to each electronic bit, the components are tied off on blue pegs. These pegs are attached to each other by conductive thread much like wirewrap circuit construction.

Right now, the circuits are extremely simple, but they really remind us of a few vintage ham radio rigs. While this method is most likely too complex to print 3D printer electronics (a much desired and elusive goal), it’s very possible to replicate some of the simpler projects we see on Hackaday.

[CarryTheWhat] put the models and files up on GitHub if you’d like to try out a build of your own.

3D Printing From An Android Device

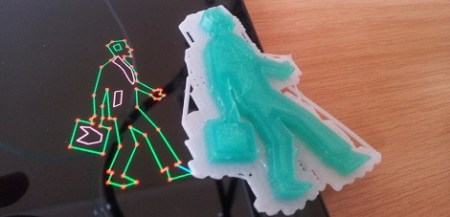
[skullkey] over at the House4Hack hackerspace in Pretoria, South Africa wanted a way to get kids excited about technology and desktop fabrication labs. Wanting to give kids a visceral feel for the march of technology, he created Makerdroid, an android app that allows for the creation 3D objects on an Android tablet and preparing them to be printed on a Reprap or Makerbot.

What’s really interesting about this build is not only the fact that [skullkey] and his lovely beta testers are generating .STL files on an Android device, the object files are also being converted to GCode on the Android, without the need for a conventional computer. Makerdroid uses the very popular Skeinforge to generate the instructions for the printer (although a lot of people are switching over to Slic3r).

Makerdroid doesn’t need a PC to print objects out on a 3D printer, but we think the process of shuffling GCode files from a tablet to the printer with an SD card is a little archaic. It might be possible to print directly from an Android tablet over Bluetooth with the Android Bluetooth Reprap app that is currently in development. Still, we love the idea of printing objects we just created on a touch screen, as shown in the Makerdroid demo video after the break.

Continue reading “3D Printing From An Android Device”

Hackaday Links March 8th, 2012

Solder Your Pin headers Straight

straight-header solder

If you’re worried about how to solder your pin headers straight, why not try this simple trick and put them into a breadboard before soldering?

Etiquette for Open Source Projects

soapbox Phillip Torrone

If you use or develop open source projects, it’s worth checking out [Phillip Torrone]’s Unspoken rules of Open Source article. You may not HAVE to do all the things he says, but it’s certainly a good starting point for being ethical with your hacks.

The [GoAmateur] Camera Mount

go-amateur camera mount for bike

If you can’t afford a professional camera mount for your bike, why not make one yourself? As pointed out in the article, normal cameras aren’t really made for this, so do so at your own risk. If this isn’t shoddy enough for you, why not make a mount for your 4 year old dumb-phone (Env2) out of a block of wood?

A 3D Printer BOM

If you’re wondering how much a 3D printer will cost you, or where to source the parts, this Bill of Materials for a Prusa Mendel should help. We would assume this project will be updated as everything is built, so be sure to check back!

MakerBot Assembly Time-Lapse

makerbot time lapse

Along the same lines, if you’re wondering about getting into 3D printing, this time-lapse of the Thing-O-Matic being assembled may give you some insight into what’s involved in getting one functional!