Build A Pong Gaming Console

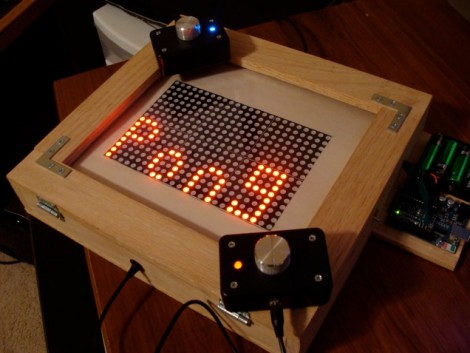
A lot of thought went into [Patrick Mccabe’s] Pong gaming console build. He used components we’re familiar with; an Arduino as a controller, 8×8 LED modules as the display, and potentiometers (with fancy knobs) in project boxes as the controllers. But every step along the way he took care to build this cleanly and robustly. Even the MAX7219CNG drivers for the six LED modules reside on PCBs from a fab house. The finished project is something you’d be proud to pull out and play when you have friends over. Even if they’re not part of the geek elite we think they’d enjoy a game or two. Great job [Patrick]. We hope to see an internalized microcontroller and scoring in your next update!

Want to do this but the cost of the matrix drivers scared you away? Follow our tutorial to build your own display using an AVR for the multiplexing.

AVR Controlled RGB LED Matrix Plays Tetris

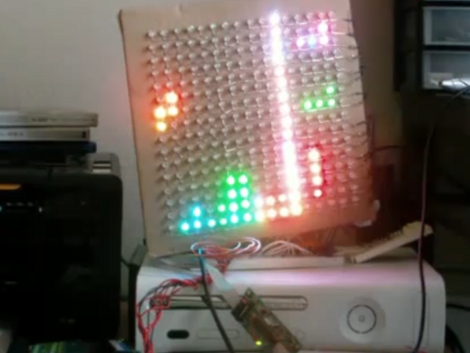
[Stan] built this LED matrix using a 16×16 grid of RGB LEDs. He built the hardware and wrote some subroutines to randomize the colors. He’s not using PWM because frame buffering is not feasible for the 1k SRAM limit of the ATmega168 he used. Instead, shift registers drive the lights which can be mixed to achieve eight different colors (including off for black) reducing the framebuffer size to just 96 bytes. After he got done with the build he realized this is sized well for a game of Tetris. We’ve seen AVR tetris, PIC Tetris, and Tetris using composite video but it’s always a pleasure to see a new display build.

After the break we’ve embedded [Stan’s] demo video, several pictures, and a schematic. He’s using many of the same principles outlined in our How to Design an LED matrix tutorial.

Continue reading “AVR Controlled RGB LED Matrix Plays Tetris”

70 LED Matrix In A Jack-o-lantern

What takes eight hours to solder and uses more shrink tubing that you thought imaginable? An LED matrix installed in a real pumpkin. When I mentioned that we’d like the LED pumpkin in last Friday’s post scaled up to a full LED matrix I had no idea it would be me doing the work. But [Caleb] and I thought it might be just the thing to present for the hacker’s favorite holiday.

Installed in the autumn vegetable is a marquee made from a 5×14 matrix of light emitting diodes. I spaced them by printing out a grid on the computer, taping it to the pumpkin, and drilling 70 holes in the front of the thing. The real trouble came when inserting all of the LEDs from the inside; each of them has four wires soldered to it, creating a net of black wiring. Above you can see it turned out great. This is a shot of it scrolling the message HAPPY HALLOWEEN.

Join us after the break for video of this prop. But we’re not just sharing the finished product. I’ll take you through the build process. Along the way you’ll learn the design considerations that go into an LED matrix and how you can use these techniques to build your own in any size and configuration you desire.

Continue reading “70 LED Matrix In A Jack-o-lantern”

Matrix Clock Is A Breadboarding Win

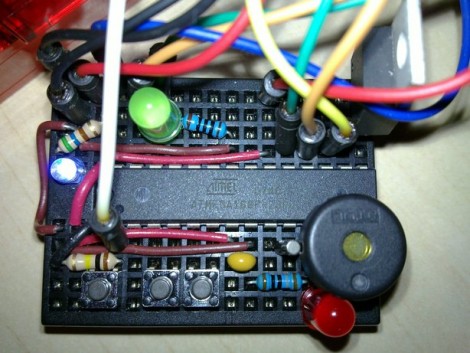
Normally when we feature a clock made with a 32×8 LED matrix we’d load up an image of the display for the banner photo. But this time around we were so impressed by [JB’s] breadboard work we had to use this image. We see an ATmega168, three buttons, three LEDs, a piezo buzzer, 32.768 kHz crystal, smoothing capacitor, and a few resistors; everything he needed to keep time and display it on the matrix module. If this is just going to sit on your bookshelf for a while it’s a great alternative to point-to-point soldering on a protoboard. Nice work fitting it all on there [JB].

ATtiny2313 Prime Number Generator

[Scott Harden’s] prime number generator exhibits a great way to use an LED matrix to present readable information. The project resides in a hinged wooden box with a grid of holes on the lid for the LEDs. [Scott] has overlaid the matrix with a printout showing powers of two that represent different prime numbers. Inside you’ll find an ATtiny2313 microcontroller that handles the column scanning and prime number testing. We’ve embedded a video the break where [Scott] explains the project in great detail, but you should also check out his prototyping and construction pages.

Continue reading “ATtiny2313 Prime Number Generator”

FPSLIC Powered LED Matrix

[Mathieu] built this display in hopes that he can play pong on it. You can imagine the headache that awaits when trying to figure out how to drive the 6144 bi-color LEDs. I must have worked out because the thing looks great in the video after the break. The solution he chose was a bit unfamiliar to us though. He used a Field Programmable System Level Integrated Circuit produced by Atmel, or FPSLIC. This is a kind of mash-up of components we’re more accustomed to.

The AT94K is a single chip that houses an 8-bit AVR microcontroller, and FPGA, and SRAM. This project uses that FPGA to handle the multiplexing of the display via code written in VHDL. The AVR core receives data via a USB port, stores two images in the SRAM (one for each LED color), and then outputs it to be drawn on the display. On second thought, this project sounds like fun and it’s a great way to get start learning that VHDL you’ve been putting off. Continue reading “FPSLIC Powered LED Matrix”

LED Matrix With A Gross Of Pixels

This LED matrix is arranged in a 24×6 pattern for message scrolling. There’s no etched boards here, making us wonder where [Syst3mX] found protoboard this long. He’s using an Arduino to drive the demonstration (clip after the break) but you can use any microcontroller with this setup. That’s because he’s using three shift registers for column data and a decade counter for row scanning, requiring just five control pins.

While you’re going to the trouble of ordering components, maybe you should try your hand at building a touch sensitive LED matrix too.

Continue reading “LED Matrix With A Gross Of Pixels”