MAME Cabinet 3D Modeled And CNC Milled

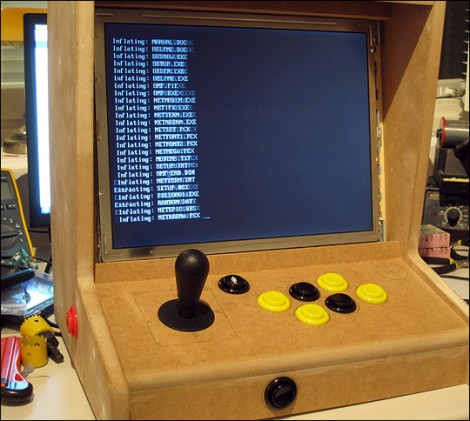
[Entropia] is just putting the final touches on his bar-top MAME cabinet (translated). The project started out as a 3D model to get the case dimensions just right. An old laptop is being, so the enclosure was designed to fit the bare LCD assembly and hide the rest of the computer. [Entropia] had access to a CNC mill through an education program and used it to cut most of the parts for the case out of MDF.

From there the build proceeds as normal. Mounting holes for the controls were cut with a drill and hole saws. We think it’s a bit easier to lay this design out once you have the control panel itself milled, rather than try to get it right in the 3D model. The image above is part way through the build. Since it was taken the case has been painted and a sound system was added but it looks like it’s still waiting for a bezel over the LCD and a marquee for the masthead.

You can see a demo of the game selection UI after the break.

Continue reading “MAME Cabinet 3D Modeled And CNC Milled”

Steampunk Wings: Bigger, Heavier, And Steampunkier

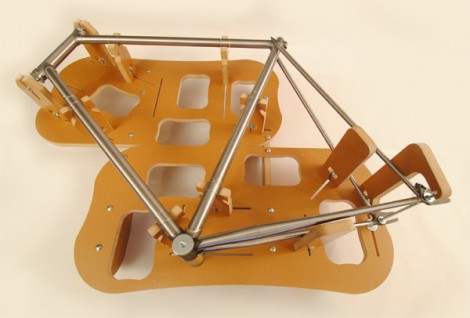
This pair of backpack-mounted wings was conceived after seeing the Angel/Archangel character in the movie X-Men: The Last Stand. They measure 14’6″ inches across, but they fold up so that the wearer can actually get around in them. The mechanism is built from MDF, using several layers of gears cut from the material as well as pieces that act as the skeleton for the appendages. This makes them look and work well, but adds a lot of weight as the project comes in at about 25 pounds.

The steampunk wings we saw a few days back were partly inspired by this set. But this pair is more true to the Steampunk concept, relying on pneumatics instead of electricity for motion. A pair of pneumatic rams originally made to cushion the closing of screen doors let the wearer automatically extend the unit. As you can see in the video after the break, this happens quickly and gracefully. They do have to be folded back up by hand, and we’d bet you need a second person to assist with this, but we could be wrong.

Continue reading “Steampunk Wings: Bigger, Heavier, And Steampunkier”

vacuum_forming_consistent_results_every_time

How To Build A Vacuum Form Table That Gets It Right Every Time

[James] builds all sorts of robots and superhero costume replicas at home, so he is always searching for a better way to get consistent results when using his vacuum table. A lot of people use their oven or exposed heating coils from electric frying pans to warm the plastic sheets, but [James] wasn’t really interested in going down that route. He cites that he would rather not heat plastic in the oven where he cooks his food, nor is he really keen on the idea of exposed heating elements.

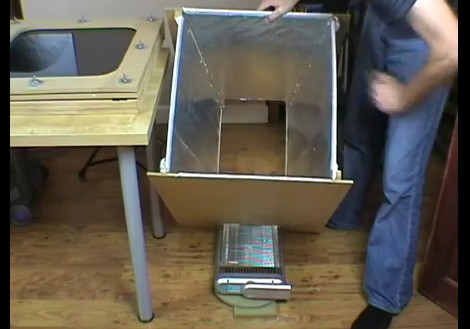
Instead, he opted for a slightly pricier, though completely reasonable setup that produces consistent results every time. Most of the forming table was built using MDF sheeting, as you can see in the video below. His heating apparatus was the most expensive part of the rig, since it’s an off the shelf quartz-based room heater. He lays the heater on its back side, and directs the heat up through an MDF frame using aluminum foil as a reflector. The plastic sheeting mounted at the top heats evenly, and in no time, he has a perfectly vacuum formed prop that is ready to be painted.

Sure, it might cost a bit more than some other vacuum formers we’ve looked at before, but spending a bit more up front to get consistent results is well worth it if you ask us.

Continue reading “How To Build A Vacuum Form Table That Gets It Right Every Time”

Building A Cluster Of IPaq PCs

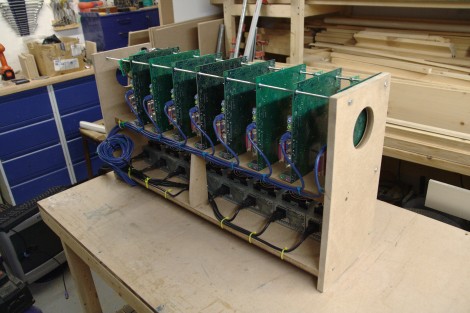
[Steven Pigeon] got his hands on ten iPaq computers that a friend acquired through an eBay auction. The older machines were in good condition but the march of technology had left them behind as casualties. He’s given them new life by assembling a cluster. The first order of business was testing the hardware to make sure it’s working. [Steven] used memtest86+ that comes along with the Ubuntu distribution of Linux to find one bad memory chip in the bunch (a revelation that took 10 hours to discover on the slow hardware). He assembled the unit above with MDF as a support structure and threaded rod to hang the boards. He ended up with a beautiful module and his next step is to choose the operating system that will pull the whole thing together.

We find this build every bit as beautiful as the file cabinet cluster. It’ll be interesting to check back with him and see what kind of performance he can get out of it.

Add A Clean Room To Your Workshop

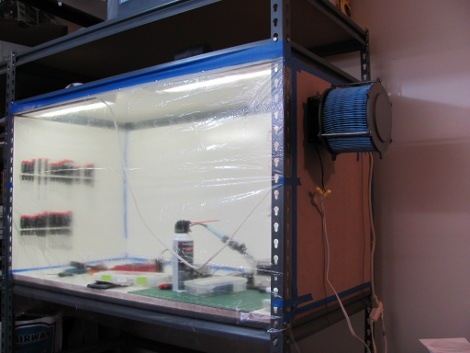
I Heart Robotics has posted a guide for building your own clean room. They’ve been clever with their materials, starting with heavy-duty shelving to provide the framework. We like that idea, it allows you to position your workspace at whatever height you desire.

The side walls are MDF painted with white enamel. Light, power, and tools are mounted to these walls. To keep things clean, a ventilation system uses a vacuum filter and 12V fans to keep filtered air moving in and dirty air out.

Maybe now we’ll be able to pull off that window hack without killing our hard drive.

[Thanks Mawitö and Ciric]

CNC Project Roundup

We asked for CNC projects, and wow did you guys deliver!

First up is [J-J Shortcut’s] MDF based CNC. He’s made three thus far, with the most recent costing about 180 euro and taking 2 months to build.

[Qwindelzorf] has also constructed a multitude of CNC machines including this industrial size router and this smaller miller.

Finally, [Mick’s] large steel CNC which just made its first cut only a week ago!

Keep up the great work guys, CNC machines are not easy to build and your accomplishments are ones for the record books.