Backyard Ski Lift

If you own a cabin in the mountains of British Columbia what do you do during the warmer summer months? Well, we’d probably mix of a cocktail and string up a hammock, but [Darrin] is quite a bit more motivated. He planned for the snowy season by building his own ski lift. He shared the details in a forum post, but you’re going to have to register and wait for approval before you can view that thread. Perhaps you’ll want to look at the video after the break before making that kind of commitment. Normally we would just pass over projects that require a login to view, but this one deserves the attention.

The setup is essentially a very steep tow rope. 1600 feet of 1/8″ aircraft cable covers an 800 foot span of his property. Apparently he’s got a total of 1000 feet of vertical drop but the lift doesn’t cover the whole area quite yet. That 6.5 horsepower Honda engine drives the cable loop, with the pulley system seen above used as an RPM reducer. Each skier can hook onto the cable used the nylon rope with a ski-pole spacer and a hook. The RC vehicle remote control works as a dead man’s switch, starting the lift slowly when the throttle is depressed and stopping it when released.

Normally we like to link to similar projects, but so far this is the only ski lift we’ve covered. You’ll have to settle for this ski-pole mounted POV display.

Continue reading “Backyard Ski Lift”

Automated Squinting Instead Of Glasses, Contacts, Or Lasik

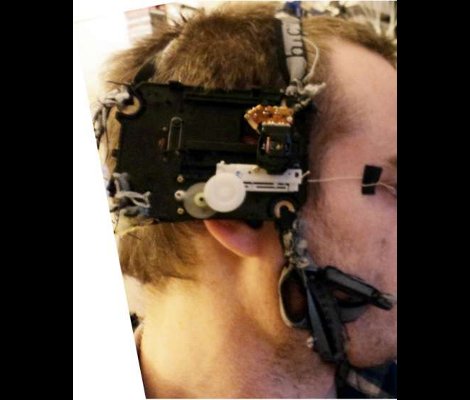
[Lee] is nearsighted and has had it with contacts and glasses. When trying to figure out an alternative, he looked at the core of the problem. The eye is not shaped correctly and therefore cannot focus adequately. The solution is to change the shape of the lens. This is exactly what lasik (laser eye surgery) does, but instead of going under the incredibly bright knife [Lee] built some headgear that pulls on your face to reshape your eye.

The hardware is from an old portable CD player. The sled that moved the laser lens has been repurposed to pull a thread taped to the skin at the corner of his eye. He built a control system that lets him adjust the tension by moving his fingers. Basically when the skin is pulled tight it causes him to squint and possibly reshapes the cornea just a bit. We’re not sold on the idea, but we can’t poo-poo the experiment; who knows what discovery this could lead to? We’re just glad he didn’t use electrical impulses to hack his peepers.

You can find some test video embedded after the break.

Continue reading “Automated Squinting Instead Of Glasses, Contacts, Or Lasik”

Heatless Compressed Air Dryer

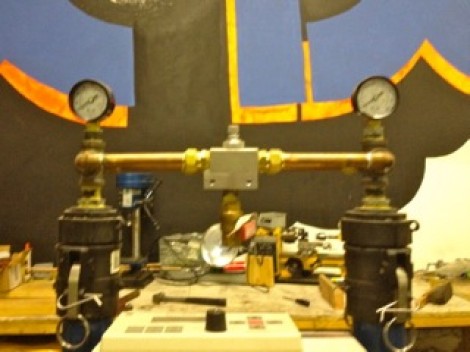
The pressurized air from a standard air compressor is fine for most uses. But some applications like plasma cutting call for low-humidity air and the hardware available to facilitate this can cost a bundle. [Roland] and his cohorts at TX/RX Labs (a Houston, Texas Hackerspace) just built this air drying system.

It works using a desiccant; a substance that sequesters moister. It’s the stuff in those little packets you find in shoe boxes and the like with a warning that you shouldn’t eat it. The image above shows two chambers which house the desiccant. Only one is used at a time, so that as it’s ability to remove moisture drops, the system can switch over to the other chamber. There’s even an automatic recharging system built in that uses a portion of the dried air to remove the humidity from the unused desiccant chamber.

There’s a functional diagram at the link above. It’s resolution is low enough that the text is almost unreadable but we’ve asked [Roland] if he can repost the image. This seems like a build in which other hackerspaces will be interested.

CNC Milled Bicycle Frame Jig

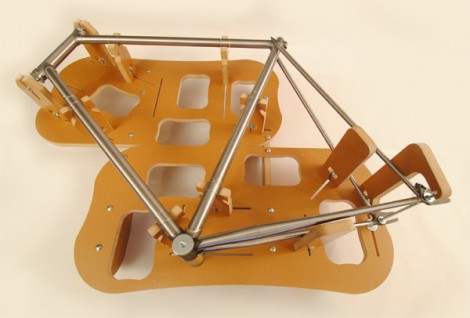
This bicycle frame jig is cut from MDF. It’s the latest in a growing trend that we love to see: the increasing availability of manufacturing techniques for the common hacker. This is a Kickstarter project, and alas it appears the designs are not available for you to cut your own. But we love the potential this shows, and maybe you can use the concept the next time you’re welding together a frame for something.

We really never look at building traditional frames at home. Mostly it’s the oddities that catch our eye. But if you’re into cycling and want to get your own custom-fit frame this has got to be the lowest-cost option available. In fact, you can get the jig and a tube set for under $600. The frame can be fit with just a few hand tools (a hack saw and a file). It uses lugs so the joints will be strong as long as you get the pipes fitting well enough for a quality welded joint.

Android 3.1 Devices Have USB Host Mode. Here’s How To Use It.

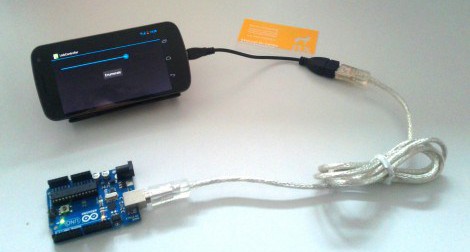
With the coming of Android 3.1 you finally have the option of using the device as a USB host. This may be through a USB OTG (On-the-Go) adaptor, but nonetheless it’s a feature which was sorely missed until now. [Manuel] put together a guide on using Android as a USB host. As you can see, his example hardware is an Arduino board but this is applicable with just about any device.

The tutorial implements a test app for the Android device where a slider will set the brightness of the Arduino’s on-board LED. The Arduino sketch is nothing special, it just reads data received on the UART. This means that it doesn’t care if it’s connected to an Android, PC, OSX, or Linux system, it goes about its business until the RX interrupt updates the data variable.

This will greatly simplify a lot of projects we’ve seen, such as this message scrolling belt buckle. That used extra hardware to make the Arduino the host, a step that is now necessary.

Projection Screen Using Latex Paint And Sand Blasting Beads

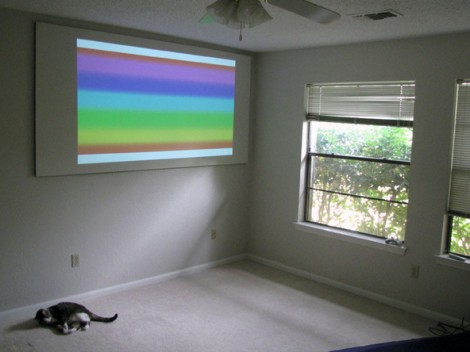
This method of building your own projection screen is new to us. [Sean Michael Ragan] ran across some sand blasting material made up of minuscule glass beads at Harbor Freight and inspiration struck. He purchased a fifty-pound bag and set out to see if it could be used with regular latex paint to create a projection screen. The answer is an absolute yes, but results are dependent on how you apply it.

Now there is paint you can buy which will turn your wall into a projector screen, but it’s expensive. [Sean’s] hack isn’t a direct replacement as he found the results of just mixing the beads with paint and applying them to a vertical surface weren’t up to the standards he’s looking for. But if you build a screen to hang on the wall you can let gravity work for you. He laid the screen flat and applied a heavy coat of paint to the surface. He then sprinkled a heavy coat of the glass bead over the wet paint and let it dry. Finally he cleaned off the material which didn’t stick and hung it on the wall.

Don’t have a projector to use with this hack? No problem, just build your own.

[Thanks Skuhl]

Up Your FPGA Game By Learning From This LCD Control Prototype

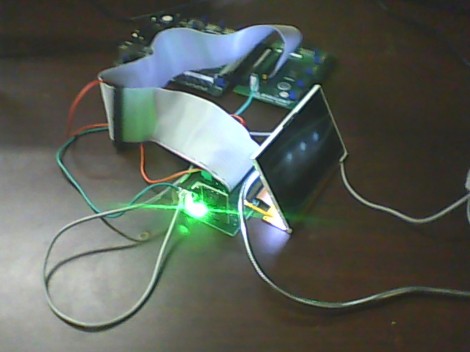
[Cesar] recently got a PSP display up and running with his FPGA development board. That’s a nice project, but what we really like is that he set aside a lot of time to show how it’s done every step of the way. This isn’t just a tutorial on that particular screen, but an overview of the skill set needed to get any piece of hardware working.

The screen itself is a Sharp LQ043T3DX02; a 480×272 TFT display with 16 million colors. Not bad for your project but when you start looking into the control scheme this isn’t going to be like using a Nokia screen with an Arduino. It takes twenty pins to control it; Red, green, and blue take sixteen pins, four pins are used for control, the rest are CK, DISP, Hsync, Vsync.

Wisely, [Cesar] designs his own interface board which includes the connector for the ribbon cable. It also has drivers for the screen’s backlight and supplies power to the device. With hardware setup complete he digs into the datasheets. We just love it that he details how to get the information you’re looking for out of this document, and shows his method of turning that first into a flow chart and then into code for the FPGA.